Showing posts with label punches. Show all posts

Monday, June 10, 2013

Mosaic Madness

Welcome back! It is Monday and time for a new card. This one is similar to one I made last week and actually this is the first of the two that I made. We made this card at my Hostess Night that was held that last of May. The colors are Daffodil Delight, Island Indigo, Pool Party, Pumpkin Pie, Strawberry Slush and Whisper White. The stamp sets are Mosaic Madness and Really Good Greetings which are both new in this catalog. I just couldn't resist using the Mosaic Punch and Coordinating Modern Mosaic Embossing Folder. The Designer Series Paper is the new Quatrefancy Specialty Paper. I felt like it need just a bit of dimension so I added a Circle of Strawberry Slush Card Stock behind the Vintage Faceted Designer Button and topped it off with a knotted 1/4" Whisper White Stitched Ribbon.
This week is blog hop week so I am busy creating new cards to share with you. In fact I have made 4 new cards in the last couple of days so be sure and stop by Thursday to see what I have to share. I won't make you wait that long however and will be posting tomorrow also. Thanks for stopping by and have a great day! Tonya

Thursday, March 14, 2013

Beautiful Butterflies

Hello! I am going to share another card with you today that we are doing at our Stamp Time this week. The ladies tonight will be making this card as well as yesterday's card. I must tell you that I bought the Papillon Potpourri Stamp Set a while back but haven't inked it up until this last week. I am glad I waited however since Stampin'Up! just introduced the Bitty Butterfly Punch that coordinates with the set. With the Bitty Butterfly Punch and the Elegant Butterfly Punch this card comes together rather quickly and there is no fussy cutting. The colors are Sahara Sand, Pink Pirouette, Pretty In Pink, Raspberry Ripple, and Early Espresso. The center of the card has been cut out with the Big Shot and the Labels Collection Framelits, so the sentiment which is from the Sale-a-bration set Vintage Verses is popped up in the center of the opening and layered on top of the Pink Pirouette Card Stock. After cutting out the center I added texture with the Lacy Brocade Textured Impressions Embossing Folder. I used Dimensionals to pop up the sentiment and the butterlies, then I added Pearl Basic Jewels to the butterfly bodies and the sentiment for just a bit of extra detail. If you are interested in learning how to make this card please let me know and we can set up a time to do so. Thanks for stopping by today and have a great day! Tonya

Wednesday, February 27, 2013

Happy Birthday Quilt

Good morning! We have yet another snow day for the kids. At this rate they will be in school until June. Oh, well better to be safe than sorry and since it is still snowing home is fine by me. Today I have a fun Birthday card that I decided to make last week after all of our other cards were made. I love the Quilt idea and I had just used the Twitterpated Designer Series Paper on this  All Dressed UP card. So it seemed like a good combo for this Birthday Card. The stamp set is from the Best of Birthdays Stamp Set that is part of the 25th Anniversary Collection. I used a card base of Basic Gray and added some texture with the Sqaure Lattice Textured Impressions Embossing Folder. The quilt panel was made much like yesterday's in that I started with a piece of Whisper White Card Stock and 1" Square Punch. Since I was setting my square on an angle I scored a light line down the center of the card stock so help me line up my squares. After I attached the squares I ran the panel through the Big Shot with the Fancy Fan Textured Impressions Embossing Folder. I added Island Indigo Card Stock that had been punched with the Scallop Trim Border Punch along both the top and bottom of the panel and attached some scrunched Baja Breeze Seam Binding before attaching it to the front of my card. The sentiment was stamped twice once with Basic Gray and once with Island Indigo. I punced out the Basic Gray sentiment with the Extra Large Oval Punch and hand cut out the Birthday to add with Dimensionals to the Basic Gray. I added it to the card with more Dimensionals then added the cute little dyed flower from the 5/8" Flower Trim. Now I just need to Birthday person to send it to. Since we are home bound today I am hoping to start on my Blog Hop projects to next week. It would be nice to be a head of schedule instead of rushing all the time. Maybe these last few snow days have been our catch up time and our chance to slow down for a while. I hope you are warm and dry where ever you are. Have a great day and thanks for stopping by, Tonya

Monday, January 28, 2013

Time to Sale-a-brate!

Hello and welcome to Monday! The weekend flew by and while be were super busy it was a fun busy. I want to share with you a quick 3 x 3 card that I made with some of the Sale-a-bration items. The colors are pretty simple, Real Red, Crumb Cake, Very Vanilla and Basic Black. The stamp set is Petite Pretties which is a Sale-a-bration set as is the new Petite Curly Label Punch. I also used the Small Heart Punch and just a bit of the new More Amore Designer Series Fabric. I may add this little card to one of my kids lunch boxes with a note just to let them know I am thinking about them. I have a child home today so I am going to keep this short. I hope you have a wonderful day, it is supposed to be warm here which will be nice for a change. Thanks for stopping by, Tonya

Thursday, October 18, 2012

Season Greetings Catalog Case

This last few weeks I have been working on Christmas Cards and while flipping through the catalog I noticed the card on page 18 that used the Snow Swirled Stamp Set and decided to case it. I changed up the colors but the rest is the same or at least as much as I could tell from the picture. I used Baja Breeze, Early Espresso, Cherry Cobbler and Whisper White. There is a lot of bling on this card with Basic Rhinestones on each snowflake and the glittery edge made with Sticky Strip and Dazzling Diamonds. The sentiment is punched out with the Extra Large Oval Punch and then the banner is made with the Bitty Banners Framelits and cut in half. Can you see the texture behind the sentiment? That was made with the Designer Frames Folders. There are two shapes to this set the oval and the rectangle that I used on the Cherry Christmas Tree Card.  After making the card I however decided it wasn't quite right for my Christmas Card Classes. If you would like to make this card let me know and I would be happy to help you place an order for the supplies. I hope you have a great day and thanks for stopping by, Tonya

Thursday, June 7, 2012

June Blog Hop

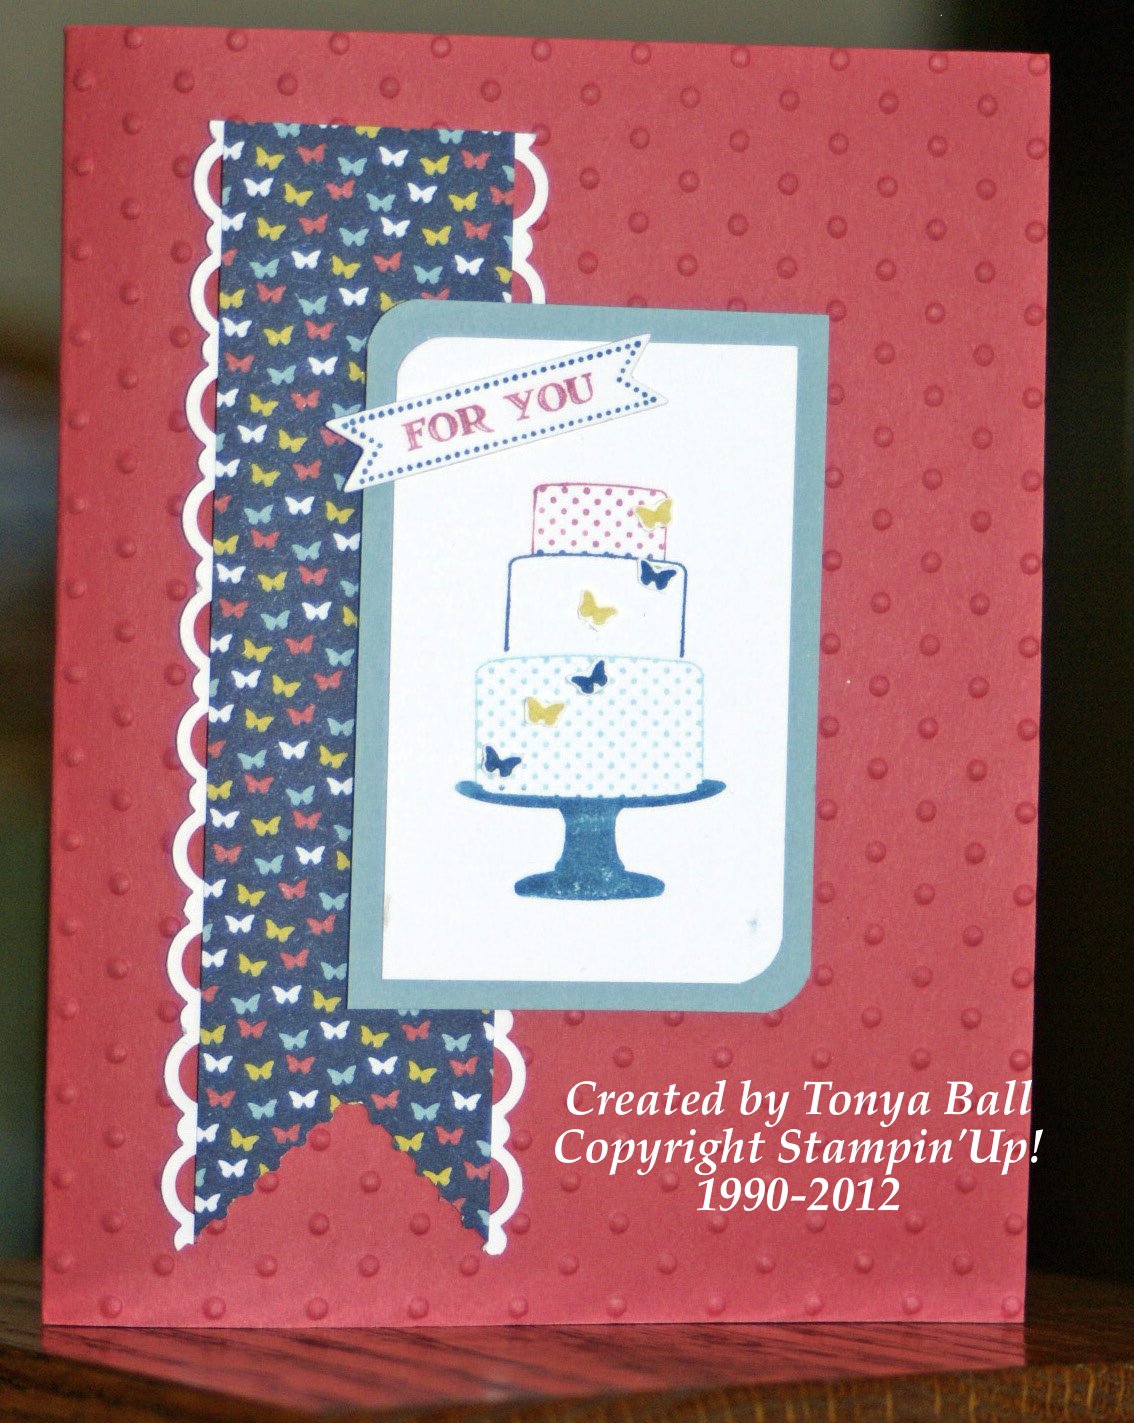
Good morning and welcome to another round of our Stylin' Stampin' Squad Blog Hop. If you have travel through then hop then you just came from my friend Rose's Blog. I love her projects. If you are just joining us then don't worry you can continue on from blog to blog just follow the links. I have three projects to share with you today all contain new catalog items. The first is a the new set called Make a Cake and then the cute little banner if from the Itty Bitty Banner Stamp Set. The colors are a mix of old with new including the new Primrose Petals with Whisper White and Baja Breeze. The Designer Series paper is the new Patio Party. I used the Stampin' Write Markers to ink up all the images and then cut out the small butterflies on the cake. For punches I used the Corner Rounder and the Scallop Trim Border. Of course I used the Big Shot too and added texture with the Perfect Polka Dots Folder and we have a new Framelits Set that cuts out the Itty Bitty Banners that is called wait for it Itty Bitty Framelits.

For the second card I used more of the new In Colors. This card has Baja Breeze, Whisper White, Midnight Muse and Summer Starfruit. I love the new ink pads. They ink up so smoothly and are great with solid image stamps like the new Betsy's Blossoms that I used on this card. I added just a bit of Baja Breeze 1/8" Taffeta Ribbon and a Dotted Scallop Ribbon Border punched out of Summer Starfruit. Clean and simple for this card.
My final project is a box that I made using the Simply Scored Scoring Tool and the new Apothecary Accents Framelits. I used the biggest Framelit as the flap that closes the box. The paper is the new Floral District. If you love the brights you will love this paper. I used Betsy's Blossoms again to add the flowers to the Rich Razzleberry Card Stock in Rich Razzleberry ink. I wanted to show off the new 1/4" Stitched Grosgrain Ribbon so I added it to the front closure by making a bow and adding a Rich Razzleberry Button behind it. This box is wide enough to hold a bottle of lotion to give as a gift or you can fill it up with candy and a gift card to give to your favorite grad. 
 
Well, that is it for my projects for today. I hope you enjoyed them. Now you can travel on to Dawn's Blog just by clicking on the button below. Thanks for stopping by and please leave me a comment to let you know that you were here. Have a great day, Tonya


Blog Hop Participants:
  1. Shellie G. of http://www.creativeeclectica.com/">Creative Electica
  2. Annie L. of http://lovemecard.blogspot.com/">Love Me Cards
  3. Pam S. of http://www.stampininthesun77.blogspot.com/">Stampin' in the Sun!
  4. Anji C. of http://www.alteredscraps.com/">Altered Scraps Blog
  5. Rose C. of http://www.stampwithrose.blogspot.com/">Stamp with Rose
  6. Tonya B. of http://www.stampinwithtonya.blogspot.com/">Stampin' with Tonya
  7. Dawn S. of http://dawnscreativechalet.blogspot.com/">Dawn's Creative Chalet
  8. Patricia T. of http://sunnystampin.blogspot.com/">Sunnyone Stampin'
  9. Heather W. of http://www.stamp-aholic.blogspot.com/">Heather's Stampin' Blog
  10. Pamela W. of http://www.stampinup.net/esuite/home/stinkytofu/blog">Stinky Tofu
  11. Linda O. of http://www.stampatlindas.com/">Stamp at Linda's
  12. Darcy J. of http://www.stampindj.blogspot.com/">DJ's Stampin' Place
  13. Pam S. of http://www.sunnygirlscraps.com/">Sunny Girl Scraps
  14. Kim R. of http://www.rydenkim.blogspot.com/">Stamping with Kim

Saturday, March 3, 2012

Technique Swap- Wet Stampin'


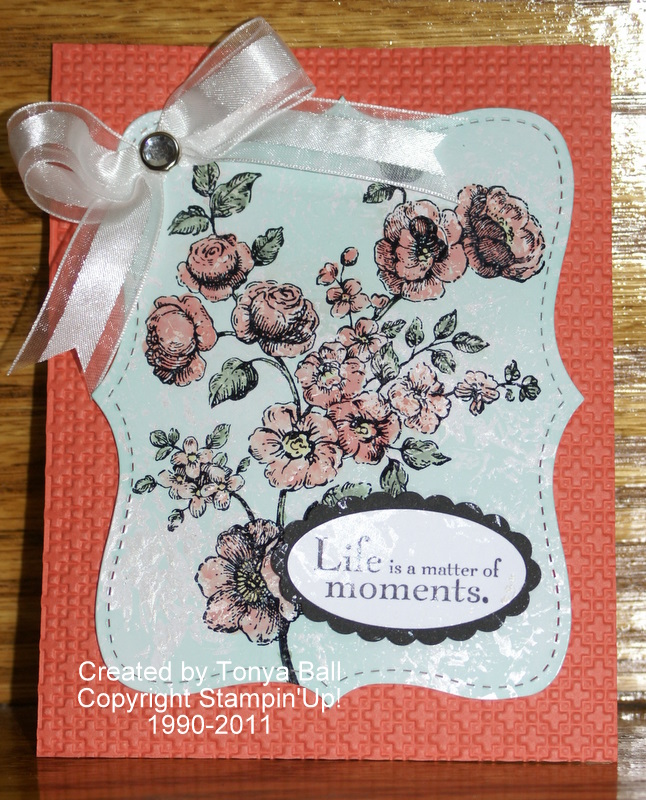
Hello, I was going through some of my drafts that didn't get posted and a came across this card. I hope I haven't all ready shared it with you but if so maybe someone else hasn't had a chance to see it yet. This card is one I did for Convention swaps last July and uses a technique called Wet Stamping. It is really easy to do and really can change the way a stamp set looks. For this card I used Fifth Avenue Floral and Word Play. The colors are Wisteria Wonder, Concord Crush, Regal Rose and Basic Gray Satin Ribbon. I also used Watercolor Paper which is an important part of the technique and the Scallop Trim Border Punch. If you would like more information about this technique please let me know and we can set up a private class for you and a few friends. Thanks for stopping by and have a great weekend, Tonya

Friday, December 9, 2011

Snowman Gift Bag


Happy Friday! I am so looking forward to the weekend! It is going to be a busy one. My kids and I are taking part in our Church Annual Living Nativity both tonight and tomorrow. It is a ten scene drive thru that will involve lots of people and live animals too. The kids are excited and so am I!
Today I have a quick and easy gift bag to share with you. I am always in need of gift bags and love when I can make them myself. This one uses a brown paper lunch sack. I punched a hole in the top for a handle with the Wide Oval Punch then stamped snowflakes across the bag with Whisper White Craft Ink and the Serene Snowflake Stamp Set. I added Whisper White Card Stock along the bottom for snow but first I tore the top edge and added Mica Flakes with Tombow Multipurpose glue. It really holds the Mica Flakes in place. To make the snowman and present I used punches. The present is made with the 1" Square Punch and the Blossom Bouquet Triple Lyaer Punch. The Snowman is made with the 1 3/4", 1 3/8" and 1" Circle Punchs, 1" Square Punch, Word Window Punch, Snowflake Punch and the Bird Builder Punch. I added the buttons, eyes and mouth with the Basic Black Stampin' Write Marker. My snowman looked a little cold so I added a scarf made with the Marina Mist 1/8" Taffeta Ribbon. Now I just need a gift to add inside. I must admit I have not done any shopping this year and I really need to get busy before I can't find what I need.
Well, I am off to start decorating the house. Have a great weekend and Thanks for stopping by! Tonya

Wednesday, November 9, 2011

Technique Time again!


Wow it has been a while since I have used today's technique and this one uses a new twist on it. The technique is Faux Silk and traditionally you would use tissue paper to stamp on then layer it on a base but while blog surfing I found that Lyssa over on Song of My Heart Stampers did this technique using coffee filters. One thing I really like about the coffee filters is that they are a little sturdier and tend to allow for a little rougher treatment just in case you don't get the filter lined up on your base just the way you want to. :)

The supplies are pretty basic I used two stamp sets, Serene Snowflakes and Perfect Punches, three ink colors: Bashful Blue, Marina Mist and Not Quite Navy. I also used Not Quite Navy Card Stock and Tafetta Ribbon as well as Whisper White and Bashful Blue Card Stock. For the sentiment I used the 1 1/4" Circle Punch, 1 3/8" Circle Punch and the Scallop Circle Punch which is paper pierced on each scallop. This card would be easy to make a bunch of in a short amount of time so if you haven't started your Chistmas Cards yet then be sure and contact me to place your order for supplies. I will be back tomorrow with a new post that will show you are new Cookie Press Stamps. I had so much fun trying them out and look forward to using them again. Thanks for stopping by and have a great day, Tonya

Friday, September 16, 2011

Halloween Club Card


Good afternoon! I am going to share the the project we did at Stamp Club this week with you today. This card has several elements and extras but it was fun to do and will be fun to give away too! The card stock that we used is Old Olive, Basic Black, Cajun Craze, Whisper White, and Basic Gray. We also used the Frightful Sight Designer Series Paper, Basic Black 1/8" Taffeta Ribbon, Spider Wed Textured Impressions Embossing Folder and a Basic Black Mini Clip just a few accessories. ;) The two stamp sets are Fun & Festive which is in the Holiday Mini and Sweet Centers. Jet Black Stazon was used to stamp the Happy Halloween and then it was colored in with a Blender Pen and various Stamp Pads. The Eek You're Sweet was inked up with the Basic Black, Old Olive and Cajun Craze Stampin Write Markers. Oh and of course what is a card without a few punches. In this case we used the 1 1/4" Circle and the 1 3/8" Scallop Circle Punch. I am finishing up packing for a workshop tonight then tomorrow I am taking the boys on a road trip to see Kaylee run in Joplin. Busy weekend let's hope the weather plays nice and holds off on anymore rain. Have a great weekend and thanks for stopping by, Tonya

Friday, August 26, 2011

Strength and Hope Part 2


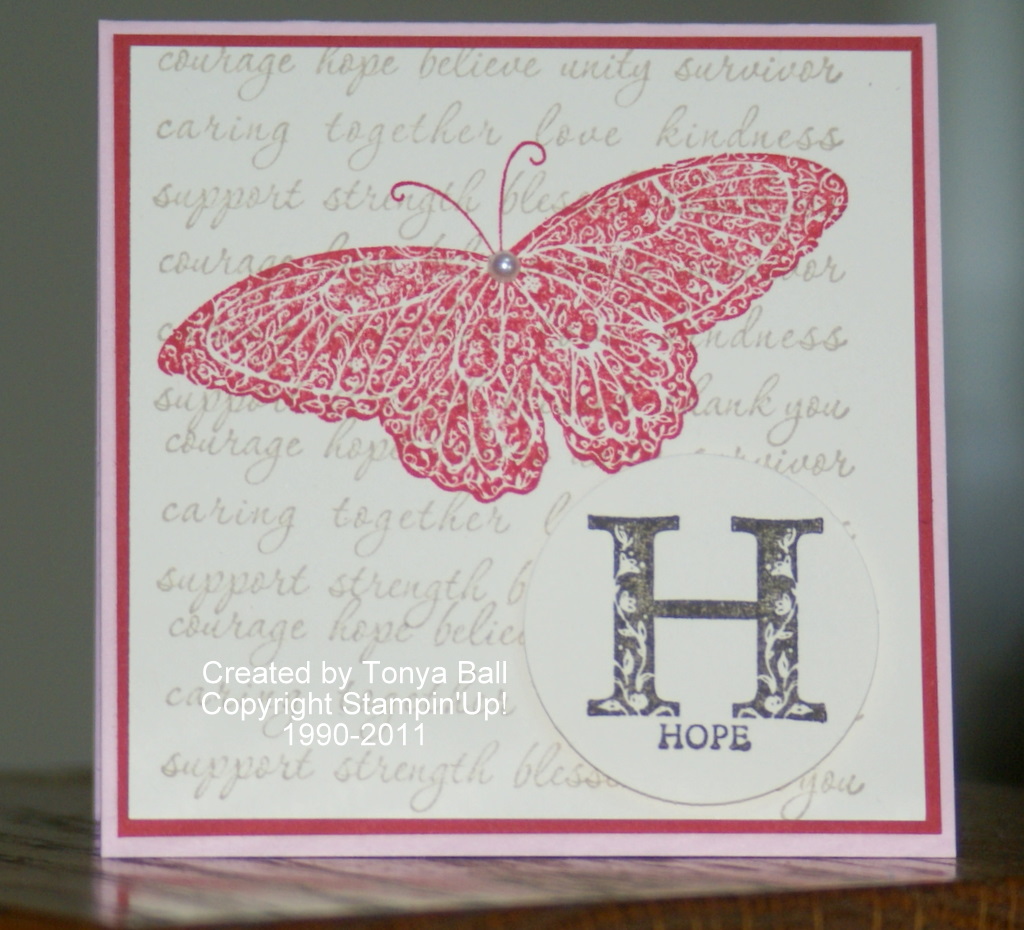
Good morning, it is a beautiful day and I have another 3x3 card to share with you that uses the Strength and Hope Stamp Set. I made this card last week before the Savy Seniors event and forgot to share it with you. The colors I used are Pink Pirouette, Crumb Cake, Very Vanilla, Early Espresso and Riding Hood Red. What a great combo. I started by stamping the word image over and over across the Very Vanilla Card Stock with the Crumb Cake Classic Stampin' Pad, then I stamped the beautiful butterfly on the same piece with Riding Hood Red Classic Stampin' Pad. I added a Basic Pearl to the center of the butterfly just to add a touch of bling. I stamped the H hope with the Early Espresso Classic Stampin' Pad and punched it out with the 1 1/4" Circle Punch before adding it to the card with a Stampin' Dimensional. The card was finished with a layer of Riding Hood Red under the Very Vanilla Card Stock and then a base of Pink Pirouette.

This is the perfect size card to add to a gift or put inside a lunch box to add a bit of encouragement. You can also add it to a 4 1/4 x 5 1/2 piece of card stock and make it a full size card that has a added sentiment area on the front. I will try and turn this one into a full size card today and show you an example.

Remember this stamp set is only available until August 31, so please don't hesitate to order yours. Every Stamp Set purchased helps with the fight against breast cancer.

Thank you for stopping by today and I hope that you have a great weekend. I may stop in this weekend and post it depends on how busy life gets. :) Tonya

Wednesday, August 24, 2011

Big Top Birthday!

Good morning, this is going to be a quick post as I have a lot to do before I send all the kids off to school today. They all have a half day, Kaylee due to extreme heat and the boys because it is their first day. The card I am sharing today is another card for my Bring on the Birthday Cards Class which is today and tomorrow. The cards uses Real Red, Tempting Turqouise and Whisper White. I used various circle punches to make the card and the Big Top Birthday Designer Series Paper. Oh and one of my favorite new embossing folders Stripes. I used it last week to make the fun plaid backgrounds. The stamp set is Bring on the Cake and we are using it on all five of the cards in the class. Ok, that's it for today. Thanks for stopping by and have a great day, Tonya


Tuesday, August 23, 2011

Beau Chateau Birthday Wishes


Good morning, I am happy to say that I have been stamping. I finished two new cards yesterday and another one today so I will have new cards to share for the next three days and if I can keep the ideas flowing then I will keep on stamping. My boys start back to school tomorrow and I can get back into a routine with my mornings being for stamping and then I have the rest of the day for other things. :)
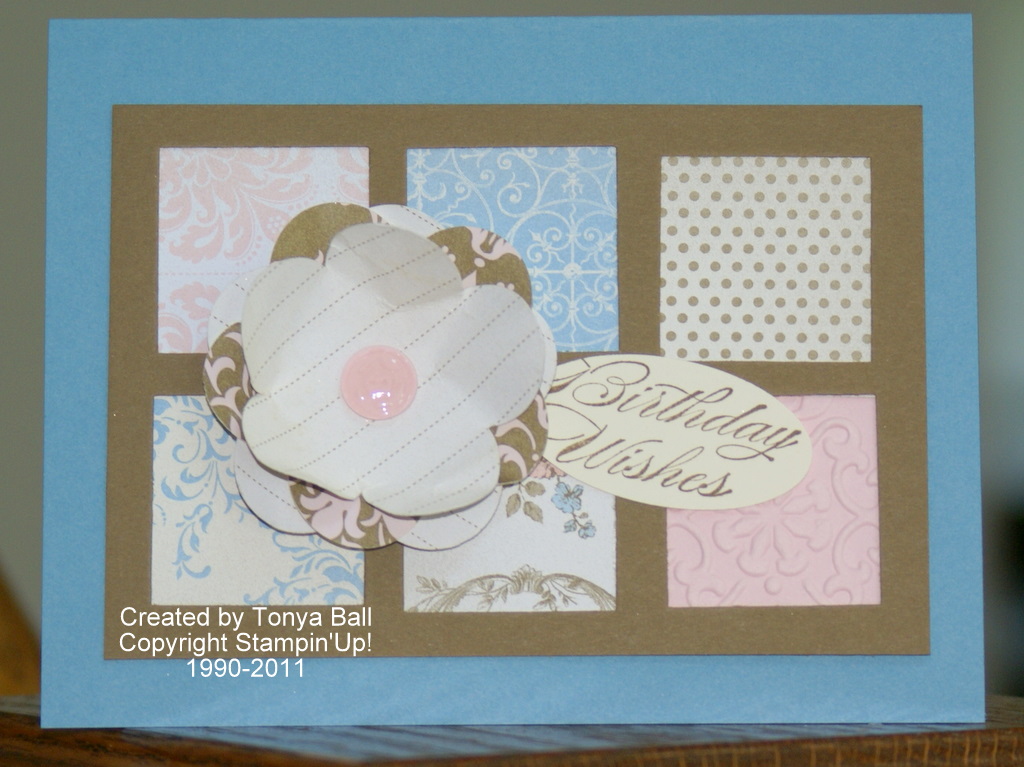
Today's card is one that we will be making at the Bring on the Birthday Cards class that I am having tomorrow and Thursday. This card is a case from the catalog and can be found on page 160. I made a few changes like the colors, turning the card sideways, leaving off the ribbon and adding the sentiment under the flower instead of in one of the squares but the layout is still the same. I really like the Beau Chateau Designer Series Paper and as just a reminder it is one of the packs of paper that is included in the Buy 3 get one Free Offer that ends on August 31. One thing I do want to point out is that the center of the flower looks shining, well I didn't have buttons that worked for this card so I made my own. I used the Sweet Buttons Embosslits Die and cut out three of the same button, stacked them on top of each other and then added Crystal Effects to the top one to make it all Glossy and shiny. You do need to allow extra time for the button to dry but it is worth the wait. I will be premaking these today for the classes so that there will be no wait time. ;)
Well, that's it for today. Thanks for stopping by and please let me know if you have any questions. I will be happy to answer them for you. Have a great day, Tonya


Saturday, August 13, 2011

Technique Fun with Easy Events


Hello and welcome to the weekend. Today I am going to share one of the cards we did for club this week. It is the same technique I showed you on my last card. It uses the Big Shot and the Striped Embossing Folder. The colors are the new Lucky Limeade, Poppy Parade and Crumb Cake. The stamp set is Easy Events and we used the Aquapainter to watercolor the image after it was stamped on the Very Vanilla Card Stock. The scallop was created with the 2 3/8" Scallop Circle Punch and the Very Vanilla Circle was cut out the the #2 Circle Die and the Big Shot. The final additions to the card are the Perfect Polka Dots on the Lucky Limeade Card Stock base and the Scallop Polka Dot Ribbon around the middle of the plaid Poppy Piece. I really like that the Ribbon is Polka Dotted on one side and plain on the other so that you can use it either way. It's like getting two ribbons on one roll.
I have a few other cards to share with you this coming week, including another Bring on the Birthday Cards Card. It is a more manly card and I will share it on Monday.
Thanks for stopping by today and have a great weekend! Tonya


Wednesday, August 10, 2011

Little Duckie!


Hello and good afternoon! Today I want to share a fun card that I made this week with a new Technique that was featured at Convention by Jan Tink of Stamp, Paper, Scissors. The technique piece is the plaid background that can be seen behind the duckie. To make this piece all you need it the Big Shot, Striped Embossing Folder, Brayer, Classic Ink Pad(s) and White Card Stock. The colors for this card are Calypso Coral, Pool Party, and Whisper White. The duck includes Daffodil Delight and Pumpkin Pie. The duck is from the Easy Events Stamp Set and is punched out with the 2 3/8" Scallop Circle Punch after is was colored with the Aquapainter. I added a Calypso Coral Dotted Scallop Ribbon Punch piece to the side of the card and to finish off the card I used my sewing machine and stitched. The stitching was quite easy and I will probably more likely to stitch on my cards in the future but I really want to start a new sewing project too, possibly a Christmas one. One more night of club this evening and then I have a few days off but need to work on more Birthday cards for the Bring on the Brithday Cards Class. Have a great day and thanks for stopping by, Tonya


Thursday, August 4, 2011

Designer Birthday Wishes!


Good afternoon! Well, summer is offically coming to an end. I went today and we got my Daughter's class schedule for her Sophomore year. The years seem to fly by and with each passing year is of course another Birthday. Since I have so many Birthdays in the next two months I really need to get a lot of cards made plus I have my upcoming Bring on the Birthday Cards Class. I am not sure if this will be a card for class or not but I do like the way it turned out and am glad the UPS man dropped off the Not Quite Navy Taffeta Ribbon this morning because it is just what this card needed. The Designer Series Paper is from the Paisley Petals Paper Pack and after adhering the 1" strips I cut it out with the Top Note Bigz Die then added some texture with the Houndstooth Textured Impressions Embossing Folder. I sanded the raised areas just a bit to give it a more worn look like that favorite quilt that gets used and loved in places that makes it all soft and comfortable. The sentiment is from the Bring of the Cake Stamp Set and was stamped in Not Quite Navy and punched out with the Wide Oval Punch. The mat is River Rock Card Stock and was made by cutting out two Top Notes then cutting each in half one in each direction. Then with some layering you get a mat that is larger than the full Top Note. Of course I could have cut the trim line around the top note but I had the main image done before I thought to add the mat.

I am going to try and do some more stamping today as well as cut the ribbon for the ribbon shares so that they are ready for delivery. I still have other shares available if you are interested just contact me or leave a comment. Thanks for stopping by today and as always I hope you have a great day, Tonya

Wednesday, August 3, 2011

Candles a Plenty!


Good morning, today I wanted to share a Card for the upcoming Bring of the Brithday Cards Class. This card features the Bring on the Cake Stamp Set and the Just Add Cake Designer Series Paper. I also used the Build a Blossom Stamp Set and the coordinating Blossom Petals Builder Punch to make the flames on the candles. The base of the card is Peach Parfait. This card went together pretty quickly with the help of our wonderful punches that make it a snap to make. It might be hard to see in the picture but there is Dazzling Diamonds on each of the flames. We will make three cards of this design for the class as well as three of 4 other designs for a total of 15 cards. If you would like more info or would like to RSVP to reserve your spot please contact me.

Also be sure and scroll down for the post on the Tax Free Items that are available this weekend in Missouri. Today is another busy day so I am going to keep this short. I hope you have a great day and thanks for stopping by, Tonya

Thursday, July 14, 2011

Pennant Parade


Good morning, sorry for not posting last night I had every intention of doing so after club but I some how got busy doing other things and forgot. Today's card is one that we made at club this week and uses a fun new stamp set that I recommend everyone should get ;) and of course you need to coordinating punch. This card is pretty simple to make and would be a fun one to make in lots of different colors just to have on hand for those birthday's that pop up and you forgot a card. For this card we used Crumb Cake Card Stock for the base and Baja Breeze, Rich Razzleberry, and Island Indigo which is one of the new In Colors for 2011-2012. Isn't it pretty. I love the new ruffled ribbon in Island Indigo and need to figure out a project just for the ribbon. So the other supplies are Perfect Polka Dots Textured Impressions Embossing Folder, Big Shot, Whisper White Baker's Twine, 1" Circle Punch, 3/4" Circle Punch, 1/2" Circle Punch, Petite Pennants Builder Punch, 1/16" Circle Punch, Versamark, Classic Ink Pads in the three colors and the Pennant Parade Stamp Set. Oh, I almost forgot that I added Rhinestones to the center of the circles too, just for a little bling. We will be using this stamp set at my upcoming Christmas In July Class which is next Friday. Pennant Parade is such a verstile stamp set take a look and then give me a call or order your set today.

Thanks for stopping by and please let me know if I can help you with any of your Stampin'UP! questions. Tonya

Monday, July 11, 2011

Technique Swap-Faux Mother of Pearl

Sorry for the lack of posts but I have been busy making cards for a technique swap at Convention. I am not going this year but my friend Sarah is and she is taking the swaps for me so I have new ideas to share with you. This is one of the cards that I made for the Faux Mother of Pearl Swap. The supplies I am using are Calypso Coral Card Stock, Glossy White Card Stock, Basic Black Card Stock, Top Note Bigz Die, Square Lattice Textured Impressions Embossing Folders, Frost White Shimmer Paint, Jet Black Stazon, Calypso Coral Classic Ink, Always Artichoke Classic Ink, So Saffron Classic Ink, Large Oval Punch, Scallop Oval Punch, Clear Rhinestone Brads, 5/8" Whisper White Organza Ribbon , and Aquapainter. I am going to keep this post short as I have Stamp Club projects to cut and more projects on my list to design. Thanks for stopping by and have a great day, Tonya


Friday, July 1, 2011

PaperCrafter Case!

Hello! Today is a BIG Day for Stampin'Up! and everyone that loves their products. Today is the first day of the new Catalog Sales Period. If you don't have a new catalog what are you waiting for give me a call and I will get you one ASAP. Today's card uses new products that are available starting today. I saw this layout in my resent PaperCrafters Magazine and since Stampin'Up! just released a new Pennant Punch and matching Stamp Set I just couldn't resist casing it. To make this card you will need to following supplies:


Pennant Parade Stamp Set (122740 Wood) (122742 Clear), Thank You Kindly (111700), Pool Party Card Stock (122924), Whisper White Card Stock (100730), Early Espresso Classic Ink Pad (119670), Calypso Coral Classic Ink Pad (122939), Basic Rhinestones Jewels (119246) Early Espresso/White Baker's Twine (123124), Petite Pennant Builder (122361), Big Shot Die-Cutting Machine (113439), Backgrounds 1 Texturz Plates (114512), Petal Cone Bigz L Die (121810).
I really like this layout and plan on making one of these cards for each of my customers that order from me this week. I will probably try other color combos but will stick with the new In Colors. I put a picture below of the card with the cover of my PaperCrafters magazine so that you can see the comparison.


I will be posting my Product Shares soon so please stop by again to see how you can get a wide variety of new ribbons, Designer Series Papers and the In Colors. Thanks for stopping by, Tonya