Thursday, July 30, 2009

Red, White and Suede?

Good morning, did you think I had left and forgot to tell you? I have been crazy busy trying to get ready for convention and preparing all my swaps. I am so excited to be going and even more excited to share all the great swaps with you that I receive when I get back. For those of you that are local, I will be holding a convention night after I get back to share it all with you!
After working for several days on various cards I finally decided that I had to do some fun stamping. I had just received the Medallion Background Stamp (115223) in a order this week and have been anxious to ink it up! I decided to go with a patriotic theme and also try out the new Soft Suede In Color. I haven't used this color much but I have been wanting too. The card is pretty simple and would be great if you have a lot of thank you cards you would like to make or even thinking of you, birthday or just any other sentiment. Now for the recipe. The base is Soft Suede Card Stock (115318), then a layer of Real Red Card Stock (102482). The Medallion Background is stamped twice on Confetti White Card Stock (102028) once in Soft Suede Classic Ink (115657) and then again after cleaning the stamp in Brocade Blue Classic Ink (100907). I punched out the center of the Brocade Blue Image with the 1 3/4" Circle Punch (112004) and layered that on the Soft Suede Image. I used a Square Red Fire Rhinestone Brad (109112) in the center of the image to add a little extra bling. The sentiment is the Elegant Thank You Stamp (114484) and I just simply inked up the Thank you with the Brocade Blue Stampin' Write Marker (100064) and lined the image up with the Stamp-a-ma-jig (101049) and stamped it exactly where I wanted it. There you have the finished card, very simple yet special.
Next week I will be gone most of the week but never fear I will be prewriting my post so you have something new to see. Most will be swap cards that I am saving until convention to show. Have a great day and thank you for stopping by, Tonya

Monday, July 27, 2009

Deal of the Week #5


I am back with this week's Deal of the Week. For this week only the Heart to Heart Punch is only $10.99 instead of the usually $15.95. This punch is great with card stock, designer series paper and is also coordinates with the Love You Much Stamp Set (113756). If you are interested in placing an order for this deal please contact me and I will help you place your order. As in past weeks I will place an order on Friday for all those interested in ordering to help save of shipping. Hope you are having a great day, Tonya

Inspired by the weekend!

Wow what a great weekend! We had two family reunions this weekend and both were so much fun! We spent Saturday at Monkey Cove. The kids loved it and we definitely got our money's worth on just the slide alone. One of my DS went down 51 times. After that we cleaned up and went out to dinner with all the family. Now if my count is correct and I may be off a few there were 66 family members and that is just my Grandparent's kids, grandkids and great grandkids. It was fun to spent time with so many of them and I have to thank my aunt and uncle for all the time and planning that went into the reunion.
Then on Sunday after church it was off to Big Lake for another family reunion. This time for my mom's side of the family. We had a great turn out for this one as well with over 60 people attending. The kids had a blast with water games including baseball with the home plate being a kiddie pool filled with water. Good thing they all brought a change of clothes. Now you maybe wondering what does all that have to do with stamping? Well, I honestly didn't plan on having a card this early in the morning but something inspired me and I just couldn't resist. As I was cleaning up from yesterday I opened one of my White Elephant gifts and it hit me that this would make a great card. First I am going to show you the Inspiration Piece then the card. Now remember that it doesn't have to look exactly like the inspiration piece, you just find something that inspires you to create.

My piece is a candle holder and I quickly jotted down that I wanted to use So Saffron,
Almost Amethyst and Old Olive, not the exact colors of the piece but the colors I liked. I also wanted to use the new Stampin' Up! Perfect Details Texturz Plate (115962). I played around with different ways to use the plate but finally decided that I liked it best in Old Olive with the textured areas highlighted with the White Uni-ball Sign Gel Pen (105021). Now this did take some time but I think the result it well worth it. The flowers which really remind me of the pansies on the inspiration piece are the Big Shot Stampin' Up! Simple Flower Embosslit Die (114514) The embosslit dies not only emboss but they also cut out the image all in one step. They cut through card stock as well as designer series paper. I sponged the edges of the flowers with Whisper White Craft Ink (101731) and added a 5/16' White Brad (112534) to the center of each. The Old Olive leaves are cut using the Stampin' Up! Little Leaves Sizzlit Die (114511). I sponged the edges of the leaves with Old Olive Classic Ink (102277) just to give a little contrast to the background. The sentiment is from Teeny Tiny Wishes Stamp Set (115370) and is stamped in Old Olive Classic Ink on Whisper White Card Stock (100730) and punched out with the Modern Label Punch (116630). The base of the card stock is Almost Amethyst Card Stock (102282) and a So Saffron Card Stock (105118) mat was added between the Old Olive Card Stock and the base.
I hope you enjoyed your inspired by card today. Look around and see what inspires you today and let me know. I will be back later this morning with the Deal of the Week for week #5. Thank you for stopping by and have a great day, Tonya

Friday, July 24, 2009

The Big 50!

Good morning, today is a very special day in our house. My DH has a birthday today and while he doesn't really want a big fuss made about it it is a big birthday as I am sure the title of my post and the card will let you know. The kids and I have some plans for today after he gets done doing some work for friends of ours. That is one of the things I love about my husband is that he is always willing to help others at anytime. He is very generous with his time.
Moving on to today's card, I don't often use retired sets or sets that are no longer available for my blog post but this set was just perfect for the birthday card. Now this is a take 2 card as the first one we started we decided we didn't like. Have you ever done that scrapped a card and switched your process completely? As this is a big birthday we had originally planned to go with black and basic gray on the card but the kids really wanted the "hill" in the middle. Well the two together just didn't work so we switched to this bright colored more cheerful card. The base of the card is Brilliant Blue Card Stock (101843). I used a 5" x 10" piece which makes the finished card 5 x5. This size works best with the inside surprise. I cut out the Whisper White Circle with the Circle Scissor Plus (112530) then stamped the mower image from And Many Mower in Basic Gray Classic Ink (109120) I used the Aquapainter and watercolored with Brilliant Blue, Basic Gray, Real Red and Gable Green Water Color Wonder Crayons. My DD punched out circles from scrap card stock in Gable Green (102795) and Real Red (102482) then texturized them with various Big Shot Texturz Plates.

The inside of the card contains the "hill" that the kids wanted. I used the Pop-Up Three Tier Cake Bigz XL Die (116760). You may remember me using is as a traditional card for my niece's birthday. It also works as a great hill. When adding the strips around the hill, I cut them a little wider than the directions called for so I could cut them to look like grass. Since this is the big 50 we thought that 50 should be at the top of the hill and cut the 50 out with a old sizzix set that I have in Real Red card stock. The Brilliant Blue Circle is punched out with the 1 3/4" Circle Punch (112004). The sentiment And Many Mower! is also from the stamp set it was punched out with the Word Window Punch (105090).
I hope that you enjoyed today's card and that you have a great weekend. We have two family reunions which I am looking forward too! I love the chance to get together with family that we don't often get to see and just reconnect. Thank you for stopping by and I will be back on Monday with the new deal of the week. Remember it isn't to late to take advantage of this weeks deal of the week, just give me a call. Thanks, Tonya

Wednesday, July 22, 2009

Big Shot Fun!

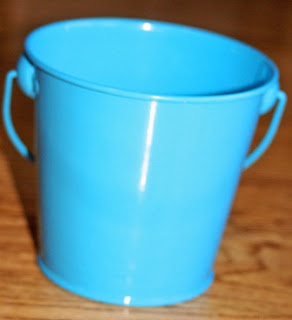
Good morning! Yesterday was a super busy creative day but I didn't take pictures of the items I helped create. Don't fear I do have pictures for you today of something I did create. Yesterday I started my day by helping one of our school's teachers and a wonderful customer of mine create some new decor items for her classroom. She had decided to do a wall decor item with the Inspire Definition from the new Decor Elements Catalog. We put the white definition on a white frame and then added some extra embellishments that were made with the Big Shot. We also decorated a pail and bucket for her classroom with Decor Elements Sheets and the Big Shot. Now it was after she left I realized I didn't take any pictures to share with you, so I decided I would just have to make my own decorated pail. I love to shop the $1 spot at one of our local stores and am always coming home with goodies but don't always use them right away. Well, I had some cute Tempting Turquoise Pails sitting on a shelf and decided one would be perfect for my project. I quickly cut out several flowers using the Big Shot and the new Stampin' Up! Blossom Party Die ( 115971). I used Decor Elements Sheets in White (114335) and in a matter of minutes I had this cute pail. I left it out for club last night and have decided it is a great place to keep my bone folders, pens and scissors so they don't get misplaced on the table while we are having club. Last night was also our last club night of this month. The date had been switched from last week because of Baseball. Thank you to all the ladies that were willing to make the switch for me. I really appreciate it. So today's project was super quick but it makes me want to go see what else I can add some extra wow to! If you have any questions about how to use our Decor Elements please let me know. We can set up a demonstration for you either in my home or yours. Thanks for stopping by and have a great day, Tonya

Monday, July 20, 2009

Deal of the Week #4

It's Monday so that means it is time for another Deal of the Week. This week's great deal is the Styled Vanilla Hodgepodge Hardware Kit for only $18.99. The kit includes:

Raised Dots Designer holders (10)

Small Rectangle holders (10)

Raised Dots Designer holders (10)

1" Circle holders (10)

Sqaure Holders (10)

1/2" Genuine brads (10)

3/8" Star brads (10)

1/2" Flower brads (10)

3/8" Flower brads (10)

Flower ribbon slides (10)

3/16" brads (100)

All in a reusable tin. These high quality metal accents coordinate with many of our punches. If you are interested in purchasing this weeks Deal of the Week be sure and email me. I will once again place an order on Friday to save on shipping or you can order online. I am working on a post of a couple of new cards so be sure and check back later. Have a great day, Tonya

Moving on through!


Moving on through the club cards that is! Happy Monday morning, I hope you all had a great weekend. We did at our house, it was a relaxing weekend for the most part which is always great! Today I want to share with you the last club card we made this month and also show you an alternate card that I made with the same design and similiar supplies. Now I must admit that when the Stampin'Up! Movers & Shapers Curly Label Die (114506) came out it was one that I easily passed by. I just didn't see enough options for me in it, but when I saw the new Stampin'Up! Punch Windows Movers & Shapers (115953) that coordinates with four of our punchs I knew then that it was a must have. I love the ease of cutting out the cards d am already thinking about what else I can add to the windows. Now for those of you that haven't used the Movers & Shapers Dies the fun part it that the punch shapes are movable. So you can put the window at the top, bottom, center, left or right of your card front. The card is pretty straight forward so I am just going to list the supplies used:
Rich Razzleberry Card Stock (115316)
Rich Razzleberry Classic Stampin' Pad (115658)
Rich Razzleberry 1/2" Polka-Dot Grograin Ribbon (115613)
Whisper White Card Stock ( 100730)
Old Olive Card Stock (100702)
Cottage Wall Designer Series Paper (115671)
Clear Rhinestone Brads (113144)
Scallop Edge Punch (112091)
Modern Label Punch (116630)
5-Petal Flower Punch (109041)
Versamark (102283)
Teeny Tiny Wishes Stamp Set (115370)
Fresh Cuts Stamp Set (111634)
Paper-Piercing Tool (116631)
Mat Pack (105826)
Big Shot Die-Cut Machine (113439)
Swirls Scribbles Sizzlit Die (113441)
Stampin' Up! Movers & Shapers Curly Label (114506)
Stampin' Up! Punch Windows (115953)

After making the first card I just couldn't resist making this second one with the left over Rich Razzleberry cut out. The layout is exactly the same I just used Old Olive Card Stock, Old Olive Classic Stampin' Pad (102277) , Old Olive 5/8" Grosgrain Ribbon (109054) and the Stampin' Up! Beautiful Butterflies Die (114507).

If you have any questions about either card please leave me a comment and I will be happy to answer them. As always thank you for stopping by my blog and have a great day, Tonya


Saturday, July 18, 2009

Wonderful Linen


Good morning, I did get to stamp yesterday but what I created I can't share at this time as it is a swap for convention. So today I am going to share one if the two cards we did at club this week. One of the swaps I signed up for at convention is a technique swap. What this involves is each person makes a 6x6" page with a technique sample and directions on how to make this technique. One of the ones that I chose is Faux Linen and since I had the technique on my mind I decided to share it with my wonderful club ladies.
The card starts with a base of Dusty Durango Card Stock (115321). We used a piece of Night Quite Navy Card Stock (101722) that was texturized with the Big Shot Die Cut Machine (113439) and the Texture Plates Kit #4 (114531). Before we mounted the Not Quite Navy Card Stock to the Dusty Durango we added a piece of Dusty Durango 1/2" Polka Dot Ribbon (115609) to the card with the Polka Dots facing the card stock.
The linen image is created using Glossy White Card Stock (102599) and a sanding block (103301). To create the linen background you first sand the glossy white paper in one direction with the sanding block then you sand again at a 90 degree angle to the first sanding. Wipe off all the excess sanding dust and then proceed to the next step. For the next step you need a craft ink pad or spot. I used Creamy Caramel Craft Ink (103034) and a Stamping Sponge (101610). You ink up the sponge with the craft ink and rub it over the sanded glossy white card stock. The craft ink will settle into the sanded places on the card stock and after you buff away the excess you have a faux linen look. We used the flowers from the One of a Kind Stamp Set (113624) in Dusty Durango Classic Ink (115654) , Not Quite Navy Classic Ink (103008) and Tempting Turquoise Classic Ink (100814) to stamp the flowers on the faux linen paper. We set this aside to dry and moved on to our sentiment. The Wonderful was stamped with Not Quite Navy Classic Ink and the Friend was stamped on a piece of scrap Very Vanilla Card Stock (101650) in Dusty Durango Classic Ink then punched out with the Small Oval Punch (107304). Both the wonderful and friend are from the Wonderful Favorites Stamp Set (115114). After layering the Wonderful on a piece of Tempting Turquoise Card Stock (102067) it was mounted to the card using dimensionals the friend was also added with dimensionals. I decided the upper right hand corner needed something but I wanted it to be subtle so I went with a Photo Corner Punch (109042) in Not Quite Navy that I added some dry embossing and there you have the finished card. I hope you enjoyed learning how to faux linen. It really is an easy technique and adds that extra something to a card. Try it with a different color of craft ink and let me know what you think.
I also got all the paper cut for the paper share yesterday so if you took part in that please contact me and we will work out delivery. I am off to spend the day with my family, hope you get to do the same. Have a great day, Tonya

Friday, July 17, 2009

Become a Stampin' Up! Demonstrator for only $85

Have you ever considered becoming a Stampin' Up! Demonstrator. Whether you want to do it just because you love their products and would like to get a discount on them or whether you want to earn some extra money and be your own boss, now is the perfect time to become a demonstrator. From July 15 until August 31 you can become a demonstrator for just $85 with our special Mini Starter Kit.


The special, limited-time Mini Starter Kit (pictured above) contains many of the items you need to get started in your new business, including
For All You Do stamp set
In Color Classic Stampin' Pads (6)
Whisper White card stock (8-1/2" x 11")
In Color assorted card stock (8-1/2" x 11")
Business forms and tools
Or if you want to buy the standard $199 Starter Kit, in addition to the supplies listed below, you'll get all six of the new In Color Classic Stampin' Pads and one pack of In Color assorted card stock (8-1/2" x 11")--a $43 value! The standard Starter Kit includes
Five stamp sets
A Stampin' Around wheel, handle, and ink cartridge
Stampin' Pastels
Card stock
Eastern Blooms Décor Elements and applicator tool
Five Classic Stampin' Pads
VersaMark Pad
Stampin' Scrub and Mist
Blender pens
SNAIL
Business forms and tools


I originally became a demonstrator because I fell in love with the Stampin' Up! products and decided a discount on those products would be great! Since that time I have changed my perspective and now love to share my ideas with others through workshops, clubs and classes. I have meet some great individuals by doing this.If you have any questions about becoming a demonstrator please don't hesitate to ask. I would love to help you and I would love to have you join my team of demonstrators. Thank you, Tonya

Ribbon Shares


The beginning of a new catalog period is always a busy time but pair it with summer and it becomes especially so. I have been busy the last few days cutting and packaging all the ribbon for the two ribbon shares that I offered this year and since I haven't been doing much stamping besides those I thought I would share the finished product with you. The box on the left if just like the card box we used back in May when I held my Oval All Card Class. I used the new Razzleberry Lemonade Designer Series Paper on each of the boxes but the base and ribbon colors varied. This box as you can see from the next picture holds all the new Ribbon Styles that are available in the catalog.
I wound each ribbon on a piece of Whisper White Card Stock that was punched out with the Round Tab Punch (108340).
The second Ribbon Share consisted of all 19 colors of the 1/4" Grosgrain Ribbon. To make the box for this share I used four of the Big Shot Bigz XL Die Box #2 (114518). I cut the lids off and glued the boxes together using tombow. After they were glued together I used a 1 3/4" strip of Razzleberry Lemonade DSP to wrap around the boxes. I then created a lid and covered the top with more of the Designer Series Paper. The ribbon is again wrapped on the Whisper White Round Tab Punch outs. All the colors fit nicely in the box as you can see in the picture below. As with the other ribbon share
the Designer Series Paper varies on each box lid and sides.
So I am happy to report if you purchased one or both of these shares they are available to pick up. If you didn't order one and would like to still get one contact me and I will work something out with you. I will start working on the paper shares today and getting them cut out. Thank you for stopping by today. I do plan on stamping today so be sure and come back tomorrow. Have a great day, Tonya

Wednesday, July 15, 2009

Same Supplies Different Layout

Good afternoon, today I am going to share two cards with you that use the same supplies (different colors) but have two different layouts. Usually when I have a Card Class such as a Stamp A Stack all the cards look the same, but recently a customer asked if I could help her with some card designs using the Loads of Love Stamp Set (115022) and after working on one card I thought it would be fun to try and make a second card using the same supplies only change the layout. She had requested birthday cards for both boys and girls. We also discussed colors and some things she liked about certain cards in the catalog. I do this at Christmas time with my customers to help them design their Christmas cards too. The first card uses Pretty in Pink Card Stock (100459) as the base and also for the punched out flowers which are done with the Trio Flower Punch (109183). The Truck is stamped on Whisper White Card Stock ( 100730) and watercolored in with the Aquapainter (103954) and the Soft Subtle Watercolor Wonder Crayons (106697) and Neutral Watercolor Wonder Crayons (106746). I layered the truck image on a piece of Certainly Celery Card Stock (105125). I scalloped one edge of the Certainly Celery Card Stock (105125) with the Scallop Edge Punch(112091). I used a Strip of Tea Party Designer Series Paper (113992) down the side and a piece of Pretty in Pink 1/4" Grosgrain Ribbon (109032) was knotted on the Tea Party DSP. Before I added the truck layer to the card I used the Paper-Piercing Tool (116631) and the Mat Pack (105826) to add the Punched Flowers and then the Silver Brads (104336) This hides the brad backs behind the Certainly Celery Layer and makes the card look more finished. The Happy Birthday was stamped with Basic Gray Classic Stampin' Pad (109120) and is from the Tiny Teeny Wishes Stamp Set (115370).

The second card uses the same supplies except the base is Almost Amethyst Card Stock (102158) and I used Pretty in Pink Card Stock behind the truck image. The ribbon was changed to Whisper White 1/4" Grosgrain Ribbon (109025). I really like both cards and it is an easy way to get to cards that look similar but yet not the same from the same supplies. This is really nice if the cards you make are going to the same family at different times of the year.
Tonight we will be having or First Stamp Club of this catalog period and I am looking forward to showing the ladies some new items from the catalog. I will be showing you the projects we are doing tonight later in the week so be sure and stop by again to take a look. If you see a project you would like to try contact me and we can set up a workshop for you and your friends. My workshops are totally hands on and everyone there will get to make two items to keep. Thank you for stopping by today and have a great day, Tonya

Monday, July 13, 2009

Deal of the Week #3

Wow have I been gone for a while. Sorry about that I didn't intend to take such a break from blogging, life just has been busy. I have been busy with Stampin'Up! business just not anything that is ready to share. I have been busy with Convention swaps and cutting ribbon for the ribbon share. For those of you that placed your Ribbon Share orders they will be ready this week.
Now on to this weeks Deal of the Week. This week the Square Fire Rhinestone Brads are only $6.99 plus tax and shipping. These are fun to add to any project whether it be a card or scrapbook page. They come in Pink, Red, Pumpkin and Yellow and there are approx. 80 brads per container 4 colors in two sizes. This is club week so if you are a club member this is a great items to add to your order. If you are not a club member but would like to order these please let me know and I will place a group order to save on shipping. You can also take advantage of this special by shopping online.
I will be back tomorrow with a new card to show you so plan on stopping by. Have a great day, Tonya

Wednesday, July 8, 2009

Birthday Birdie


Wow I can't believe it is Wednesday already. This week seems to be flying by with it also your chance to purchase the Big Shot Doctor Bag for only $49.99. Don't forget that I am placing an order on Friday if you want to take advantage of this great deal.

Okay on to today's card, as told you yesterday it again uses the Razzleberry Lemonade DSP (115675). The layout came from an ad in a Card Magazine I was looking through this month. I liked the simplicity of it and decided it would make a nice Birthday Card. The card base is just simply Whisper White Card Stock (100730) that I ran through the Big Shot (113439) with the Stampin'Up! Background 1 Texturz Plates (114512) to add the polka dots. The scallop circle is also made with the Big Shot and the Stampin'Up! Pennant Bigz xl die (113483). I used Rich Razzleberry Card Stock (115316) for the scallop circle. I stamped the Birthday Birdie from the Pun Fun Stamp Set (115054) in Basic Gray Classic Ink (109120) on Whisper White Card Stock. Using the Aquapainter(103954) and the following Classic Ink colors (Rich Razzleberry 115658, Crushed Curry 115659, Pumpkin Pie 105216) I watercolored the bird. After it was watercolored I used the 1 3/4" Circle Punch (112004). The circle was mounted to the scallop circle with adhesive. I cut two pieces of different prints from the Razzleberry Lemonade DSP and the bottom one was attached directly to the bottom of the base. The top piece I used the Mat Pack (105826) and the Paper-Piercing Tool (116631) to make small holes on both ends. This allows me to add Silver Brads (104336) and then attach the strip with Dimensionals. I also attached the scallop circle with dimensionals. I stamped the Happy Birthday on the card last using Basic Gray Classic Ink and the new Teeny Tiny Wishes Stamp Set (115370). This set of 24 stamps includes sentiments for all occasions including holidays, graduation, new baby, and sympathy just to name a few also the sentiments all can be punched out with the new Modern Label Punch (116630). Be sure and take a look.
Thank you for stopping by my blog today, I appreciate it and hope you enjoyed the card. If you have any questions or would like to purchase the supplies to make this card contact me. Also this card would be a great card to make at a workshop contact me if you would like to have one and earn free Stampin'Up! products. Have a great day, Tonya

Tuesday, July 7, 2009

Lemonade and Bees

Good morning! I finished this card and another one (I'll show you it tomorrow)yesterday but because of the lighting last night I couldn't get a good picture. This still isn't the best picture but after taking 15 of this card I figured it wasn't going to get better. I am using the new colors and Designer Series Paper but since I haven't bought any of the new stamp sets yet I am going through some of my older ones and getting them back out to use. With the flowered design in the Razzleberry Lemonade DSP I thought Bees would be perfect. What else would you find next to all those pretty flowers and bright colors but Bees. The base of the card is Rich Razzleberry Card Stock (115316) with a square of Melon Mambo Card Stock (115320) layered on top. I used the Razzleberry Lemonade DSP (115675) to make the three panels that I placed on top of the Melon Mambo Card Stock. I stamped the Beehive and the Bees from Just Buzzin' By (113228) on Watercolor Paper (105019) in Soft Suede Classic Ink (115657). I used the Aquapainter(103954) and Crushed Curry Classic Ink (115659), Melon Mambo Classic Ink (115656)m and Soft Suede Classic Ink to color in the stamped images. After cutting them out I used dimensionals to attach them to the card. The sentiment is also from the Just Buzzin' By Stamp Set. It is actually one long sentiment but I wanted it to fit the Large Oval Punch(107305) so I used the Melon Mambo Stampin' Write Marker (116329) to color the part that I wanted stamped, cleaned the stamp, inked up the rest and stamped again. This was layer on the a Pumpkin Pie Card Stock (105117) Scallop made using the Scallop Oval Punch (114889). That finished off the card, inside I will add Hi! and the card is ready to send. Tomorrow I will be back with a card using the same Designer Paper but a different look. Have a great day, Tonya

Monday, July 6, 2009

Deal of the Week #2

Wow, Stampin'Up! is offering you a great deal this week. From now until Monday July 13 at 9:50 ( MT) you can get the Big Shot Doctor Bag for only $49.99 plus tax and shipping. This is almost $20 off the regular price. I have this bag and love it. It holds my Big Shot and many of the dies too! I can take it with me when I have a workshop, party, or crop. It makes taking the Big Shot someplace so easy. Also it is great for storing your Big Shot in if you don't keep your's out all the time. Have a mentioned how much I love it! If you don't currently have the Big Shot Doctor Bag I would encourage you to buy it this week. For my local customers that are interested in saving on shipping I will place an order Friday morning just contact me before then. You can also place an order directly through my demonstrator website. The link is in the upper left column. As always if you have any questions please let me know and I will be happy to answer them. Have a great day and I hope to be back later with something new to show you. Tonya

Thursday, July 2, 2009

In Color Cards

Good morning to all! Sorry I didn't post more pictures on my Uncle Sam post yesterday. We had a busy day at our house and since the weather was so beautiful we spent quite a bit of time outside. I did do some creating last night after most of the kids were in bed. DD has been staying up later this summer and she actually kept me company while I did these cards and helped with ribbon colors and such. I really wanted to show you some of the new In Colors but also wanted quick cards that would work in all the colors. Then I remembered our Decor Elements Stencil that I got a while back. Did you know that we have stencils in the Decor Elements Line? We do and Stampin'Up! has added seven new ones in the new Decor Elements Catalog (which can be downloaded on the left of the screen). I used Kind Thoughts Brocade (116572) which is the small size. Each card uses one of the New Incolors

with the first one I made being Rich Razzleberry Card Stock(115316). I used Dotto (103305) to hold the stencil in place then I sponged the Rich Razzleberry Classic Ink (115658) all over the stencil. When I had the coverage I wanted I simply removed the stencil, wiped off the adhesive from the Dotto and the card was ready to finish. I stamped the for you from Fresh Cuts (111634) on either Whisper White or Kraft Card Stock depending on the card and punched it out with theLarge Oval Punch (107305). On the Rich Razzleberry Card I added White Taffeta Ribbon(109070) and tied a knot. This card is simple but has an elegant feel about it. Perfect for mass producing and having on had for almost any occasion. Here is the list of colors that I used on the three other cards. Melon Mambo Card Stock (115320), Melon Mambo Classic Ink (115656), Whisper White Card Stock and Organza Ribbon (114319). Crushed Curry Card Stock (115319)
Crushed Curry Classic Ink (115659),
Chocolate Chip Classic Ink (100908),
Whisper White Card Stock and Chocolate
Chip Taffeta Ribbon (109065). Fourth Card
Dusty Durango Card Stock (115321), Dusty
Durango Classic Ink (115654), Kraft Card Stock (102125) and Kraft Taffeta Ribbon (109068).
Also I wanted to remind you that the Deal of the Week is only good until Monday at 10:50 Central time. If you are interested in purchasing the Scallop Edge Punch and you are local please contact me. I will place one order which will save on shipping and handling. Also if you are interesting an any of my Ribbon or Paper Shares please let me know as spots are filling up in the first group. Thank you for stopping by my blog today. I appreciate it and would love to hear from you. Have a great day,Tonya

Wednesday, July 1, 2009

Uncle Sam


With all the new Catalog excitement the 4th of July has sort of snuck up on me. Since Stampin'Up! is updating our websites as well as having to wait until Noon to place my first order, I decided it was time to create Uncle Sam. I had originally planned to have him be a bagalope like my other creations but with his goatee it just wouldn't work out. So I think he is going to become a wall decoration. I started with the Top Note Die and cut out his face using Blush Blossom Card Stock. The eyes were created using the 3/4" Circle Punch, 1/2" Circle Punch and 1" Circle Punch. Using Ballet Blue, Basic Black, and Whisper White Card Stock in that order. The nose was created by cutting out a triangle from Blush Blossom Card Stock then sponging the edges with Blush Blossom Classic Ink. I hand drew the mouth on with the Basic Gray Stampin' Write Marker. The goatee and the tufts of hair were created with the #2 Daisies Die for the Big Shot. The large and medium flower were cut out twice in Whisper White Card Stock and the little flower once also in Whisper White. The flowers were then cut in half and the folded in half again making sure that the petals lined up between each the other row. I hope this makes since if not I will post pictures later to explain. After folding the flowers I used Tombow to hold the layers together. The tufts of hair are one half of a large flower with one half of a medium flower on top. Make two. The goatee is two large flower halves layered on top of each other, then two medium flower halves, then the two smallest flower halves. the tufts of hair and goatee are lightly sponged with Going Gray Classic Ink to give a little contrast. This gives Uncle Sam a nice long goatee. The hat was created free hand by first taking a rectangle and making the bottom narrower than the top. The red stripes were then added which are 3/4" Real Red Card Stock. The top of the hat is trimmed into a oval shape using a non Stampin'Up! template. A Night of Navy Band was added with Small Star Punches added. The brim of the hat is also Whisper White and was made using the same template from the top of the hat. I will take some pictures later this afternoon as I know that these directions are not the clearest. Of course you could also just make the hat straight up and down and the brim also. I just wanted to try and add dimension by rounding it.
I will be hopefully posting more this week but in case I don't I hope that you all have a safe and Happy 4th of July and thank you to all the service men and women that help keep our country free. Tonya