Thursday, December 27, 2012

Clearance Update


I wanted to let you know that the Clearance Rack has been updated with new products. It is a great way to stretch your crafting dollars and get some wonderful items including punches, stamp sets, markers, ribbon and even Big Shot items. Please let me know if you need assistance with your order and I will be happy to help you. Thanks and I will be back posting again soon now that Christmas is over and life is getting back to normal at our house. We've added 15 more products to our Clearance Rack Blitz! See the list of newly added products below:
  • Neutrals Flower Brads
  • Regals Flower Brads
  • Subtles Flower Brads
  • Pretty in Pink 5/8" Satin Ribbon
  • Bashful Blue 5/8" Satin Ribbon
  • Chantilly 1/2" Crochet Trim
  • Artichoke 3/8" Denim Jean Ribbon
  • 2010-2012 In Color Stampin' Write Markers
  • 2011-2013 In Color 12" x 12" Textured Cardstock
  • Timeless Portrait Designer Series Paper
  • Beau Chateau Designer Series Paper
  • Well Worn Designer Series Paper
  • Beau Chateau Side Notes
  • Sweetest Stem Embosslits Dies
  • Flower Burst Embosslits Dies

Friday, December 7, 2012

Cute Treat Bundles

Are you the type of Christmas giver that loves to bake and make wonderful treats and goodies to share? If so then the bundles below will help make your treat giving even more special. Stampin'Up! is offering the following two bundles at 20% savings just in time for the holidays.
 I have posted the information and pictures below so that you can see for yourself how cute the bundles are. Need to place an order? Give me a call and I will be happy to help you or you can order online at www.tonyaball.stampinup.net Thank you for stopping by today and have a great day!


Available November 29-January 2.
Trimmings & Tags Bundle
Item 132769
$13.50 (a $16.85 value)
Includes
  • Gusseted Cellophane Bags (25 bags; 5" x 3" x 11-1/2")
  • Snow Festival Designer Printed Tags (25 double-sided tags; 4-1/2" x 3-1/8")
  • Cherry Cobbler 1/4" Sweater Trim (10 yards)
Petite Treats Bundle
Item 132770
$13.50 (a $16.85 value)
Includes
  • Glassine Bags with die-cut edges (10 bags; 3" x 5" x 1-1/2")
  • Handmade Holidays Stitched Felt (8 pieces)
  • Gumball Green 3/8" Stitched Satin Ribbon (10 yards)

Thursday, December 6, 2012

Holiday Hop 2012


Hello and welcome to our Holiday Hop! I love to do the hops and of course seeing what everyone else makes, but this month is such a busy time of year that I kept my projects simple. If you are just joining the hop there is a link below that will take you through the whole hop.
 My first project is a treat container that I think would be great for my nieces and nephew when they come to visit. I would feel them with little treats. I used the Petal Cone Die and made a Christmas tree from Lucky Limeade Card Stock. There is textured add to the tree with the Petals a Plenty Embossing folder and I sponged the card stock with Lucky Limeade Ink.  I used the Tasteful Trim XL Die and cut the double scallop in half to make the garland then I added ornaments with the Merry Minis Punch Pack in Real Red Glimmer Paper, Primrose Petal and Early Espresso and the Candlelight Christmas Specialty Designer Series Paper. To make the ornaments a little more fun I added Crystal Effects on each one then sprinkled Dazzling Diamonds on the Crystal Effects while it was still wet.

 
My next project focusing on gift wrapping. I love to personalize the gift wrap and packaging when giving a home made gift and our Kraft Gift Boxes can help you with that. I used more of the Candlelight Christmas Specialty Paper to make a bow and "wrap" the box. I say wrap because the box is still able to be opened with out havin to remove the pieces. I like to make my bows with brads to hold them together so the center of this bow has a nice sparkley Real Red Glimmer Brad. Simple yet pretty or at least I hope the receipent thinks so. This box will be for an ornament that I need to make for an ornament exchange we are doing at our church. Now moving on to our final project which can be for your home or to give as a gift.  
 

I love to do glass etching and it is so easy with our Big shot and dies. I used the Snow Flurry Bigz Die to cute out clear contact paper and used the negative image and applied it to the glass then etched the glass. After removing the contact paper you are left with the snowflakes. I tried to get a picture of the candle vase with an actual candle in it but it the snowflakes didn't show up very well so I just placed a piece of card stock behind it for picture purposes. I hope you enjoyed my projects today and were inspired to create something new.
 
 
Now I will send you of to Dawn's blog. You can get there by clicking on the next button below, but before you go I wanted to thank you for stopping by. Have a great day and enjoy the hop! Tonya


Blog Hop Participants:
  1. Shellie G. of Creative Electica
  2. Annie L. of Love Me Cards
  3. Pam S. of Stampin' in the Sun!
  4. Nancy B. of Lady Stamps-A-Lot
  5. Rose C. of Stamp with Rose
  6. Tonya B. of Stampin' with Tonya
  7. Dawn S. of Dawn's Creative Chalet
  8. Darcy J. of DJ's Stampin' Place
  9. Kim R. of Stamping with Kim
  10. Terry B of Goin' Over the Edge
  11. Justin K of JK Cards
  12. Heidi B of Stuck on Stampin'
  13. Jennifer B of NW Stamper

Monday, December 3, 2012

Ornament Elegance Kit

Stampin'UP! is making the supplies for the Ornament on the front of the Holiday Catalog available while supplies last. This is a beautiful ornament and the price is fantastic! Please contact me today or order online as these kits will not last long. The info below is from the Online Store and give you more details on what you will receive with your kit. Thanks!
Price: $14.95
The ornament on the cover of our holiday catalog was such a hit that we are making it available to you — just in time to deck the halls with terrific trimmings you’ve made yourself!

All you need (in addition to the kit) is a glue gun, adhesive glue stick, and scissors.

Makes 10 heirloom ornaments.

Kit includes: Die-Cut Cardstock Elements; Cherry Cobbler 3-1/2" Scalloped Tulle Ribbon; Natural Linen Thread; Vintage Faceted Designer Buttons; Large Pearl Basic Jewels.

Order now so you will have plenty of time to make them for Christmas gifting—or for your family tree!

Available while supplies last.

Wednesday, November 21, 2012

God Bless You

Hello and good afternoon! Tomorrow is Thanksgiving and I wanted to share this card that I recently made with you before then. This card is going to be a Thank you card for a special person who has offered our family a lot of support this past week. I used the Gently Falling Stamp Set and the Trust God Stamp Set. I used Cajan Craze, More Mustard, Old Olive and Soft Suede Card Stock and Ink Pads as well as Very Vanilla and Watercolor Card Stock. For textured I used the Woodgrain Textured Impressions Folder. I used just a bit of Linen Thread and punched the sentiment out with the Wide Oval Punch before I sponged the edges.
I hope you enjoyed today's card and more importantly that you are able to spend Thanksgiving with your loved ones. Thank you for stopping by, Tonya

Tuesday, November 20, 2012

Frosty Friends

Good morning! It is feeling a little chilly out this morning but not quite cold enough for these little Frosty Friends. We made this card last week at Stamp Club and it is such a hit in our family that we maybe using it as one of our personal Christmas Cards. The layout is cased from the Holiday Catalog with a few changes here and there. The base is Cherry Cobbler with texture added with the Snow Flurry Textured Impressions Embossing Folder. I used Shimmer Paint in Frost White and Rubbing Alcohol to give the base just a bit of shimmer and sparkle. The Designer Paper is the Festival of Prints Designer Series Paper Pack. If you haven't checked this paper pack out you are missing a great group of designer papers. I really like them and you get four of each design which is great for your card making. We added Pool Party Baker's Twine around the card and added a bow to the side before adding our main image. The Frosty Friends and the Merry Christmas which is from the Greetings of the Season Stamp Set were stamped on Whisper White Card Stock with Jet Black Stazon. The image was cut out with the Big Shot and the Apothecary Accents Framelits and then colored with a Blender Pen and the following Ink colors: Cherry Cobbler, Pool Party, Old Olive, and Pumpkin Pie. I hope you enjoyed today's card.
Just a reminder that the Online Extravaganza is still going on and you can place your orders either online or by calling or emailing me. Also the Starter Kit promotion continues until December 16 if you are interested in becoming a Demonstrator whether it be for extra cash or just for a discount on our great products. Thanks for stopping by today and have a great day, Tonya

Monday, November 19, 2012

Petal Cone Santa

Hello again, I hope you have taken a moment to look over the Online Extravaganza. On a recent blog hop I noticed a cute little Santa that was made with the Petal Cone and just knew that I need to share it with my club ladies. I made some changes to Santa by using some different supplies but the basic idea is the same. You can see my inspiration at Goin' Over the Edge. I wanted to share him with you today because the Petal Cone Die that I used to make him is on sale right now during out Online Extravaganza for just $23.07. This is 30% off and if you don't own a Big Shot it is also on sale but for today only. The additional supplies need for Santa are: Real Red Card Stock, Whisper White Card Stock, Basic Black Card Stock, Pink Pirouette Card Stock, Silver Glimmer Paper, Ribbon Slides, Googlie Eyes, Basic Pearls, Itty Bitty Shapes Punch Pack, Scallop Oval, 2 3/8" Scallop Circle and the Bird Builder Punch. He would be great filled with candy and given to a special someone as a fun treat and is easy enough for kids to help make. If you would like to purchase the supplies for Santa please contact me and I will be happy to help you with you order. Thanks for stopping by and have a great day, Tonya

Online Extravaganza


Good morning, today starts the Online Extravaganza. Now of course you can also contact me to place  your order but if you want to order online then the link to my online ordering site can be found here. If you have any questions please let me know as I am always happy to help. Thank you for stopping by and I will be back later with a new project to share.


Online Extravaganza


Dates: November 19-28, 2012
Details
The Online Extravaganza promotion is our biggest online sale of the year!  So during these 10 days only, you  can get incredible discounts-up to 50 percent-on some of your favorite products!
In addition, there will be three products 20 percent off for 24-hours only on both the first and last days of Online Extravaganza-our very own doorbusters! Woot!
Monday, November 19, midnight - 11:50 PM (MT)

Page
Item
Description
Retail Price
24-Hour
Sale Price
181
125586
Simply Scored Diagonal Plate
$11.95
$9.56
186
113439
Big Shot Die-Cutting Machine
$99.95
$79.96

186
113474
Big Shot Doctor's Bag
$69.95
$55.96

Wednesday, November 28, midnight - 11:50 PM (MT)
Page
Item
Description
Retail Price
24-Hour
Sale Price
7
118941Clear Block Bundle (Blocks A-I)
$66.95
$53.56
7
120279Clear Block Storage Caddy
$16.95
$13.56
175
109127Stack & Store Caddy
$34.95
$27.96
 

Saturday, November 17, 2012

Finnish Star Ornament

Hello and good afternoon! I have been wanting to post this all week but we have had a super busy week and a little bit of unexepted things come up that have kept me from writting up the post. I have been making a variety of paper ornamnets and this one is a favorite of mine. It is just make with paper strips and once you have the general idea it goes together pretty quickly. I watched this video before making mine if you want to give them a try too. The strips I used are 6" by 1/2" just so you have a size reference. The supplies I used are: Candlelight Christmas Specialty Designer Series Paper, Tombow Multipurpose Adhesive, Snow Flurry Bigz Die, Delicate Doilies Sizzlits, Early Espresso Card Stock, Primrose Pink Card Stock,  and Vintage Faceted Designer Buttons. If you are interested in making one of these ornaments please check out my upcoming classes as we will be making them after Thanksgiving. I am going to make this check so I can get a few other things accomplished today. Thanks for stopping by and have a great weekend, Tonya

Friday, November 16, 2012

Sizzix Texture Boutique Embossing Machine


Due to our partnership with Sizzix, we are pleased to be able to offer a test run of the Texture Boutique Embossing Machine in our North American markets. We have 4,000 available to be sold only while supplies last. If this product test goes well, we may offer the Texture Boutique again in the future.
The Texture Boutique works with Textured Impressions Embossing Folders to transform ordinary cardstock, paper, metallic foil, or vellum into an embossed, textured masterpiece. This machine embosses only; it does not die cut.


'Tis the season of giving, and the Texture Boutique makes a wonderful gift for anyone who wants to create their own elegant embossed art. To help you with your gift-giving needs, we're offering a special value bundle that saves you $5.90. If you prefer, you can also purchase the Texture Boutique alone. Looking for stocking stuffers? Pick up some additional embossing folders.
Texture Boutique Bundle
Item 132700
$39.95 (a $45.85 value)
Includes
  • Texture Boutique Embossing Machine, 1 Pair of Standard Embossing Pads, 1 Mylar Shim
  • Flower Garden Textured Impressions Embossing Folder-Stampin' Up! exclusive
  • Stripes Textured Impressions Embossing Folder-Stampin' Up! exclusive
Texture Boutique Embossing Machine
Item 132657
$29.95
Includes
  • Texture Boutique Embossing Machine, 1 pair of Standard Embossing Pads, 1 Mylar Shim

Please let me know if you are interested in ordering the Embossing Machine. Thanks!

Thursday, November 8, 2012

What I am grateful for.. Blog Hop


  Hello and welcome to our November Blog Hop. This month our theme is I am grateful for. My thought first went to Thanksgiving and the fact that I am thankful that we still get most of my mom's family together every year for dinner and family time. As we all get older and add more family to the mix it gets more challenging but it is such a great way to reconnect and of course eat!

My has lots of texture with the embossing folders and of coures the leaves. My supplies include: Saraha Sand, Cherry Cobbler, Old Olive, More Mustard, Cajan Craze, Early Espresso and Very Vanilla Card Stock. Early Espresso Classic Ink was used with the Teeny Tiny Wishes and Wonderfall Stamp Sets. I used the Autumn Accents Bigz Die to cut out the leaves before stamping them. The Ribbon Slide has a strip of the Early Espresso Core'dinations Card Stock through it that has has texture added by running it through the Big Shot with the Woodgrain Textured Impressions Embossing Folder. Don't forget the First Edition Speciality Paper, the Word Window Punch, the Modern Label Punch, the Scallop Edge Border Punch and the Houndstooth Textured Impressions Embossing Folder to finish off the supply list.
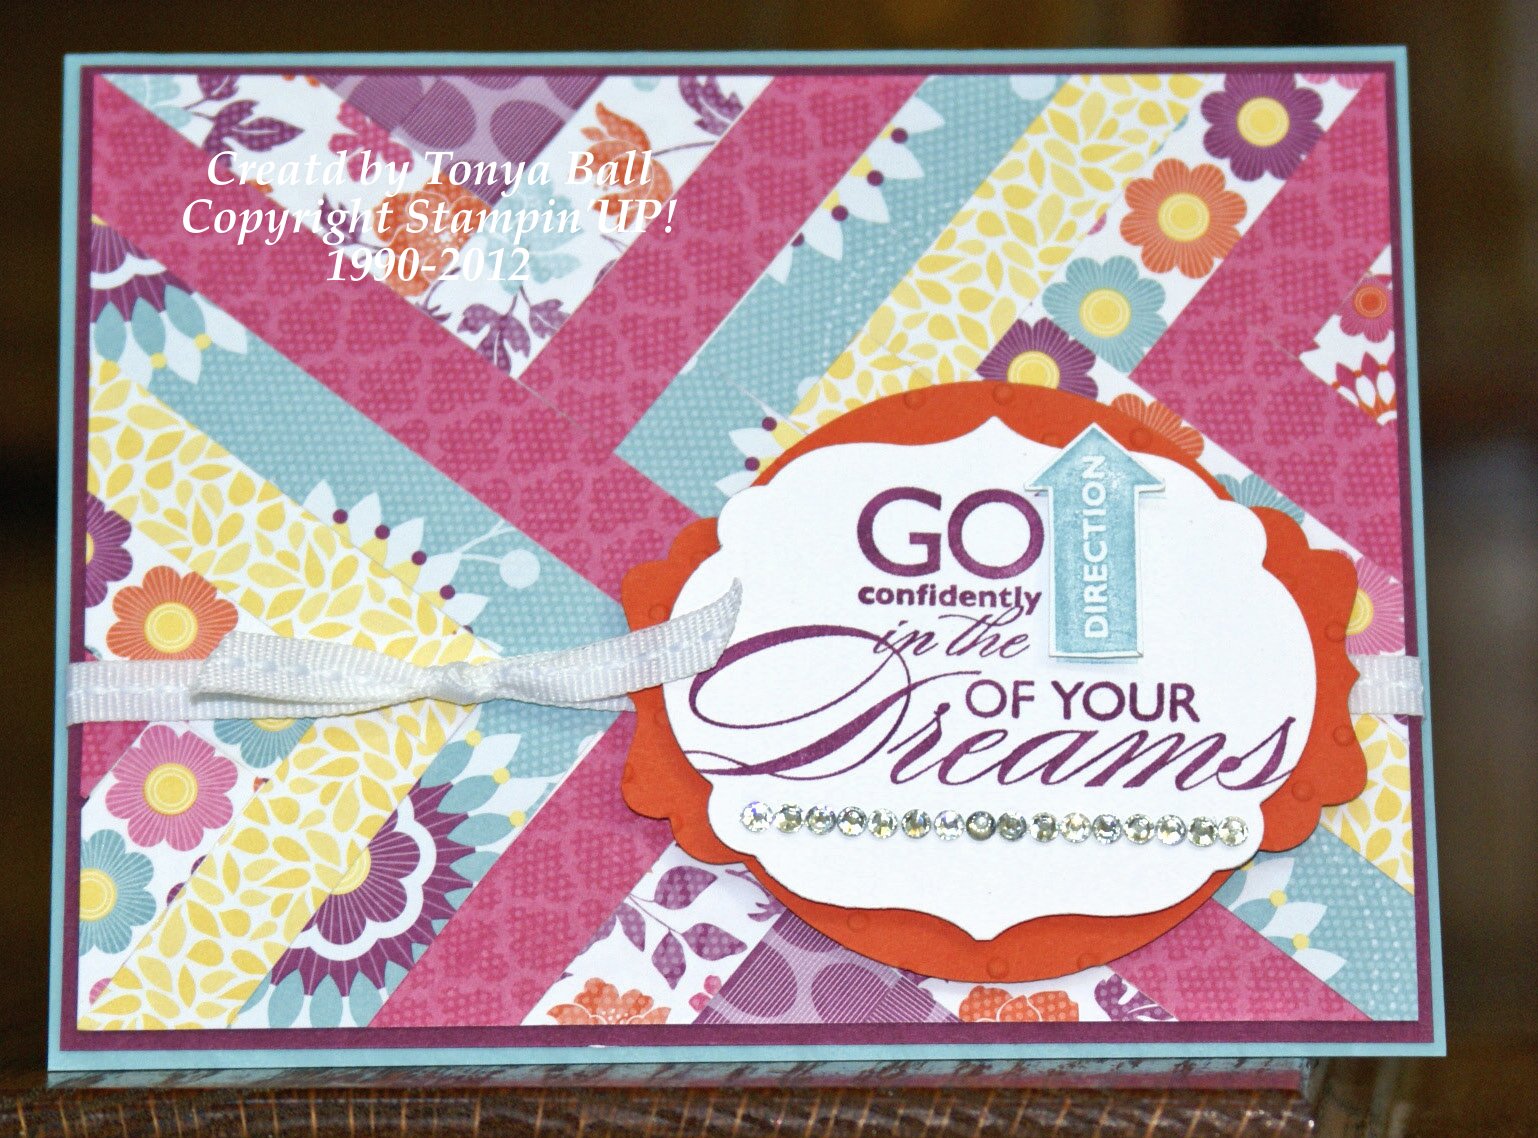
My next card uses some of the same colors as the above card but the look is different because of the technique that I used. I love the sentiment on my second card it is from the Trust God Stamp Set. I am so thankful for God's grace and understanding. I paired the sentiment with the Gently Falling Stamp Set which is one of my favorite fall sets. The colors are Old Olive, Cajan Craze, Soft Suede and More Mustard. For card stock I used Cajan Craze, More Mustard, Soft Suede, Very Vanilla and Watercolor Paper. I started this card by spritzing the Watercolor Paper with water until it was wet, I then stamped my images and let the paper dry. I wanted my images to be a bit more blurred so I used my Aquapainter and randomly added water drops through out, then I used the Spritzing Tool and adding Early Espresso and Soft Suede across the card front. I used Soft Suede Taffeta Ribbon on the card as well as Basic Pearls. I used two punches the Scallop Trim Border Punch and the Curly Label Punch which was layered on a tag from the Lots of Tags Sizzlits.

My final two cards are part of our Hostess Gift Challenge. As demonstrators we are always thankful for our wonderful customers and our hostesses are the best. You help keep our business growing and we can't do it without you. So as part of the challenge I thought I would make some cards that I could give my hostesses just to let them know how special they are. Now mine have sentiments on them for when I give them I will make several of each card and then make the sentiments into card candy so they are customize each card with the sentiment that best suites their occasion. I have wanted the Blooming with Kindness Stamp Set since the catalog came out and during the recent sale I just couldn't resist buying it. I love the sentiments with it too!
The first card has a base of Soft Suede with Cajan Craze, Summer Starfruit and Very Vanilla Card Stock too. I used the Comfort Cafe Designer Series Paper. To ink up the image I used the Stampin' Write Markers in Summer Starfruit, Soft Suede and Cajan Craze. There are three punches used on the card: the Large Oval Punch, Scallop Oval Punch and the Dotted Scallop Ribbon Border Punch. With a little Twine and some texture from the Vintage Wallpaper folder this card is ready to go.


The second card uses the same texture just with a Pool Party base that has been sponged around the edges with Soft Suede. I stuck to just Pool Party, Soft Suede and Very Vanilla for this card. I used the Rock and Roll technique to ink up the flower. The 1 1/4" Circle Punch is the perfect size for the Thank you sentiment and I rounded the corners of the left side with the 3/16" Corner rounder and this card is ready for a special person.
I hope you enjoyed today's cards. I am glad you stopped by. If you have a extra moment please leave me a comment and let me know which card  you liked best. As always have a great day and don't forget to head over to Dawn's Blog and see what she have to share with you today. Thanks again, Tonya


Blog Hop Participants:
  1. Shellie G. of Creative Electica
  2. Annie L. of Love Me Cards
  3. Pam S. of Stampin' in the Sun!
  4. Nancy B. of Lady Stamps-A-Lot
  5. Tonya B. of Stampin' with Tonya
  6. Dawn S. of Dawn's Creative Chalet
  7. Patricia T. of Sunnyone Stampin'
  8. Pamela W. of Stinky Tofu
  9. Darcy J. of DJ's Stampin' Place
  10. Kim R. of Stamping with Kim
  11. Nancy B of Momma B Stampin'
  12. Terry B of Goin' Over the Edge

Monday, November 5, 2012

Glitter Ornaments


Good morning, today is the last day to take advantage of the free digital downloads and 50% off the Digital Kits. If you have any questions please contact me and I will be happy to help you with your downloads. I will be stamping later today and will have a card or two to share with you soon but in the mean time I made a few more ornaments. These are glass ornaments that you use Reinkers and Dazzling Diamonds to color. The top one is Midnight Muse and the bottom is Raspberry Ripple. After you coat the inside with reinker you pour out the excess and then add Dazzling Diamonds and shake it up. The Dazzling Diamonds sticks to the reinker and coats the inside. I dump out the extra dazzling diamonds which give you more colors of glittery fun to play with and then allow the ornament to dry before adding the cap back. I will be adding a ribbon to each of these but just couldn't wait to share. I have several other sizes and shapes to work on but need to add more Dazzling Diamonds to my next order. Have a great day. I am off to run and do errands before I sit down to stamp. Thanks for stopping by, Tonya

Saturday, November 3, 2012

Ornament Tags


I love the Big Shot and all the wonderful things it can do. One of my favorites is cutting through metal. Yesterday I was playing around and came up with these two ornaments that you can use for tags on a gift and can still be used later. All  you need to do is use a permenant marker to write a message or even the year and they are ready to go. For both I used metal flashing that you can find at your local home improvement store, the Big Shot, the larger of the Scallop Squares from the Scallop Square Duo Bigz Die, embossing folders I used both the Delicate Designs Folder and the Northern Flurry Folder, Basic Rhinestones that have been colored with a permanant marker and ribbon. In my case I used retired ribbon since I am working on these for a craft show I am doing in December. I made a larger one also but I will share that another day.
If you would like more information about the Big Shot and all that  you can do with it please give me a call and we can schedule a private class for you and a few friends. It really is an amazing tool that will change how you craft and did you know you can get the Big Shot and $25 worth of dies for just $99. Give me a call and I will tell you how.  Thanks for stopping by. Have a great weekend, Tonya


Friday, November 2, 2012

School Treats

Good evening, I have a lot to share with you over the next few days. I want to share one last Halloween post before I head into Christmas and Thanksgiving. I was in charge of the take home treats for my youngest son's class this year and what better set to use than Googly Ghouls and the Googlies Eyes. I stamped the treat bags with Jet Black Stazon and the retired White Stazon. The tags are made from Whisper White Card Stock, Pumpkin Pie Card Stock and Elegant Eggplant Card Stock. I stamped the images with Jet Black Stazon and colored them with a blender pen and Lucky Limeade, Elegant Eggplant and Pumpkin Pie Classic Ink. I used the Labels Collection Framelits to cut out the tags and texture was added with the Spider Web Embossing Folder. I thought about adding a boo sentiment to each but in the end kept them simple. I hope you enjoyed the treats. Tomorrow I will share a few Christmas Ornaments that I have been working on but until then Thanks for stopping by, Tonya

Thursday, November 1, 2012

New Trimmer is Available Now!


I thought I would share the exciting news with you and also let you take a look at the new trimmer in action. The following video and information was provided by Stampin'Up! Please let me know if you have any questions.

Introducing the new and improved Stampin' Trimmer! Although paper trimmers are a common crafting tool, this trimmer was designed exclusively by paper crafters for paper crafters-and because it was made by Stampin' Up!, you know it's a cut above the rest!
Features of the All-New Stampin' Trimmer
  • An extra-wide 6-1/4" cutting base and an extended 14-1/2" ruler
    • The extra-wide cutting base provides a large work area and is marked in 1/4" (4 mm) increments, allowing for small measurements.
    • The right-side grid helps you measure and cut very thin strips.
    • The extended cutting arm has a stabilizing leg to provide a sturdy and steady cutting surface for longer cuts.
    • When fully extended, the extended cutting arm sits flush with the trimmer base, providing more accurate and consistent measurements across the entire surface.
    • The cutting base and track include a full ruler, incorporating measurements down to 1/16" and grid lines that mark each quarter inch.
    • All rulers and measurements on the base are printed under a plastic cover so your measurements won't wear off.
    • The base has nonskid feet, which keeps the Stampin' Trimmer securely in place on your work area.
  • A full 12" cutting and scoring track
    • The extra-long cutting track has space at the top and bottom so you don't have to take the cutting and scoring blades out when you're not using them.
    • The track gives you enough space to cut or score a full 12" (30.5 cm) without having to remove or switch out handles.
    • The cutting track locks in place for secure storage or transport.
    • The track includes an insertion point for cutting and scoring blade handles so you can easily insert handles into the cutting track.
  • Specially designed handles and cutting track to ensure straight cuts
    • The hook on the scoring and cutting blade handles keeps the handles stable so the cuts are as straight as possible.
    • Handles come in two colors: dark for cutting, light for scoring.
    • The precision tip on the cutting blade allows you to pinpoint precisely where you're cutting.
    • The point on the side of each handle shows you where the blade will cut, making it easy to see exactly where your cuts and scores will begin.
  • Storage compartment under base
    • The storage compartment holds scoring and cutting tools such as a Bone Folder, Simply Scored Stylus, extra scoring and cutting blades.
    • Separate compartments within the storage compartment keep your tools organized, and the clear cover makes it easy to see what you've stored.
  • Product details: item 126889; $29.95

Ink-redible

Stampin'UP! has started yet another great promotion today! It is definitely a great time to be involved with this wonderful company. There are two ways to take advantage of the Ink-redible ink pad special which are:

  1. Hostesses who hold a minimum $450 party will get a FREE collection of Classic Stampin' Pads (Neutrals Collection not available)!
  2. New demonstrators who join Stampin' Up! during the promotion period will get a FREE collection of Classic Stampin' Pads (Neutrals Collection not available) with their Starter Kit!
This offer is good until December 16 so we have plenty of time to schedule your workshop. Wouldn't it be fun to get together with family and friends and make handstamped Christmas cards for them to share over the holidays. Give me a call and we can discuss a date and time. Thanks for stopping by and come back later today when I will have a project to share. In the mean time have a great day. Tonya

Monday, October 29, 2012

Sell-a-Stamp Spooktacular Today only!


Today is the big day! Stampin'Up! would like to sell the most stamps in one day today, but they need our help and they want to help us too by making the stamps 15% off. This is like getting free shipping and no taxes on your order. There are a few exceptions which are as follows.

  • Starting at 12:00 AM (MT) and ending at 11:50 PM (MT), almost every stamp we sell will be 15 percent off.
  • This means all stamps in the current catalogs including
      • Background stamps
      • Personalized name stamps
      • Cookie press stamps
      • Single-image stamps
    This DOES NOT include
      • Hostess sets
      • Bundled stamp sets
      • Digital stamp brush sets
    Take a look at the list then give me a call so I can help you with your order. I will be ordering at 10pm. I will try and post a project later today that uses the Cookie Press stamps to make Christmas Ornaments and of course you can always make sugar cookies with them. Our personalized stamps make a great housewarming gift or a wedding gift for the new couple. Thanks and have a great day, Tonya

    O Christmas Tree

    Good morning! Today is the big day! Sale-a-Stamp is going on all day and that means you have the opportunity to save of almost all of our stamps. Today is the only day that you can receive 15% off your stamp order so please let me know if you have an order to place. Now onto today's card. We made this one last week at the Christmas card class and it is inspired by the bag on page 7 of the Holiday Mini. The colors we used are Crumb Cake, Early Espresso, Cherry Cobbler, Lucky Limeade and Very Vanilla. We used three punches on the card. The new 1 1/4" Scallop Circle Punch, new Star from the Merry Minis Punch Pack  and the 3/4" Circle Punch. To add some texture we used the Woodgrain Textured Impressions Folder on the tree trunk and then the Petals-a-Plenty Folder on the Crumb Cake Card Base. There are two stamp sets with the first being a wonderful sentiment set Petite Pairs and the Jolly Bingo Bits Stamp Set which is a 24 piece Christmas set, both are on sale today. For accessories we used Cherry Cobbler Baker's Twine, an Early Espresso Button, a scallop punch from the Festival of Prints Designer Series Paper Stack and Champagne Glimmer Paper which is so pretty. This card goes together pretty quickly it just has quite a bit of punching but you could make multiples pretty easily if you are still looking for a Christmas Card idea.
    Thanks for stopping by today. I have my to do list ready for today. Lots of last minute Halloween items to check off the list and of course I hope to do some stamping. Have a great day, Tonya

    Thursday, October 25, 2012

    Sell-a-Stamp Spooktacular

    I can't believe the special Stampin'UP! just announced today. I don't remember them ever doing a special quite like this one in all my years as both a customer and as a demonstrator. Monday October 29th, Stampin'UP! is trying to sell the most stamps in one day. That means an extra savings for you because almost all of the stamp sets are 15% off one day only. So it is time to get your wish list out and start deciding which sets you want to order. Plus if you order reaches $150 in merchandise you will receive hostess benefits. So why not call a few friends and see if they would like to order a stamp set or two.  The details are as follows:

  • Starting at 12:00 AM (MT) and ending at 11:50 PM (MT), almost every stamp we sell will be 15 percent off.

  • This includes
      • Background stamps
      • Personalized name stamps
      • Incentive stamp sets from the supply list
      • Cookie press stamps
      • Single stamps
    This DOES NOT include
      • Hostess sets
      • Bundled stamp sets
      • Digital stamp brush sets
    Of course you do not have to wait until Monday to let me know what stamp sets you would like to order so feel free to call or email me or you can order online and receive the same great savings. Just make sure that you go to my Stampin'UP! website for the best savings.  Other specials will also be starting Monday including Digital Scrapbooking Day. This promotion will continue until November 5th and will include three free digital downloads as well as 50% off all Digital Kits. My goal is to sell 50 stamp sets. Would you like to help me meet my goal? Everyone that orders on Monday will be entered into a drawing and one luck person will win a free stamp set valued at $17.95. Thank you for stopping by today and be sure and let me know if you have any questions. I am always happy to help. Tonya

    Wednesday, October 24, 2012

    Three Little Gingerbread Men

    Hello! So glad you stopped by today and I am excited to have a new Christmas card to share with you. I had a Christmas Card Class and this is one of the cards we made. I love the cute little gingerbread men and they have a framelit to match which means no fussy cutting. We used two stamp sets on this card, Teeny Tiny Wishes and Scentsational Seasons which you can get either by itself or in the bundle with the Holiday Collection Framelits Dies which I recommend because you not only save money. Only two ink pads are needed for this card Eary Espresso and Gumball Green and the card stock is Cherry Cobbler, Very Vanilla and Gumball Green with a little bit of Be A Good Cheer Designer Series Paper. The Decorative Label Punch was used to punch out the sentiment. The texture along the bottom was added with the Big shot and Delicate Designs Folder and then we used the Tasteful Trim Bigz XL Die to create the scallop piece in Gumball Green. Please let me know if you would like to make this card and I will be happy to set up a private class. You can also use the candy cane or tree from the same set and make similar cards. Thanks for stopping by and have a great day, Tonya

    Friday, October 19, 2012

    Christmas Keepsake Ornament

    Good morning, well I have been trying to stamp but just haven't been completing many cards this week. Lots of ideas but thus far they are just pictures on paper. Instead I thought I would share another ornament made with the Holiday Ornaments Framelits Dies and the Be a Good Cheer Designer Series Paper. I also added the Cherry Faceted Designer Series Button and a Large Pearl Basic Jewel. The Rosette in the middle is made with the Simple Scored Scoring Tool and the Scallop Trim Border Punch. To add just a bit of glimmer and sparkle I spritzed it with Frost White Shimmer Paint mixed with Rubbing Alcohol. We will be making an ornament like this in my upcoming Ornament Class in November. Please check the calendar for more info. Mean while I am off to try and finish a card or two today. Wish me luck and thanks for stopping by, Tonya

    Thursday, October 18, 2012

    Season Greetings Catalog Case

    This last few weeks I have been working on Christmas Cards and while flipping through the catalog I noticed the card on page 18 that used the Snow Swirled Stamp Set and decided to case it. I changed up the colors but the rest is the same or at least as much as I could tell from the picture. I used Baja Breeze, Early Espresso, Cherry Cobbler and Whisper White. There is a lot of bling on this card with Basic Rhinestones on each snowflake and the glittery edge made with Sticky Strip and Dazzling Diamonds. The sentiment is punched out with the Extra Large Oval Punch and then the banner is made with the Bitty Banners Framelits and cut in half. Can you see the texture behind the sentiment? That was made with the Designer Frames Folders. There are two shapes to this set the oval and the rectangle that I used on the Cherry Christmas Tree Card.  After making the card I however decided it wasn't quite right for my Christmas Card Classes. If you would like to make this card let me know and I would be happy to help you place an order for the supplies. I hope you have a great day and thanks for stopping by, Tonya

    Wednesday, October 17, 2012

    Lucky Limeade Christmas Card

    Hello, what a wishy washy day we are having. The sun can't decide if it wants to shine or not and while that makes it not a great day to take pictures it does make it a great day to stay in and stamp. I hope to do some of that later this afternoon. In the mean time I have a card to share with you that will be included in next weeks Christmas Card Class. I cased the layout from an old swap card I recently came across but there was no name on the back. The Snow Swirled stamp set is an older one but one that I still enjoy using. I used Lucky Limeade for the base and added snow flakes with the Illuminate Glimmer Watermark Stampin' Pad. The sentiment is stamped with Early Espresso and the tree is stamped with Lucky Limeade before I added some bling with the Rhinestone Basic Jewels that I colored with a marker. I used the Candlelight Christmas Specialty Designer Series Paper and the tree is on a Early Espresso Tag made from the Two Tags Bigz Die. If you would like to make this card please contact me and let me know and I will add you to the Class next week. Thanks for stopping by and I am off to stamp. Have a great day, Tonya

    Tuesday, October 16, 2012

    Cheerful Christmas Tree

    Hello, the week is flying by as usual and I didn't get a chance to post yesterday. Sorry about that, but I do have a card to share with you today. This card is full of details and is one that we made last week at club. I am also going to be doing a similiar layout at next weeks Christmas card class. The colors are Gumball Green, Cherry Cobbler, Primrose Petals, Very Vanilla and Crumb Cake. The Designer Series paper is Be a Good Cheer it is a fun paper that I have enjoyed using on several projects. The stamp set is Scentsational Season which I purchases in the Scentsational Season Bundle with the Holiday Collection Framelits Dies. There are several other Big Shot dies including the Tasteful Trim Bigz XL Die, and the Designer Frames Folders. To add just a bit of sparkle to the Christmas Tree I used Silver Glimmer Paper and the Ribbon is the 3/8" Stitched Satin Ribbon.
    If you would like to attend the Christmas Card Class next week please let me know by Thursday so I can have your cards cut and ready for you. I will be posting a few pictures tomorrow of the cards. Thanks for stopping by and have a great evening, Tonya

    Friday, October 12, 2012

    Noel Ornament Club Card

    Good morning, I thought I would share a Christmas Card with you today. I know it is only October but if you like to get a start on your cards early then now is the time to think about them. This is a card we made for Stamp Club this week. It uses Realy Red, Lucky Limeade, Early Espresso and Primrose Petal. I used the Ornament Keepsake Bundle, Lacy Brocade Textured Impressions Folder, Greetings of the Season Stamp Set, Labels Collection Framelits, Little Leaves Sizzlits, and Early Espresso 1/4" Stitched Grosgrain Ribbon. Did you know if you purchase the Ornament Keepsake  Bundle and the Candlelight Christmas Specialty Designer Series Paper this month you also receive the Festive Paper Piercing Pack which can be used with the Holiday Ornaments Framelits Dies (included in the Keepsake Bundle) as well as the Labels Collection Framelits? It is a great time to purchase these items if you haven't all ready done so.
    Thanks for stopping by today. I am off to do some more stamping so I have more cards and projects to share with you. Have a great day! Tonya

    Thursday, October 11, 2012

    Googlie Halloween Treat

    Good morning, sorry for not posting this treat early. When you order the Ghoulish Googlies Kit you will receive both oval and circle tags. I used the circle tag to make these cute little pixie stick holders. You will need the Jet Black Staz On, 1"x8" Cellophane Bags, Pumpkin Pie Card Stock, 2 3/8" Scallop Circle, and Lucky Limeade Bakers Twine. I stamped the spider on the tag and the cellophane bag with the Jet Black Stazon and the rest is assembly. Snail the tag to  your Scallop Circle add you Bakers Twine through the hole and then add your tag to the cellophane bag with a Dimensional. These would be a great project for kids to help with. I should have added Googlie Eyes to my spider before I took the picture but oops I forgot. Will do it before I give it away. Thanks for stopping by today. Off to take my boys to school and start on my day. Have a great one, Tonya

    Thursday, October 4, 2012

    October Blog Hop

     
     Hello and welcome to another round of our Stylin' Stampin' Squad Blog Hop. This month the theme is Halloween and I have three projects to share with you. The first is a framed My Digital Studio piece that I recently made for a hostess. She loves Halloween and had asked about the Toxic Frameable Digital Designer Template so I decided to make this for her.  I printed it from my home computer and then trimmed it down to fit a 5x7" frame. To add just a bit more interested I added the 1/2" Striped Satin Ribbon and Basic Black Card Stock to the printed image then to the frame I added a Rosette that I made using the Howlstooth & Scaringbone Designer Series Paper. I added a Button and a Black Punched out circle to the rosette to finish it off.
     

    My next project was inspired by the Christmas ornament on the front of the Holiday Mini. I thought a Halloween one would be just as cute and would be great for a package or just as a decoration on a fall garland. I again used the Howlstooth & Scaringbone Designer Series Paper and cut out two different ornaments with the Holiday Ornaments Framelits Die. I used the new 7/8" Cotton Ribbon and some black lace I had on hand between each ornament on the bottom layer. For the rosette I used Scallop Trim Border Punch, a Vintage Faceted Designer Button and a Large Pearl Basic Jewel that I colored black with a Sharpie Marker. I realized after I finished it that the center sort of looks like an eye which for Halloween is kind of fun.
    My third project features the Bootiful Occasions Stamp Set. I really like the rain boot in this set but for this card I decided to use the Witch's Boot. I was stuck on a layout so found one similar to this on Stampin' Connections then got busy on my card.  I used a mixture of different colors from the Color Collection Designer Series Paper Stacks for the flags which were cut out with the Itty Bitty Banners Framelits and the Big Shot. You just cut out the biggest banner then cut it in half and you have two flags for your cards. My image was stamped with Jet Black Stazon and colored in with the Stampin' Write Markers before I punched it out with the 2 1/2" Circle Punch and layered on the Basic Black card stock that was cut out with the Delicate Doilies Sizzlit Die. The sentiment which I cut apart from the boot is stamped then punched out with the Large Oval Punch and finally I added texture to the Rich Razzleberry Card Stock with the Fancy Fan Folder.
    Thanks for stopping by today. I hope you enjoyed my projects and you are ready to travel on to Dawn's Blog. I so look forward to seeing what everyone makes each month. It is a great way to be inspired to try something new or just see a product used in a different way. Thanks again, Tonya


    Blog Hop Participants:
    1. Shellie G. of Creative Electica
    2. Pam S. of Stampin' in the Sun!
    3. Nancy B. of Lady Stamps-A-Lot
    4. Rose C. of Stamp with Rose
    5. Tonya B. of Stampin' with Tonya
    6. Dawn S. of Dawn's Creative Chalet
    7. Patricia T. of Sunnyone Stampin'
    8. Pamela W. of Stinky Tofu
    9. Darcy J. of DJ's Stampin' Place
    10. Kim R. of Stamping with Kim
    11. Nancy B of Momma B Stampin'
    12. Terry B of Goin' Over the Edge

    Wednesday, October 3, 2012

    Ghoulish Googlies

    Good afternoon, are you looking for a quick and easy Halloween Treat idea? If so then check out the Ghoulish Googlies Bundle on Page 27 of the Holiday Mini. You can get the Googly Ghouls Stamp Set, 20 printed double sided tags, 10 glassine bags, 50 adhesive backed googly eyes and 10 pieces of Pumpkin Pie Baker's Twine. I used my bundle to make this cute treat container. I ran the Glassine Bag through the Big Shot with the Spider Web Folder. When using the bags for embossing don't use any tabs on your Big shot platform as it will cause the folder to cute through your bag. I stamped "Frankie" with Jet Black Stazon and then colored him with a Blender Pen and the Lucky Limeade Classic Ink Pad before I added the googly eyes. I wanted the printed tag to stand out just a bit more so I cut out Pumpkin Pie Card Stock with the Big Shot and the Label Collection Framelit. The Pumpkin Pie Label was also embossed with the Spider Web Folder then sponged with a sponge dauber and Basic Gray Classic Ink. I added the Baker's Twine and this treat bag is ready to fill. I have an additional project to share with you later that uses the extra printed tags you get with the Bundle. Be sure and stop by tomorrow as it is Blog Hop day and I will have more Halloween Projects to share with you. Thanks for stopping by, Tonya

    Tuesday, September 18, 2012

    Halloween Kitty

    Good morning, I have more Halloween to share with you today. This card uses one of our single stamp sets and was inspired by my friend Rose's cat card. My card turned out a bit different but she inspired me to buy the stamp. Don't you just love it when that happens.  I know the perfect cat lover to send it to. The stamp set is Frightening Feline and only cost $8.95. I again used the Howlstooth & Scaringbone Designer Series Paper. The colors are Basic Gray, Very Vanilla, Tangerine Tango and Basic Black. I used Jet Black Stazon and if you look closing the the cat is wearing a rhinestone collar. The ribbon is the Very Vanilla Seam Binding and I used the 1/2" Circle punch to notch out a spot for my knot. I used two Big Shot items to complete this card: the Finishing Touches Edgelits and the Spider Web Folder. I sponged the Spider Web with a sponge dauber and the Basic Gray Stamp Pad. Well, that is it for today. I hope you enjoyed the card. Have a great day and happy stamping, Tonya

    Monday, September 17, 2012

    Toxic Treats

     
    Hello, last week was a club week and while I really intended to post the projects earlier it just didn't happen that way. So this week I will be posting pictures for you and hopefully stamping a few more new ones. Today's card features the herringbone technique but with a Halloween theme. I used the Howlstooth & Scaringbone Designer Series Paper, Toxic Treat Stamp Set, Very Vanilla Card Stock, Basic Black Card Stock, Tangerine Tango Card Stock, Jet Black Stazon, Basic Black and Tangerine Tango Stampin Write Markers, Basic Black Polka Dot Scallop Ribbon More Mustard Stamp Pad, Festive Paper Piercing Pack,  Labels Collection Framelits, Big Shot and Multipurpose Adhesive Sheets.
     
     
    I decorated the inside with left over pieces of designer series paper from the herringbone technique and stamped the inside. Really the technique isn't to difficult so if you would like to learn how to do it please let me know and we can set up a private lesson. I hope you enjoyed today's card. Thanks for stopping by and have a great day! Tonya

    Thursday, September 6, 2012

    Fall/ Back to School Blog Hop


     Hello and welcome to the Fall/Back to School Blog Hop. If you are just joining our hop don't worry there is a list below off all the hoppers and you can travel around the group from here. I can't wait to see what everyone has made this month.
     
     
    My first project uses the Herringbone Technique. I have been wanting to try it for a while but have been putting it off. I will be trying it again soon. This card is for that college student that might need a little pick me up those first few weeks away from home. I used Baja Breeze Card Stock and Stampin' Write Marker, Rich Razzleberry Card Stock and Stampin' Write Marker, Whisper White Card Stock and Tangerine Tango Card Stock. The Designer Series paper is the Floral District Paper and is so bright and cherry. The sentiment is from the Word Play stamp set and is cut out with the Labels Collections Framelits after it was stamped. I made the mat piece behind it with a 2 1/2" Circle Punch and a Decorative Label Punch that I added Polka dot texture to. To finish off I added Whisper White 1/4" Stitched Grosgrain Ribbon. My next project is a gift set for a teacher.
     
     
    I made 10 note cards with matching envelopes to give as a back to school gift for a teacher. The note cards are in a cute back pack ready to deliver. I really like the idea of using the Note Cards because the envelopes are included and since you get 20 in a package you can make 2 gift sets.

    The back pack is made from Whisper White card stock, Daffodil Delight Card Stock and Classic Ink Pad, Floral District Designer Series Paper, Basic Black Card Stock, 1" Circle Punch, 1 1/4" Scallop Circle Punch, 1 3/8" Circle Punch, Scallop Trim Border Punch, 1/4" Whisper White Stitched Ribbon, Lovely Letters Stamp Set and Square Lattice Folder


    The note cards use Jet Black Stazon and Daffodil Delight since our school colors are black and gold. The stamp set is Just Believe and I kept the design clean and simple. I did add just a little texture with the Simply Scored Scoring Tool. I also added a stamp to the front of the envelope.
    I hope you enjoyed my projects for today. I would love it if you left me a comment so I know you were here. Thanks for stopping by and just click on the next button below to continue on your blog journey.


    Blog Hop Participants:
    1. Shellie G. of Creative Electica
    2. Annie L. of Love Me Cards
    3. Pam S. of Stampin' in the Sun!
    4. Nancy B. of Lady Stamps-A-Lot
    5. Rose C. of Stamp with Rose
    6. Tonya B. of Stampin' with Tonya
    7. Dawn S. of Dawn's Creative Chalet
    8. Patricia T. of Sunnyone Stampin'
    9. Heather W. of Stamping with Heather
    10. Darcy J. of DJ's Stampin' Place
    11. Kim R. of Stamping with Kim
    12. Nancy B of Momma B Stampin'