Showing posts with label framelits. Show all posts

Wednesday, July 24, 2013

Puzzle Piece Resist Technique

Good evening, I finally found a moment to set down and write a blog post for you. I really haven't dropped off the face of the earth but I have been busy creating which means more cards to share with you. I had my first Technique class last night and I enjoyed it and hope those that attended did too. One of the cards we made was this Puzzle Piece Resist Technique Card that I used for one of my swaps at Convention. The technique can be found at this location. The colors we used last night were not the same but the rest of the supplies were. So onto the supply list:
Whisper White Card Stock, Bermuda Bay Card Stock, Smoky Slate Card Stock, Versamark Pad, Clear Embossing Powder, Heat Gun, Positively Chevron Stamp, Feel Goods Stamp Set, Smoky Slate Ink Pad, Bermuda Bay Stamp Pad, Daffodil Delight Stamp Pad, Sponges, Daffodil Delight Seam Binding, Buttons & Blossoms Simply Pressed Clay Molds, Simply Pressed Clay, Rhinestone Basic Jewels, Big Shot, Ovals Collection Framelits, Chalk Talk Framelits, and Dress Up Framelits.
If you have questions about this card or would like to learn how to make it please just let me know and we can set up a private class with you. Thanks for stopping by and have a great evening, Tonya

Thursday, April 4, 2013

April Blog Hop

 
Hello and welcome to another month of the Stylin' Stampin' Squad Blog Hop. This month our theme is Wedding and Anniversary. Wedding season is almost here and it is always nice to have a supply ready for all the weddings you get invited too. I started with a wedding card today then added a bonus anniversary card. Before I get into the cards if you are just joining the hop you can continue on from here and make the rounds and if you are hopping over from Nancy's Blog welcome.
 
 My first project is a card for a wedding. I recently received my Best of Flowers Stamp Set and had yet to ink it up so it was my go to set for my projects. The sentiment is from Teeny Tiny Wishes. I used Basic Gray Card Stock for my base and added texture with the Big Shot and the Lacy Brocade Textured Impressions Embossing Folder. I stamped my hydrenga image with Basic Gray ink and then colored it with a combo of Blender Pen, Pretty in Pink, Regal Rose, Old Olive and Always Artichoke Ink Pads. I want to add that as of this morning both Pretty in Pink and Regal Rose are on the retiring color list.  I cut the image out with the Big Shot and the Ovals Collection Framelits Dies. After stamping the sentiment I cut it out with the largest banner from the Bitty Banners Framelits. I layered in on a Tea Lace Paper Doily that was sponged with  Rose Red Ink. I bought the 1 1/4" Pink Pirouette/ Rose Red Two-Tone Ribbon a while back and bad me I hadn't used it on a project but I love the elegant look it adds to this card. Of course you need a good pair of scissors to cut the angles in the bottom and the Craft Scissors are perfect for the job. Now I just need a wedding and the card is ready to go.

My second project is similar to the above one just because I had orginally wanted to use the rose image from the Best of Flowers Set but it was smaller than I liked but I didn't want it to go to waste so I created a anniversary card to go with a gift or bag. I used Daffodil  Delight, Rose Red, Regal Rose, Old Olive and Always Artichoke to color again with the Blender Pen. I used the 2 1/2" Circle Punch to punch out the image and layered in on a Daffodil Delight Card Stock Doily that was made with the Delicate Doilies Sizzlit and the Big Shot. The sentiment is again from the Teeny Tiny Wishes Stamp Set and was stamped on Whisper White Card Stock with Basic Gray Ink. I used the Word Window Punch and then layered it on Old Olive Card Stock that has been punched out with the Modern Label Punch. I added a few pearls to the side for extra accent.  The card is only 3 1/2" x 3 1/2" and is Basic Gray. I used the Lacy Brocade Textured Impressions Embossing Folder and then used the Illuminate Glimmer Watermark Stamp' Pad to add a little shimmer and pearl like affect to the Basic Gray Card Stock. I realized after I took the picture that my sentiment is a bit off but that has been fixed now. ;-)


I hope you enjoyed today's cards and that you have been inspired to create. Next you will be off to Dawn's Blog and I am sure she has great projects in store for you. Thanks for stopping by and don't forget to leave a comment so I know that you were here. Have a great day! Tonya


Blog Hop Participants:
  1. Shellie G. of Craft Smashup
  2. Pam S. of Stampin' in the Sun!
  3. Nancy B. of Lady Stamps-A-Lot
  4. Tonya B. of Stampin' with Tonya
  5. Dawn S. of Dawn's Creative Chalet
  6. Darcy J. of DJ's Stampin' Place
  7. Pamela W. of Stinky Tofu
  8. Kim R. of Stamping with Kim
  9. Justin K. of JK Cards
  10. Jennifer B. of NW Stamper
  11. Bree R. of Craft-somnia
  12. Diana E. of Stampin' Fun with Diana

Wednesday, March 13, 2013

Hip, Hop, Easter is on It's Way!

Good morning, I have so many things to share with you but I will pace myself so that there is something new for the rest of the week. The card I have to share with you today is one that we are doing this week for Stamp Time. I uses the Single stamp Ears to You that is available until March 31 and only cost $6.95. That is a great deal! I used our Melon Mambo, Tempting Turquoise, Daffodil Delight and Basic Gray Stampin' Write Markers to ink up the image before stamping is on Whisper White Card Stock. I cut both the stamped image and the Melon Mambo card Stock behind it out with one of the Ovals from our new Ovals Collection Framelits. It makes a great egg like shape for the card. The Melon Mambo egg got a little extra texture from the Chevron Impressions Embossing Folder. For the base of the card I used Tempting Turquoise Card Stock with a layer of Whisper White that had clouds added with the Cloudy Day Impressions Embossing Folder. I added a bit of Lucky Limeade Grass to the bottom of the card. To make the grass I used the Finishing Touches Edgelits and added a bit of Melon Mambo 3/8" Striped Organdy Ribbon. This ribbon is new and comes in three colors Melon Mambo, Marina Mist and Old Olive. It is not to late to let you me know if you want to attend tomorrow's night Stamp Time just email or call me. Thanks for stopping by and have a wonderful day! I will be back tomorrow with a new post to share. Tonya

Friday, February 15, 2013

All Dressed UP!

Hello! I will admit that when the Spring Catalog came out I had no plans to order the All Dressed Up collection. I just didn't think I would need it... fast forward a month and I decided after seeing so many wonderful samples that I was wrong and I did "need" it. So I purchased the Dress Up Framelits and I love them! I have only made the one card so far but I see a lot more in my future. They are so easy to use and there are so many possible ways to make them your own. For this card I used Basic Gray Card Stock for my base and for my dress stand. The background paper and the dress are both Designer Paper from the Twitterpated Designer Series Paper. Behind the dress is Cherry Cobbler Card Stock cut with an oval from the Oval Framelits Dies Collection and then embossed with the Vintage Wallpaper folder.  For embellishments I used both Baja Breeze Seam Binding and an Ivory 5/8"   Flower Trim that I used both the Baja Breeze and Island Indigo Ink Pad and an Aquapainter to color. I also added a few Basic Rhinestones. The sentiment is from the Pop-Up Posies Designer Kit that was stamped using Basic Gray ink on Whisper White Card Stock and then punched out with the Large Oval Punch and layered with a Island Indigo Scallop Oval Punch. I added the sentiment and the dress with Dimensionals. We will be making a card similar to this on Tuesday at my Stamp Time. You can attend the class at either 1pm or 7pm. Please just let me know which you prefer. Thanks for stopping by today and as always please let me know if you have any questions. Enjoy  your day! Tonya

Thursday, February 14, 2013

Happy Valentine's Day

Happy Valentine's Day and Thanks for stopping by! I am busy today preparing a Valentine's
Day Dinner for my family that has me making a heart shape cakes per my youngest son's request sort of a deal I made with him and he held up his end of the bargain so so am I. :-) Tuesday I had a class at our local library and this is one of the items we made. I just love the Candy Wrapper Die and since is cuts and scores all at once it really makes life easy. In addition we used the new More Amore Speciality Designer Series Paper to wrap around the container. The heart is made with the Primrose Petals Core'dinations Card Stock  and was cut out with the Scalloped Heart of Hearts Embosslits and then sanded.  A Basic Gray banner was made with the Big Shot and Bitty Banners Framelits which goes great with the Word Window Punch and the Teeny Tiny Wishes Stamp Set. So add just a few extra details to the candy wrapper we added Very Vanilla Seam Binding on each end to close our wrapper and one of the new Vanilla 5/8" Flower Trim Flowers was added. I love these little flowers and will have a card to share with you tomorrow that has a flower that I colored with our Aquapainter and Stamp Pads. Funny story, while I was handing the flowers out at the library I managed to drop one in a cup of coffee that belongs to an attendee. After I fished it out I joked about how we could die them with coffee which of course you could. There are a lot of possiblities for these cute little flowers and I hope we see them carry over after the Spring Catalog has ended.
Well, I am off to decorate a cake and a few cupcakes too. Have a wonderful day! Tonya

Wednesday, February 13, 2013

Valentine's Day Chalk Board

Happy Wednesday! Tomorrow is Valentine's Day and I will be mailing this card are soon. It is actually one that we made a Shirlene's Workshop a few weeks ago. She had requested Valentine's and I was happy to help her with that. The card features the new Hearts a Flutter Stamp Set and matching framelits. The colors are Primrose Petal, Basic Black, Whisper White, Real Red and Pool Party. The ink colors are the same and I added Whisper White Craft ink to make the chalk board effect on the Basic Black card stock. The sentiment is from the Wacky Wishes Stamp Set and is available for anyone that host a workshop. Did you know that Sale-a-bration is a great time to host? I will tell you more about why in a bit. Other supplies include the Itty Bitty Banners Stamp Set and the Bitty Banners Framelits (which is a Sale-a-bration option), Pool Party Baker's Twine, and the Bitty Buttons. Just use a few dimensionals and your card is ready to go. The inside is also decorated with hearts on the Whisper White Card Stock that I added inside but I forgot to get a picture of it. :-(
Now back to why it is a great time to host a workshop. Usually for a $400 workshop you would receive $65 worth of free merchandise and one other item at half price (which is great) but during Sale-a-bration you would get  those items plus a package of Silver Glimmer Paper and the Sycamore Street Designer Series Paper,, Madison Avenue Stamp Set in either Clear or wood mount, and the Sycamore Street Ribbon And Button Pack. Wow that is a lot of free products just for having a few friends and family over for a fun evening/afternoon of stamping. Contact me if you want the opportunity to have fun and earn free items.
Well, I must get busy. My boys decided on the way to school today that they want to make Valentine's day treats for their friends so I need to get busy cutting out boxes. Have a great day and thanks for stopping by, Tonya

Thursday, January 24, 2013

Banner Day!

Hello and welcome! I am happy to share another birthday card with you today. This one is a little more on the girlie side so whether it is for a tween, teen or just a special lady this is a fun card to share and is a great mix of both old and new items. The supplies I used are: Easy Events Stamp Set, Primrose Petals Card Stock and Stampin Write Marker, Very Vanilla Card Stock, Crum Cake Card Stock, Rasberry Ripple Card Stock and Stampin Write Marker, Basic Grey Stamp Pad, 2 Way Glue, Dazzling Diamonds Stampin' Glitter, Frost White  Shimmer Paint, Blender Pen, Linen Thread, Scallop Trim Border, Argyle Textured Impressions Embossing Folder, Perfect Polka Dots Texured Impressions Embossing Folder, Honeycomb Textured Impressions Embossing Folder, Hearts a Flutter Framelits Dies, and Print Poetry Designer Series Paper Stack. I love the paper stack for cards as you get four sheets of each print and there are 12 prints per pack what a great deal for only $6.95. Please let me know if you need more information about this card. I am happy to answer questions or help you place an order so you can make your own card like this one. Thanks for stopping by and have a wonderful day! Tonya

Tuesday, November 20, 2012

Frosty Friends

Good morning! It is feeling a little chilly out this morning but not quite cold enough for these little Frosty Friends. We made this card last week at Stamp Club and it is such a hit in our family that we maybe using it as one of our personal Christmas Cards. The layout is cased from the Holiday Catalog with a few changes here and there. The base is Cherry Cobbler with texture added with the Snow Flurry Textured Impressions Embossing Folder. I used Shimmer Paint in Frost White and Rubbing Alcohol to give the base just a bit of shimmer and sparkle. The Designer Paper is the Festival of Prints Designer Series Paper Pack. If you haven't checked this paper pack out you are missing a great group of designer papers. I really like them and you get four of each design which is great for your card making. We added Pool Party Baker's Twine around the card and added a bow to the side before adding our main image. The Frosty Friends and the Merry Christmas which is from the Greetings of the Season Stamp Set were stamped on Whisper White Card Stock with Jet Black Stazon. The image was cut out with the Big Shot and the Apothecary Accents Framelits and then colored with a Blender Pen and the following Ink colors: Cherry Cobbler, Pool Party, Old Olive, and Pumpkin Pie. I hope you enjoyed today's card.
Just a reminder that the Online Extravaganza is still going on and you can place your orders either online or by calling or emailing me. Also the Starter Kit promotion continues until December 16 if you are interested in becoming a Demonstrator whether it be for extra cash or just for a discount on our great products. Thanks for stopping by today and have a great day, Tonya

Wednesday, October 24, 2012

Three Little Gingerbread Men

Hello! So glad you stopped by today and I am excited to have a new Christmas card to share with you. I had a Christmas Card Class and this is one of the cards we made. I love the cute little gingerbread men and they have a framelit to match which means no fussy cutting. We used two stamp sets on this card, Teeny Tiny Wishes and Scentsational Seasons which you can get either by itself or in the bundle with the Holiday Collection Framelits Dies which I recommend because you not only save money. Only two ink pads are needed for this card Eary Espresso and Gumball Green and the card stock is Cherry Cobbler, Very Vanilla and Gumball Green with a little bit of Be A Good Cheer Designer Series Paper. The Decorative Label Punch was used to punch out the sentiment. The texture along the bottom was added with the Big shot and Delicate Designs Folder and then we used the Tasteful Trim Bigz XL Die to create the scallop piece in Gumball Green. Please let me know if you would like to make this card and I will be happy to set up a private class. You can also use the candy cane or tree from the same set and make similar cards. Thanks for stopping by and have a great day, Tonya

Friday, October 19, 2012

Christmas Keepsake Ornament

Good morning, well I have been trying to stamp but just haven't been completing many cards this week. Lots of ideas but thus far they are just pictures on paper. Instead I thought I would share another ornament made with the Holiday Ornaments Framelits Dies and the Be a Good Cheer Designer Series Paper. I also added the Cherry Faceted Designer Series Button and a Large Pearl Basic Jewel. The Rosette in the middle is made with the Simple Scored Scoring Tool and the Scallop Trim Border Punch. To add just a bit of glimmer and sparkle I spritzed it with Frost White Shimmer Paint mixed with Rubbing Alcohol. We will be making an ornament like this in my upcoming Ornament Class in November. Please check the calendar for more info. Mean while I am off to try and finish a card or two today. Wish me luck and thanks for stopping by, Tonya

Tuesday, October 16, 2012

Cheerful Christmas Tree

Hello, the week is flying by as usual and I didn't get a chance to post yesterday. Sorry about that, but I do have a card to share with you today. This card is full of details and is one that we made last week at club. I am also going to be doing a similiar layout at next weeks Christmas card class. The colors are Gumball Green, Cherry Cobbler, Primrose Petals, Very Vanilla and Crumb Cake. The Designer Series paper is Be a Good Cheer it is a fun paper that I have enjoyed using on several projects. The stamp set is Scentsational Season which I purchases in the Scentsational Season Bundle with the Holiday Collection Framelits Dies. There are several other Big Shot dies including the Tasteful Trim Bigz XL Die, and the Designer Frames Folders. To add just a bit of sparkle to the Christmas Tree I used Silver Glimmer Paper and the Ribbon is the 3/8" Stitched Satin Ribbon.
If you would like to attend the Christmas Card Class next week please let me know by Thursday so I can have your cards cut and ready for you. I will be posting a few pictures tomorrow of the cards. Thanks for stopping by and have a great evening, Tonya

Friday, October 12, 2012

Noel Ornament Club Card

Good morning, I thought I would share a Christmas Card with you today. I know it is only October but if you like to get a start on your cards early then now is the time to think about them. This is a card we made for Stamp Club this week. It uses Realy Red, Lucky Limeade, Early Espresso and Primrose Petal. I used the Ornament Keepsake Bundle, Lacy Brocade Textured Impressions Folder, Greetings of the Season Stamp Set, Labels Collection Framelits, Little Leaves Sizzlits, and Early Espresso 1/4" Stitched Grosgrain Ribbon. Did you know if you purchase the Ornament Keepsake  Bundle and the Candlelight Christmas Specialty Designer Series Paper this month you also receive the Festive Paper Piercing Pack which can be used with the Holiday Ornaments Framelits Dies (included in the Keepsake Bundle) as well as the Labels Collection Framelits? It is a great time to purchase these items if you haven't all ready done so.
Thanks for stopping by today. I am off to do some more stamping so I have more cards and projects to share with you. Have a great day! Tonya

Thursday, October 4, 2012

October Blog Hop

 
 Hello and welcome to another round of our Stylin' Stampin' Squad Blog Hop. This month the theme is Halloween and I have three projects to share with you. The first is a framed My Digital Studio piece that I recently made for a hostess. She loves Halloween and had asked about the Toxic Frameable Digital Designer Template so I decided to make this for her.  I printed it from my home computer and then trimmed it down to fit a 5x7" frame. To add just a bit more interested I added the 1/2" Striped Satin Ribbon and Basic Black Card Stock to the printed image then to the frame I added a Rosette that I made using the Howlstooth & Scaringbone Designer Series Paper. I added a Button and a Black Punched out circle to the rosette to finish it off.
 

My next project was inspired by the Christmas ornament on the front of the Holiday Mini. I thought a Halloween one would be just as cute and would be great for a package or just as a decoration on a fall garland. I again used the Howlstooth & Scaringbone Designer Series Paper and cut out two different ornaments with the Holiday Ornaments Framelits Die. I used the new 7/8" Cotton Ribbon and some black lace I had on hand between each ornament on the bottom layer. For the rosette I used Scallop Trim Border Punch, a Vintage Faceted Designer Button and a Large Pearl Basic Jewel that I colored black with a Sharpie Marker. I realized after I finished it that the center sort of looks like an eye which for Halloween is kind of fun.
My third project features the Bootiful Occasions Stamp Set. I really like the rain boot in this set but for this card I decided to use the Witch's Boot. I was stuck on a layout so found one similar to this on Stampin' Connections then got busy on my card.  I used a mixture of different colors from the Color Collection Designer Series Paper Stacks for the flags which were cut out with the Itty Bitty Banners Framelits and the Big Shot. You just cut out the biggest banner then cut it in half and you have two flags for your cards. My image was stamped with Jet Black Stazon and colored in with the Stampin' Write Markers before I punched it out with the 2 1/2" Circle Punch and layered on the Basic Black card stock that was cut out with the Delicate Doilies Sizzlit Die. The sentiment which I cut apart from the boot is stamped then punched out with the Large Oval Punch and finally I added texture to the Rich Razzleberry Card Stock with the Fancy Fan Folder.
Thanks for stopping by today. I hope you enjoyed my projects and you are ready to travel on to Dawn's Blog. I so look forward to seeing what everyone makes each month. It is a great way to be inspired to try something new or just see a product used in a different way. Thanks again, Tonya


Blog Hop Participants:
  1. Shellie G. of Creative Electica
  2. Pam S. of Stampin' in the Sun!
  3. Nancy B. of Lady Stamps-A-Lot
  4. Rose C. of Stamp with Rose
  5. Tonya B. of Stampin' with Tonya
  6. Dawn S. of Dawn's Creative Chalet
  7. Patricia T. of Sunnyone Stampin'
  8. Pamela W. of Stinky Tofu
  9. Darcy J. of DJ's Stampin' Place
  10. Kim R. of Stamping with Kim
  11. Nancy B of Momma B Stampin'
  12. Terry B of Goin' Over the Edge

Wednesday, October 3, 2012

Ghoulish Googlies

Good afternoon, are you looking for a quick and easy Halloween Treat idea? If so then check out the Ghoulish Googlies Bundle on Page 27 of the Holiday Mini. You can get the Googly Ghouls Stamp Set, 20 printed double sided tags, 10 glassine bags, 50 adhesive backed googly eyes and 10 pieces of Pumpkin Pie Baker's Twine. I used my bundle to make this cute treat container. I ran the Glassine Bag through the Big Shot with the Spider Web Folder. When using the bags for embossing don't use any tabs on your Big shot platform as it will cause the folder to cute through your bag. I stamped "Frankie" with Jet Black Stazon and then colored him with a Blender Pen and the Lucky Limeade Classic Ink Pad before I added the googly eyes. I wanted the printed tag to stand out just a bit more so I cut out Pumpkin Pie Card Stock with the Big Shot and the Label Collection Framelit. The Pumpkin Pie Label was also embossed with the Spider Web Folder then sponged with a sponge dauber and Basic Gray Classic Ink. I added the Baker's Twine and this treat bag is ready to fill. I have an additional project to share with you later that uses the extra printed tags you get with the Bundle. Be sure and stop by tomorrow as it is Blog Hop day and I will have more Halloween Projects to share with you. Thanks for stopping by, Tonya

Monday, September 17, 2012

Toxic Treats

 
Hello, last week was a club week and while I really intended to post the projects earlier it just didn't happen that way. So this week I will be posting pictures for you and hopefully stamping a few more new ones. Today's card features the herringbone technique but with a Halloween theme. I used the Howlstooth & Scaringbone Designer Series Paper, Toxic Treat Stamp Set, Very Vanilla Card Stock, Basic Black Card Stock, Tangerine Tango Card Stock, Jet Black Stazon, Basic Black and Tangerine Tango Stampin Write Markers, Basic Black Polka Dot Scallop Ribbon More Mustard Stamp Pad, Festive Paper Piercing Pack,  Labels Collection Framelits, Big Shot and Multipurpose Adhesive Sheets.
 
 
I decorated the inside with left over pieces of designer series paper from the herringbone technique and stamped the inside. Really the technique isn't to difficult so if you would like to learn how to do it please let me know and we can set up a private lesson. I hope you enjoyed today's card. Thanks for stopping by and have a great day! Tonya

Thursday, August 2, 2012

August Blog Hop Holiday Style


Welcome to the Stylin Stampin' Blog Hop, whether you are just joining us or have hopped over from Rose's Blog I hope you continue on your journey through all the blogs and see the wonderful projects all the ladies made  and feel free to leave a comment as we love to hear from all of you.
August is here which means the Holiday Mini starts! I love this mini and so many of the items in it are on my list to buy but to start out I decided to be good and only get a few which I will share my favorite with you today. It is the new Holiday Ornaments Framelits Dies and Ornament Keepsakes Stamp Set. Now Stampin'Up! has made this an even better deal by making it a bundle so you save more money. Which means you can buy more stamps, accessories, card stock. Well I think you get how it works.
My first project is inspired by the wonderful ornaments that are in the Mini Catalog. I knew that I wanted to make my own and the picture below shows just how mine turned out. To make it easier to tell which supplies are new in the Mini I am going to make them bold in the supply list.


Supplies: Very Vanilla Card Stock, Cherry Cobbler Card Stock, Very Vanilla Seam Binding, Cherry Cobbler Seam Binding, Cherry Cobbler Classic Ink, Gumball Green Classic Ink, Holiday Ornaments Framelits, Ornament Keepsake Stamp Set, Lacy Brocade Textured Impressions Embossing Folder, 1 1/4" Scallop Circle Punch, 1" Circle Punch, Scallop Circle Bigz, Pearl Basic Jewels
Next I wanted to make a scrapbook page. The page is an 8"x8" page and features a picture of my kids from last years Christmas. I used their clothing colors to inspired the colors of the project. I rarely scrapbook anymore so I am always happy when the mood strikes and I feel like finishing a page. I think I will frame this one for a while just to show off my kids.
Scrapbook page supplies: Crumb Cake Card Stock, Whisper White Card Stock, Garden Green Card Stock, Garden Green Classic Ink Pad and Stampin' Write Marker, Cherry Cobbler Classic Ink Pad and Stampin' Write Marker, Whisper White Baker's Twine, Cherry Cobbler Baker's Twine, Scallop Edge Punch, Decorative Label Punch, Crumb Cake Stampin' Write Marker, Lacy Brocade Textured Impressions Embossing Folder, Holiday Ornaments Framelits Dies, and Ornaments Keepsakes Stamp Set

My final project is a Christmas Card. The Triple Stamping is very popular right now and I haven't had the chance to try it and thought that the Ornament Keepsake Set would be perfect to give it a try with. It is a pretty simple technique and I will write a post in the next few days on how it is done but for now here is the card.
Ornament Card Supplies: Early Espresso Card Stock and Classic Ink Pad, Lucky Limeade Classic Ink Pad, Primrose Petal Card Stock and Classic Ink Pad. Lucky Limeade 3/8" Ruffled Ribbon, 1 1/4" Circle Punch, 1 3/8" Circle Punch, Very Vanilla Card Stock, Petite Pairs Stamp Set, Ornament Keepsakes Stamp Set
I hope you enjoyed today's projects and the new Ornament Keepsake Bundle. I am looking forward to making more projects with this bundle so be sure and check back again. Now it is time to head off to Dawn's Blog and to get there just click on the next button below. Thanks for stopping by today, Tonya


Blog Hop Participants:
  1. Shellie G. of Creative Electica
  2. Annie L. of Love Me Cards
  3. Pam S. of Stampin' in the Sun!
  4. Nancy B. of Lady Stamps a Lot
  5. Rose C. of Stamp with Rose
  6. Tonya B. of Stampin' with Tonya
  7. Dawn S. of Dawn's Creative Chalet
  8. Patricia T. of Sunnyone Stampin'
  9. Heather W. of Heather's Stampin' Blog
  10. Pamela W. of Stinky Tofu
  11. Darcy J. of DJ's Stampin' Place
  12. Kim R. of Stamping with Kim
  13. Debra of Mommy Scraps

Friday, June 22, 2012

Cake anyone?

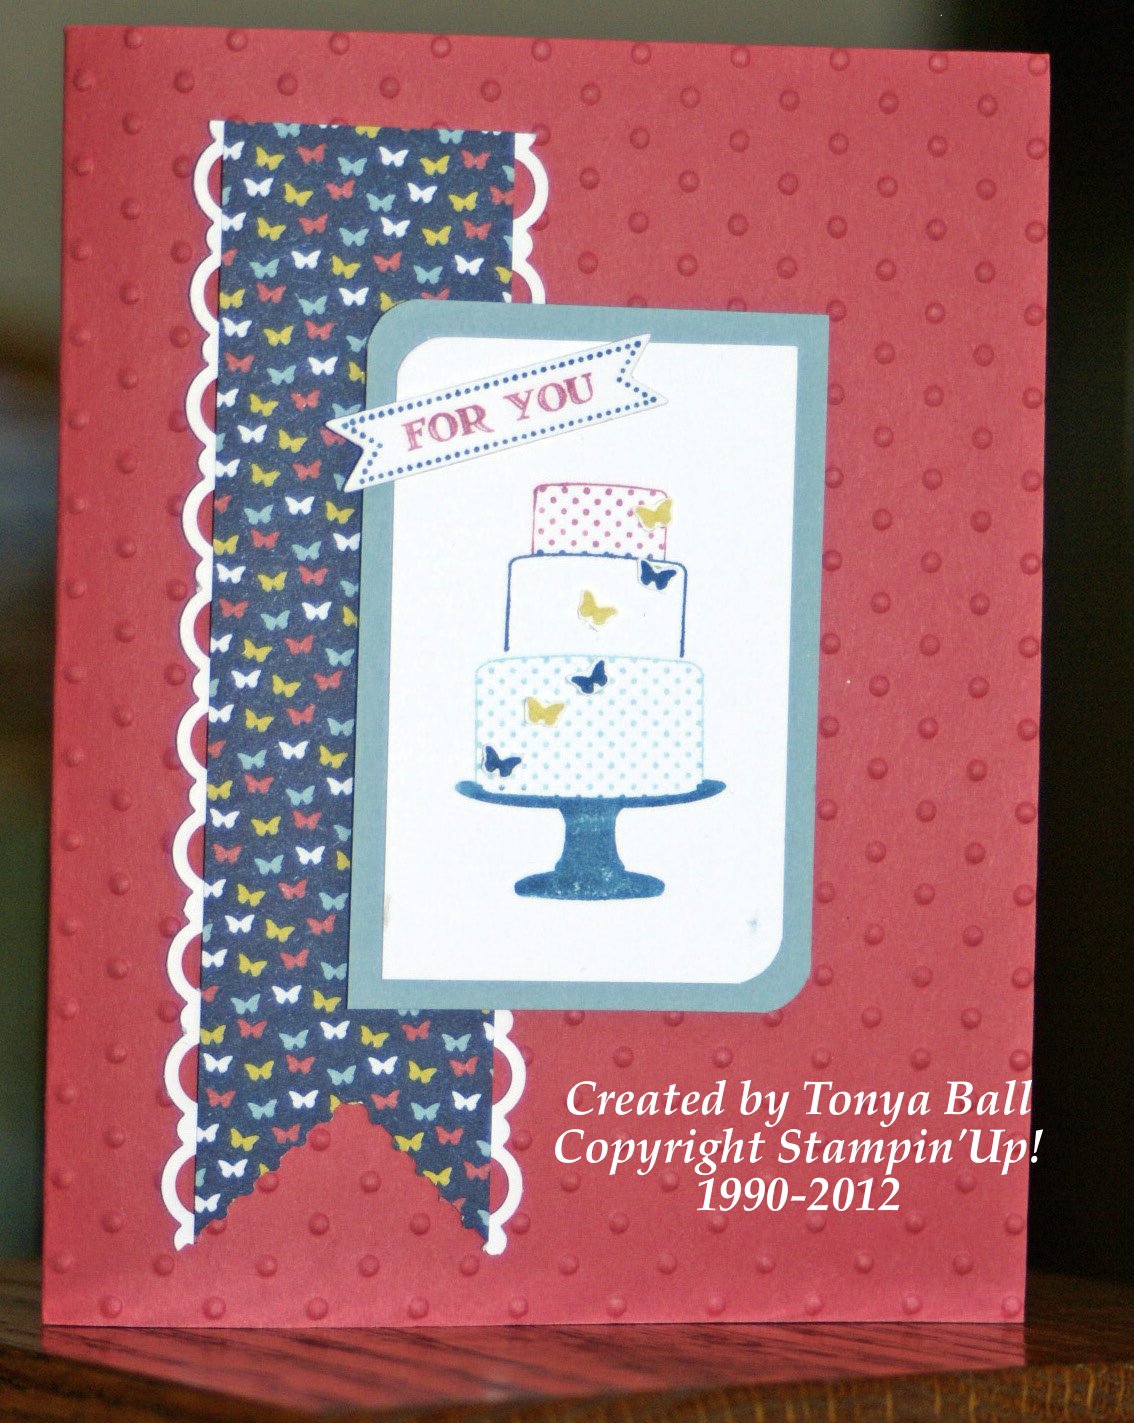
Hello and good afternoon, another post for you today. This is a record for me for a while. I have actually been stamping everyday and have enjoyed getting into a routine. Today's card once again features the Oval Accents Clear Die. I used it for the background panel that I attached to the Baja Breeze Card base before I ran it through the Big shot with the Perfect Polka Dots Embossing Folder. I also used the Labels Collection Framelits and the Apothecary Accents Framelits for the card, cutting them out in Summer Starfruit and Primrose Petals. The stamp sets are Bring on the Cake and Make a Cake. The cake is cut out and popped up with dimensionals then attached to the Whisper White panel with the Midnight Muse bring on the cake sentiment. I added white brads to the edges of the label and this card is ready to send. Since I don't have any birthday's for a while I will just add it to my sample board. :-) Next week I will share another new product with you so be sure and check back to see what it is. Thanks for stopping by and have a great weekend, Tonya

Thursday, June 7, 2012

June Blog Hop

Good morning and welcome to another round of our Stylin' Stampin' Squad Blog Hop. If you have travel through then hop then you just came from my friend Rose's Blog. I love her projects. If you are just joining us then don't worry you can continue on from blog to blog just follow the links. I have three projects to share with you today all contain new catalog items. The first is a the new set called Make a Cake and then the cute little banner if from the Itty Bitty Banner Stamp Set. The colors are a mix of old with new including the new Primrose Petals with Whisper White and Baja Breeze. The Designer Series paper is the new Patio Party. I used the Stampin' Write Markers to ink up all the images and then cut out the small butterflies on the cake. For punches I used the Corner Rounder and the Scallop Trim Border. Of course I used the Big Shot too and added texture with the Perfect Polka Dots Folder and we have a new Framelits Set that cuts out the Itty Bitty Banners that is called wait for it Itty Bitty Framelits.

For the second card I used more of the new In Colors. This card has Baja Breeze, Whisper White, Midnight Muse and Summer Starfruit. I love the new ink pads. They ink up so smoothly and are great with solid image stamps like the new Betsy's Blossoms that I used on this card. I added just a bit of Baja Breeze 1/8" Taffeta Ribbon and a Dotted Scallop Ribbon Border punched out of Summer Starfruit. Clean and simple for this card.
My final project is a box that I made using the Simply Scored Scoring Tool and the new Apothecary Accents Framelits. I used the biggest Framelit as the flap that closes the box. The paper is the new Floral District. If you love the brights you will love this paper. I used Betsy's Blossoms again to add the flowers to the Rich Razzleberry Card Stock in Rich Razzleberry ink. I wanted to show off the new 1/4" Stitched Grosgrain Ribbon so I added it to the front closure by making a bow and adding a Rich Razzleberry Button behind it. This box is wide enough to hold a bottle of lotion to give as a gift or you can fill it up with candy and a gift card to give to your favorite grad. 
 
Well, that is it for my projects for today. I hope you enjoyed them. Now you can travel on to Dawn's Blog just by clicking on the button below. Thanks for stopping by and please leave me a comment to let you know that you were here. Have a great day, Tonya


Blog Hop Participants:
  1. Shellie G. of http://www.creativeeclectica.com/">Creative Electica
  2. Annie L. of http://lovemecard.blogspot.com/">Love Me Cards
  3. Pam S. of http://www.stampininthesun77.blogspot.com/">Stampin' in the Sun!
  4. Anji C. of http://www.alteredscraps.com/">Altered Scraps Blog
  5. Rose C. of http://www.stampwithrose.blogspot.com/">Stamp with Rose
  6. Tonya B. of http://www.stampinwithtonya.blogspot.com/">Stampin' with Tonya
  7. Dawn S. of http://dawnscreativechalet.blogspot.com/">Dawn's Creative Chalet
  8. Patricia T. of http://sunnystampin.blogspot.com/">Sunnyone Stampin'
  9. Heather W. of http://www.stamp-aholic.blogspot.com/">Heather's Stampin' Blog
  10. Pamela W. of http://www.stampinup.net/esuite/home/stinkytofu/blog">Stinky Tofu
  11. Linda O. of http://www.stampatlindas.com/">Stamp at Linda's
  12. Darcy J. of http://www.stampindj.blogspot.com/">DJ's Stampin' Place
  13. Pam S. of http://www.sunnygirlscraps.com/">Sunny Girl Scraps
  14. Kim R. of http://www.rydenkim.blogspot.com/">Stamping with Kim

Wednesday, February 22, 2012

Birthday Window


Good morning! Hope you are having a great week. We are here and today everyone will be back in school so I have a lot to catch up on. :) Today's card is one that was made with a little bit of this cand that. The base is one that I used to show how easy the new Framelits are to use. I just randomly cut a window out of the Soft Suede Card Stock and set it aside. Then when I had a few moments to stamp I decided why not finish that card so I added another Framelit from the Label Collection behind the card front so that it showed through the window. The card is stamped with the Apothecary Art Set and colored with Lucky Limeade, Poppy Parade and Calypso Coral. I used a Vintage Brad, Victoria Crochet Ribbon and Calypso Coral Ribbon to attach the sentiment to the front of the card. I also used the Vintage Wallpaper Embossing folder on the front of the card to add extra dimension. All the supplies are available to purchase through my Website just by contacting me.


I hope you enjoyed today's card, I hope to finish a couple more today that I will share with you tomorrow and Friday. Have a great day and as always thanks for stopping by, Tonya

Friday, January 20, 2012

So Grateful!


Good morning! It is cold out today, wow I really dislike winter so this card gives me hope that I will see spring and the pretty flowers again. I know that it is a ways off and we still have lots of cold days ahead but I can dream right? The Occasions Mini is such a wonderful one and the Apothecary Art Stamp Set is quickly becoming one of my favorites. It is such a fun set to watercolor and with the Coordinating Labels Collection Framelits cutting out your stamped images is a snap. This card using Crumb Cake for the base, with Whisper White, Soft Suede and Pink Pirouette for accents. The image is stamped with the Basic Gray Classic Stamp Pad before we colored it with a blender pen with Pink Pirouette, Bashful Blue and Marina Mist. There are Pearls added to the sentiment and we used the Dotted Scallop Ribbon Punch along both sides of the Beau Chateau Designer Series Paper. If you would like to purchase the supplies to make this card you can order online at My Online Store or by contacting me to help you place your order. Thanks for stopping by today. I will be photographing new cards today as I still have a lot to share. Have a great day! Tonya