Thursday, December 30, 2010

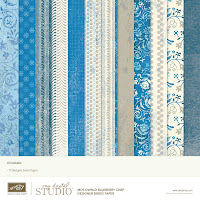
Even More New Digital Downloads


Tasteful Trim Shape 3 - Digital Download 123998
Price: $0.95


Tasteful Trim Shape 2 - Digital Download 123997
Price: $0.95


Tasteful Trim Shape 1 - Digital Download 123996
Price: $0.95


Bold Branches Stamp Brush Set - Digital Download 124212
Price: $7.95

Next In Line Stamp Brush Set - Digital Download 123994
Price: $7.95


Filled With Love Stamp Brush Set - Digital Download 123995
Price: $5.95

Wednesday, December 29, 2010

More Christmas Gift Bags!

Good morning, before the Holiday Mini ended I thought I would share a few more of the Christmas Gift Bags that I made last week. These are really easy to make and I love that you can coordinate your handmade gift with a handmade gift bag. The bags are made with two sheets of matching Designer Series Paper, so you can make 6 bags out of one package of paper with extra pieces leftover to decorate your bags or to make cards with. The other supplies you need are Sticky Strip, Coordinating Ribbon and Jumbo Eyelets. If you would like more info on how to make these bags let me know. Of course they would be great for Birthday Gifts or a Wedding Present too. Just change the Designer Series Paper to meet your needs. I am off to take my daughter to run so I am going to keep this short. Have a great day, Tonya

Tuesday, December 28, 2010

Fabric Wreath


Good evening, I started this project some time ago and have had it finished but didn't have a chance to post it. I really thought I would get it posted before it was to late to order this wonderful fabric. This wreath is so simple and quick to make. All you need is a wire wreath form found at most craft stores and the Deck the Halls Fabric. I cut the fabric strips in 1" x 5" pieces then simple knotted them around the wreath form. I only single knotted them and alternated the three patterns as I went. I had debated on adding the Cherry Cobbler Seam Binding and still might but for now it is done and looks quite nice on my bureau in my Class room area. If you would like to make your own Deck the Halls Wreath then don't hesitate to give me a call so that you can order your fabric before January 3rd because after that it won't be available. I am off to watch a movie with my kids. Hope you have a great night and I will try and post again tomorrow. Thanks for stopping by, Tonya

Holiday Mini Carryover Items

The following items will continue to be available after the the Holiday Mini ends on January 3rd. There are additional items that will continue to be available in the new Occasions Mini from the Holiday Mini that are not listed here. If you have any questions about what items will be available please give me a call. I am always happy to help. Thanks, Tonya

2010-2011 Mini Carryover Items

Item # Description Price
120890 Candy Wrapper Bigz L Die $32.95

120903

Scallop Squares Duo Bigz Die $21.95
120893 Tasteful Trim Bigz XL Die $42.95
120901 Northern Frost Decorative Strip $21.95
120902 Northern Flurry Textured Impressions Embossing Folder $7.95
120889 Spider Web Textured Impressions Embossing Folder $7.95
120982 Northern Trim Letterpress Plate $5.95
120980 Trick or Treat Letterpress Plate $7.95
120908 3/4" x 15/16" Oval Punch $10.95
120984 Waffle Paper (Assortment 1) Gold and Silver
$9.95
122124 8" x 8" Page Protectors (20) $7.95
120981 Joyful Season Letterpress Plate $5.95
120910 Vintage Frames Décor Stencils $14.95
122265 Uninked Craft Stampin' Pad $4.95

Filled with Love Promotion

Now that Christmas is behind us it is time to start thinking about Valentine's Day. Valentine's Day is the second biggest holiday for sending cards, and during the Filled with Love promotion, you and your customers can get an exclusive package of Designer Series Paper perfect for creating cards for family, friends, classmates, and more! With the Filled with Love Promotion which runs from Dec. 17- Jan. 24 you get the Filled with Love Stamp Set, Love Patterns Designer Series Paper Pack and a free container of Bitty Buttons (a $4.95 value). You can choose Clear Mount 124381 for$26.90 or Wood Mount 124380 for $32.90. If you would like to place an order or have questions please contact me and I will be happy to help. Also don't for get that January 3 is the last day to order from the Holiday Mini. There are some items that are carrying over. I will work on getting that list posted later today. I did stamp yesterday but since they are for a swap I am in I need to wait a little while before I post them. I will be back later today with a fabric project. Thanks for stopping by, Tonya


Love Patterns Designer Series Paper Pack
12 sheets total: three 12" x 12" sheets of two double-sided designs in Real Red and Pretty in Pink
item 124156 | $9.95

Thursday, December 23, 2010

A Quick Digital Greeting!

I thought I would share a quick Christmas Greeting that I made with My Digital Studio. This was a premade template that I made a few modifications too and added our Christmas Photo. Had I been a little more prepared this year, I could have had these printed and used them as our Christmas card but instead I will share it with you and I uploaded it to facebook for all of our friends and family to see and wish them a Merry Christmas. This picture is some what of a family tradition. I take a picture of the kids every year to use in our cards and most years they are in front of a Christmas tree. As I look back through the years of photos I can't help but notice how much they have grown and changed. I hope you are enjoying some family time with those you love. We spent the afternoon wrapping gifts. Each child gets to buy a gift for their siblings and while we were wrapping today my youngest said, "You know mom, my favorite part about Christmas isn't the wrapping and gifts, it is Jesus." What a sweet thing for a almost seven year old to say. Made me smile.
Well, I am off to make dinner we are having Chicken Pot Pie with Homemade Biscuits. It is one of my families favorite meals. Thanks for stopping by, Tonya

Wednesday, December 22, 2010

Teacher Gift Part 2


Hello, things are starting to calm down at our house and I hope to get to do some baking with the kids tomorrow or Friday. We haven't made sugar cookies yet and I want to give them a try with Quail Eggs so that my youngest can have some. My little guy has a wonderful reading teacher who has helped us both so much this year and her birthday is next week. So for a combo Christmas/Birthday Gift I decided to make her a Note Pad Case. This one is made with the Clear Stamp Cases that we sell for just $4.95 for 4. I had the notepads that were already just to fit from another project and they fit perfectly inside. The stamp sets are Notably Ornate and Lovely Letters. I just recently received Notably Ornate and just had to try it out. I used Jet Black Stazon and Riding Hood Red Classic Ink. The card stock I used is Crumb Cake, Very Vanilla and Basic Black. The designer series paper is Love Letters. The only thing you need to remember when making the covers is to keep them flat with no dimension as they fit between the case and the protective plastic cover. You can toss this in your purse or book bag and always have it ready for notes. We also made a similar ones in club this month with Totally Tess and each persons initial. I mentioned to my club ladies that it would be a great place to have their wish list. ;) If you would like to place an order for your own Note Pad Case give me a call and I will be happy to help. I will be back tomorrow. Thanks for stopping by and have a great week! Tonya

Tuesday, December 21, 2010

Designer Series Gift Sacks!

With all the gift giving that has been going on this week, I needed a cute way to package the kids teacher's gifts so I decided to make gift bags from Designer Series Paper. I had made a bigger version of this bag last year from directions I found on line but I decided I could make a smaller version just by taking a few measurements. The size of the finished bag is 6" high x 3" wide x 6" long. To make the bag you need two sheets of designer series paper with the same print. I will work on a tutorial if you would like to know how to make these bags. The tag is made with the 2 1/2" Circle Punch and the Cute Christmas Stamp Set. I colored the snowman and added a little Dazzling Diamonds to the snow and my son Jacob was ready to give his gift to his teacher. Inside the gift is a Snowflake Mug, Hot Chocolate and a matching fabric coaster that I showed you in this post. I hope you are having a great week. I am hoping to get some stamping in soon now that my Christmas Cards are done (yes, I sent them out late this year) and I have my baking almost done. I will be back tomorrow with a new post for you. Let me know if you want directions for the bag. Thanks for stopping by, Tonya

Monday, December 20, 2010

I'm Still here

I just wanted to check in and let you know that I am still here. Things have just been busier that usual with Christmas just around the corner and I haven't had time to post. Sorry about that. I will try and fix that tomorrow probably evening but maybe sooner. In the mean time I hope that you are enjoying the Christmas season. My boys get out of school tomorrow for the break and then Kaylee joins them on Wednesday, then the real fun will begin at our house. :)

Tuesday, December 14, 2010

The Newest Digital Downloads

Item Description Image Price
124215 Extreme Snowboard Stamp Brush $0.95
124218 Extreme Surfboard Stamp Brush $0.95
124217 Extreme Skateboard Stamp Brush $0.95
124219 Extreme Dirt Bike Stamp Brush $0.95
124216 Extreme Guitar Stamp Brush $0.95
123991 Style Beautiful Stamp Brush Set $3.95
123992 Lap of Luxury Designer Series Paper $4.95
123990 Elements of Style Stamp Brush Set $3.95
123989 Teahouse Stamp Brush $1.95

123988 Charming Stamp Brush Set $3.95

Monday, December 13, 2010

Anniversary Card for a Special Couple

This weekend was a super busy weekend, between the Debate Tournament, two Monogram Card Classes, Tableau's on Saturday Night at Church and my grandmother being in the hospital life was crazy. I didn't have a chance to take pictures of any new projects so I am going to share one from November that I haven't shared yet. It is an Anniversary Card for a couple we know that celebrated their 60th Anniversary. That number just boggles my mind, I can't imagine all they have seen in the 60 years they have been married. I used the Cherry Cobbler for the base and accented it with Early Espresso and Very Vanilla. The stamp set is Just Believe which we received at Convention and I love to use. I off stamped on the front so that it wasn't as dark then stamped the main image at full strength. The inside has the Happy Anniversary from the Teeny Tiny Wishes Stamp Set also. I used the Modern Label Punch and the matching Big Shot Movers and Shapers Die on the front of the card. Oh, yes and a Pearl Basic Jewel was added to the flower on the front of the card. I didn't add ribbon since I was mailing it and I didn't want to many bumps in the card. Well, that's it for today. I am hoping to stamp today or at least take a few pictures of other projects so I can share more tomorrow. I also have club to prepare for. Don't forget that club is tomorrow night at 7pm. Well, I am going to run! Have a great day and hope you stop by again, Tonya

Friday, December 10, 2010

Fabric Ornament


Good morning! Today's post is going to be short because I have lots to get done before I head off to judge a debate tournament. Judging will be a new experience for me so we will see how it goes. Now back to today's project. I love our Designer Series Fabric. I really enjoy sewing and like to change my crafting mediums from time to time so fabric is a great variety. This ornament that I made is really easy, no sewing and kids can help. Love the kids friendly crafts. All I used was a wire hanger (cut in half so that I could make two ornaments), the Candy Cane Christmas Designer Series Fabric cut into 1"x 5" strips and assorted ribbon. Make a circle with your wire then start tying the fabric on the wire. I used just a simple single know to make mine. Continue all the way around the wire alternating the fabric as you go. When you are done adding the fabric I added the Real Red Satin Ribbon to the top to hang the ornament and then added the Blushing Bride Ribbon in a few spots through out the fabric. I could have added more Real Red Ribbon but decided I liked it without. I did make a larger wreath version but I will share that another day. Well, I have to run. Have a great day and thanks for stopping by, Tonya

Thursday, December 9, 2010

Surprise inside!

So yesterday I left you without showing you what was inside the box that we had made at the Holiday Gift Giving Open House. I had planned on sharing this sooner but we had our Elementary School Music Program tonight and I spent the day helping get ready at school. This is a big event with the whole school involved. I will try and get a scrapbook page completed soon to share with you. Now back to the box and the surprise inside. I was blog hopping recently and came across these cute tea light candles. They are pretty easy to make and I did try burning one and while the tissue paper did turn a little brown it didn't really catch on fire. I would of course recommend that you not leave any candle unattended but the wax seems keep it from really burning. I found the idea on the blog Rubber Room Ramblings to view the post about the candles simply click on the blog name. To make the ones I did I used the Jolly Bingo Bits Stamp Set. This set is perfect to stamp on the tissue paper that you use to make the candles. I let each person pick which stamp they wanted to there was an assortment of candles made. The bottom picture is a little hard to see the wax seems to be reflecting the light. Sorry to keep you in suspense for so long. Please let me know if you have any questions about the candles. I will be happy to answer them. Tomorrow I will be back with a Fabric Project that I just finished up. Thanks for stopping by and as always have a great day, Tonya

Wednesday, December 8, 2010

Cute Package with a Surprise inside!


Today I am going to share a little box that we made at the Holiday Gift Giving Open House that I recently held. The box is based off of the box that we received at convention two years ago but the size has been modified to fit the surprise that we also made. The box is made from Real Red Card Stock and embossed with the Petals A Plenty Embossing Folder before it was assembled. To make it look more like a package the Whisper White Taffeta Ribbon was added around the lid and secured underneath with Mini Glue Dots. This allows the box to still be easily opened without destroying the box. To make the tag we used the Modern Label Punch and Soft Suede Card Stock, then stamped Merry Christmas from the Teeny Tiny Wishes Stamp Set in Real Red Classic Ink on Whisper White Card Stock and punched that out with the Word Window Punch. To add a little bit of bling a Rhinestone Basic Jewel was added and the box is finished. To find out whats inside be sure and stop by tomorrow when I share pictures of the gift. Thanks for stopping by today and have a great day, Tonya

Tuesday, December 7, 2010

Stampin'Up! has added new Digital Downloads!

Just in time for the Holiday's Stampin'Up! has added new Digital Downloads for My Digital Studio. If you have any questions please let me know. Thanks, Tonya

Item Description Image Price
125148 2011 Notable Desktop Calendar Kit $14.95
125145 Calm and Bright Photo Card Template $1.95
125146 Holiday Greetings Photo Card Template $1.95
125147 Good Cheer Photo Card Template $1.95
123981 Serene Snowflakes Stamp Brush Set $1.95
123982 Blueberry Crisp Designer Series Paper $4.95
123987 Woodgrain Stamp Brush $1.95
123985 Woodland Walk Designer Series Paper $4.95
123986 Just Believe Stamp Brush Set $5.95

123983 Curly Cute Stamp Brush Set $3.95