Thursday, January 28, 2010

Tale of Two Cards

Good afternoon, sorry for the late post but Thursday's are busy with school activities and other things which pushes my post times back, unless I happen to write it the night before which sometimes does happen but last night I was busy stamping. I have two cards to show you today and they are the same basic card just one is stepped up a little bit. The base of both is Kraft Card Stock (102125) with Whisper White Card Stock (100730) for the stamped image and Welcome Neighbor Designer Series Paper Pad (118401), which is a Sale-a-bration item. The Happy Moments stamp set (119125) I used is also a Sale-a-bration item. So for the first card or the basic card I stamped the image with the Basic Gray Classic Stampin' Pad (109120) and then watercolored the flowers and leaves with Old Olive Classic Stampin' Pad (102277), Melon Mambo Classic Stampin' Pad (115656), Crushed Curry Classic Stampin' Pad (115659), and Pretty in Pink Classic Stampin' Pad (101301). This card is looks nice and is a great card to make multiples of but I wanted to add just a little but more.
For the second card I used the same basic pieces and then stepped the card up a little bit with texture and a little matting.
So before I assembled the second card I added Polka Dots to the card front with the new Stampin' Up! Perfect Polka Dots Textured Impressions Folder (117335). Then I added a layer of Crushed Curry Card Stock (115319) that I used the new Scallop Trim Corner Punch(118870) and Scallop Trim Edge Punch another free Sale-a-bration item on. Now I will admit this took a little bit of practice to get my scallops to all match up but the result is so work it. It really just sets off the image and makes it look like a framed work of art. One more thing I want to point out is the Clear Mount Block that is next to my card. As I was getting ready to stamp this image last night I was like wow I can put both stamps on the block at the same time and just stamp once. See how nicely they fit on the block together and you can see exactly how they will be stamped. I like the clear mount stamps but I still don't think I will completely change over, but really only time will tell. Thanks for stopping by today and if you have any questions about the cards or how to purchase the supplies to make the cards please let me know. I am always happy to help. I will finish up with a close up of the Scallop Trim Frame. If you haven't given the

new punches a try what are you waiting for! Have a great day, Tonya


Wednesday, January 27, 2010

Build A Bear Valentine's Cards

Good moring, I hope that you are having a great day. I got to stamp yesterday which always makes me happy but I didn't get a chance to post so I am sorry about that. :( I am working on Valentine's Card for kids to give to their friends and I couldn't forget about the wonderful Build- A-Bear Stamps that are in the Occasions Mini. Did you know that for every purchase of $20 from the Build-A-Bear Workshop Collection, you receive a coupon for $5 off any purchase at the Build-A-Bear Workshop Stores. That is a great little bonus for ordering. If you don't have an Occasions Mini please contact your demonstrator. If you don't have one and live in the US let me know and I will be happy to help you.
Okay so back to today's cards. They are when finished 3x3 cards. I used a lot of the InColors for these as I like the bright cheery colors. The bases of the card are Bermuda Bay Card Stock (115317) and Melon Mambo Card Stock (115320), I also used Crushed Curry Card Stock (115319) on the boy card and Bermuda Bay Card Stock (115317) on the girl card. I used two stamp sets Beary Best Friends (118052) and Beary Best Times (118088). I stamped the images with Basic Brown Classic Ink (104315) on Whisper White Card Stock (100730) then watercolored with the Aquapainter (103954). If you look closely at the girl bears dress you will notice it is polka dotted well to do this a stamped the girl bear on a post it note and cut out just the dress portion of the image. Then a placed the post it note over the stamped image leaving just the dress area to stamp. I stamped over the area with Bermuda Bay Classic Stampin' Pad and the polka dot stamp from Itty Bitty Backgrounds (114996). When you remove the post it note her dress is polka dotted. This is just another form of masking and it adds extra detail to your project. For watercoloring I used Bermuda Bay Classic Stampin' Pad (115655), Crushed Curry Classic Stampin' Pad (115659), Melon Mambo Classic Stampin' Pad(115656), Close to Cocoa Classic Stampin' Pad (103139), and Creamy Caramel Classic Stampin' Pad (103220). The letters that my bears are holding were stamped on a scrap piece of Whisper White Card Stock watercolored, cut out and added with a Stampin' Dimensional. It is hard to see in the picture but I also stamped the letter on the base of the cards with the same color ink as the card. Cute little Valentine's ready to give to all your friends.
Another quick note, I will be placing an order tomorrow so if you are interested in purchasing the I {Heart} Hearts Stamp Set to help the Red Cross in Haiti please contact me today. Thanks for stopping by and have a great day, Tonya

Tuesday, January 26, 2010

New Boxes

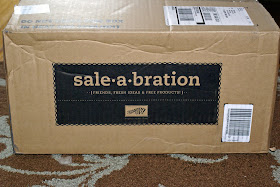
Super Quick post, I hope to get back later with some Valentines cards, but for now I wanted to share a funny story. There have been post about the new Stampin'Up! boxes for Sale-a-bration and I have been waiting to receive one and yesterday was the day. I actually received two for this month's Stamp Club Orders. So I got out the camera to take a picture to share with you all. The first picture is of the side of the box and then the top of the box. Well anyone that has placed and order with Stampin'Up! knows that of course opening the box may cause extreme excitement. I would take the may and add will but that is just me and we all know that I love Stampin'Up! products. So it is the second box that gave me a moment of laughter and the need to share with you. You see after taking the first boxes picture I started to opening the boxes and sort through all the goodies inside and let me just say that my Stamp Club ladies got some great things this month, but I won't go into that here in case a husband might stumble upon my blog. Now back to the second box, image my surprise when in the upper left hand corner where there should have been the "warning label" all I had was a blank spot. No not blank in that the box was misprinted, blank as in someone had cut the label off! I really was amazed then thought it was funny that someone would want that cute little label so much they cut it off my box. Now my kids think there is a Stampin'Up! loving UPS working that just couldn't wait to get a box with the label of their own. Who knows why but I thought I would share and maybe give a you good laugh for the day. If you are in my Stamp Club know that orders are sorted and ready for pick up. Got any stories about items being shipped that you would like to share leave me a post I would love to read them. Hope you all have a great day, Tonya


Monday, January 25, 2010

Dry Embossed Hearts

Okay today's post is a continuation of my last post with the Kangaroo Card. I was so happy with the way the Dry Embossed Hearts turned out that I thought I would share the technique with everyone. I am going to provide pictures and steps for the technique and if you have seen it before please forgive me but I haven't saw it on a blog or site so I thought I would share.


Okay so here goes start by punching out the new Small Heart Punch (117193) from the Occasion Mini multiple time from a sheet of thin cardboard. I used a sheet that came in a Definitely Decorative item. Then you need your Big Shot, Multi purpose platform which comes with the Big Shot, standard cutting pad, Standard Texturz Impressions Pad, and Standard Texturz Silicone Rubber. Open up the Multipurpose Platform to tab 1 as in the picture above and add one Standard Cutting Pad on top of the Multipurpose Platform. Now for a reference I added a piece of scrap paper cut 4 1/4" x 5 1/2". This gave me a area for my heart to be placed and I could better judge where I wanted them placed. After you have them placed you could snail or Dotto the heart down to the scrap paper. This is especially helpful if you are planning on making multiples of your card.
Next lay your card stock over the top of the hearts and multipurpose platform. Notice that the card stock is cut 4 1/4" x 11 so that I can just emboss the front of the card.


The next step is to lay the Standard Texturz Silicone Rubber onto the card stock being careful to line it up with the top of the card. You add the Standard Texturz Impressions Pad on the top lining it also up with the top of the card. By lining the two up with the top of the card you will only be embossing the front of the card and the other side will remain smooth.


You then just roll it all through your Big Shot and when you are finished you have hearts scattered across the front of your card. You could use the technique with any of our punches. Imagine all the choices you have to quickly and easily dry emboss the front of your card.
If you have any questions please contact me. I am always happy to help in any way. Don't own the Big Shot well Sale-a-bration is a great time to purchase a Big Shot plus with an order of $150 you will receive hostess benefits. Thanks for stopping
by today! Have a great day, Tonya


Saturday, January 23, 2010

Kangaroos and Hearts!

Hello! Today I am going to share a card with you that you could use for Valentine's Day or just any occasion that you want to tell someone that you love them. The Build-a-Roo Stamp Set (115948) is a stamp set that is good making a variety of cards. For this one I was thinking Valentine's day so I used traditional Valentine Colors. Chocolate Chip, Real Red and Pretty in Pink. I started with a base of Chocolate Chip Card Stock (102128) and added some dry embossed heart on the front. I will be posting a tutorial on Monday showing you how I did that. Be sure and check back then. Okay now back to the card. I used the new Pinking Hearts Border Punch (117649) and added a edge of Very Vanilla Card Stock (101650) to the edge of the Real Red Card Stock (102482). I used the Real Red Classic Ink Pad (103133) to add some random small hearts to the Real Red Card Stock. Next I stamped the main images. I started with the Hearts which were stamped with Basic Brown Classic Ink (104315), I masked the hearts and used the Stamp-a-ma-jig (101049) to stamp the Kangaroo over the hearts. I used Real Red Classic Ink to stamp the I love you this much over the kangaroo. I watercolored the kangaroo and hearts with Close to Cocoa Classic Ink (103139), Pretty in Pink Classic Ink (101301), Real Red Classic Ink and the Aquapainter (103954). The image was layered on Pretty in Pink Card Stock (100459). Before I add this to the card front I added a new Real Red Sending Love Epoxy Brad (117270) and then I attached it to the card. The Sending Love Epoxy Brads are just one of the items that were in my product share. If you ordered one of my Products Share they will be ready Monday and I will add them to club order. Thanks for stopping by today and have a great weekend, Tonya

Friday, January 22, 2010

Cupid

Good morning, I must confess that this foggy dreary weather is affecting my stamping. I just can seem to get motivated to stamp. :( I wish we would see the sun again soon but in the mean time I do have plans to stamp today so there will be new cards coming soon, but until then I was going through some Valentine Projects from last year and came across my Cupid. He was so much fun to make and since I really wasn't blogging much at this time last year I thought I would share him with you today. He is made completely out of Big Shot Dies and Punches. No stamping on this guy. I used a Envelope to make his bag as it is the perfect size and I always have Envelopes at my house. I think he is pretty self explanatory so I am just going to list the supplies which are all Stampin'UP!
Supplies: Whisper White Medium Envelopes (107301), Blush Blossom Card Stock (103318) Pretty in Pink Card Stock (100459), Bashful Blue Card Stock (105120), So Saffron Card Stock (105118), Whisper White Card Stock (100730), Chocolate Chip Card Stock (102128), Brushed Silver Card Stock (100712), Pretty In Pink Classic Ink Pad (104301), 2 Way Glue Pen (100425), Dazzling Diamonds Stampin' Glitter (102023), Scallop Circle Punch (109043), 1 3/8" Circle Punch (104401), My Way Punch (110709), Small Oval Punch (107304), 1" Circle Punch (109046), 3/4" Circle Punch (107217), 1 3/4" Circle Punch (112004), Big Shot Die Cut Machine (113439), Stampin'Up! Top Note Bigz Die (113463), Scallop Circle #2 Bigz Die (113469), Uni-ball Signo White Gel Pen (105021), Sponge Dauber (102892), Stampin' Dimensionals (104430).
If you have any questions about how I made Cupid or if you would like to make your own Cupid Treat Bags please contact me. As always thank you for stopping by and I am off to create. Have a great day, Tonya

Thursday, January 21, 2010

Haiti Relief

I can not begin to tell you what a wonderful company Stampin'Up! is to represent. They continue to amaze me with their generosity in troubled times. Today they had this announcement for Demonstrators. They would be setting aside $2 from every sale of the stamp set I {Heart} Hearts from now until February 28 to be given to the Red Cross' Haiti Relief and Development Fund. As Stampin'Up! pointed out the Red Cross is already well established in Haiti and the money will be used for both immediate and long term support. What an amazing act to help those in need.

If you have not got a peak at the new Occasions Mini, the I {Heart} Hearts Stamp Set is in there and is available in both Clear Mount and Wood Mount. I had this one on my maybe list but as of today it will be on my next order. I have provided a picture of the stamp set below. If you have any questions please don't hesitate to contact me and if you would like to place an order for I {heart} Hearts and help out the Red Cross Haiti Relief and Development Fund then please contact your demonstrator. If you don't have a demonstrator and you live in the US then let me know and I will be happy to help you place your order. My prayers go out to those in Haiti as they try to rebuild their lives. Tonya

I {heart} Hearts Wood mount (117010) $26.95
Clear Mount (118571) $18.95

Tuesday, January 19, 2010

More Big Shot Quilting!

Good morning, the morning has flown by. I took my oldest to High School today to shadow a friend and see if she likes this High School. Which brings me to today's post Quilting with the Big Shot is becoming a new hot trend. It is so quick and easy to cut out consistent sized shapes which makes quilting that much easier. I have done some quilting before I really got into stamping. It is a fun hobby that I really enjoy but I have found over the years that stamping has taken a front seat in the crafts that I do. So when I saw that the Big Shot can be used to cut fabric I realized that this was a great way to combine both crafts that I enjoy. I am looking forward to trying more quilting options but for today I am sharing another Scallop Square Purse. This one is a little smaller than my first. I only made it 2 rows high by 3 rows. I had some fabric leftover from a Saint Patrick's Day shirt that I had made years ago for my kids and since the school my daughter is attending today just happens to be the fighting Irish I thought a Irish purse was perfect. I cut all the squares over the weekend and finished the purse in about 2 1/2 hours. I am really happy with the way it turned out and am all ready looking at fabric to start another one. Now my daughter is actually not keeping this purse for herself, although if this is the school she decides to attend I have no doubt I will be making another one but this one is going to be a gift for the wonderful girl that is allowing my daughter to follow her all day. I hope she enjoys it. What a great way to show off your school spirit.
If you would like to learn how to make your own Scallop Square Purse or are a quilter and would like more information about using the Big Shot to quilt with please contact me. I would be happy to help you. I will share other quilting projects as I make more but don't worry this will not become my main focus but rather another fun creative outlet. Thanks for stopping by and have a great day, Tonya
Supplies: Stampin'Up! Supplies Big Shot Die-Cut Machine (113439), Stampin'Up! Scallop Square Bigz Clear Die (115950), Paper Snips (103579), Craft & Rubber Scissors (103179), Non Stampin'Up! Supplies Various Fabrics, Batting, Sewing Machine, White Thread

Monday, January 18, 2010

January Thank You's

Hello and happy Monday! I hope you had a great weekend. It was a busy one at our house but a good one just the same. With the start of the new year comes resolutions or things we would like to do better. It is also a time to make changes in my business and try and improve on things. So this year I have decided to not only send more cards but to send cards to my customers more. Starting this month anyone who places an order with me during the month will recieve a card in the mail as a thank you. I have decided to write a note in each on a post it note that way the receiver can use the card themselves for personal use. So today I designed a couple of cards to say thank you. I used quite a few Sale-a-bration items on the cards. I really like the selection this year for Sale-a-bration and what better way to show them off than to actually use them. No hording supplies for me this year either. The first card uses a Kraft Card Stock (102125) Base with Polka dots added using the Big Shot and the new Perfect Polka Dots Impressions Folder (117335). Is is so easy to add just a few Polka dots or make the whole card front polka dotted with this folder. I added Welcome Neighbor Designer Series Paper (118401) which is free with a $50 merchandise order. I used the new Scallop Trim Punch (118402) which is also a Sale-a-bration item. I used Melon Mambo Polka Dot Ribbon (115611) and the Sale-a-bration stamp set Vintage Labels in Clear Mount (119122). I used the Scallop Circle Punch (109043) and the 3/4" Circle Punch (107217) for the sentiment which was popped up with Dimensionals.

The second card uses similar supplies with the exception of the base which is Melon Mambo (115320), the ribbon which is Crushed Curry Polka Dot Ribbon (115614) and the punch which is the Curly Label Punch (112208) and the Curly Label XL Bigz Die (114506). I will be making some other Thank you cards with similar supplies but a little different layout. If you have placed an order with me this month then you will be getting your card at the end of the month if you haven't placed an order yet it isn't to late it is as easy as contacting me or placing an online order at my website.
As always thank you for stopping by today and if you have any questions please let me know. I am always happy to help. Have a great day, Tonya

Friday, January 15, 2010

Mini Milk Carton from the Mini

Hello, try saying that title a few time and see what happens. Now everyone that has stamped with me knows that I am a Big Shot Addict. There is no way to deny it. If Stampin'Up! comes out with a new Die I will almost certainly buy it. So the new Mini Milk Carton (117310) from the Occasions Mini is certainly no exception and since it is so much fun to share my addiction we made these cute little cartons for Stamp Club this week. The Mini Milk Carton holds about 8-10 Hershey Kisses for a reference has to how big it is. The supplies used are Big Shot Die Cut Machine (113439), Standard Premium Crease Pad (113476), Mini Milk Carton Die (117310), Pretty In Pink Card Stock (100459), Whisper White Card Stock (100730), Close To Cocoa Card Stock (101341), Close to Cocoa Classic Stampin' Pad (103139), Pretty in Pink Stampin' Write Marker (100045), Love You Much Stamp Set (113756), Pop-Up Glue Dots (104183), Scallop Circle Punch (109043), 1 3/8" Circle Punch (104401), 1 1/4" Circle Punch (104403), Sticky Strip, and 1/2" Library Clips (112581). The Mini Milk Carton is pretty easy to assemble and comes with directions also. I think these would make great school treats for friends, teachers or coworker treats. Just the right size to show someone you care. As always if you have any questions be sure an let me know. Also if you would like to purchase the supplies to make this project and you don't currently have a Stampin'Up! Demonstrator I would be happy to help. I can have your orders shipped to any where in the USA. Thanks for stopping by and have a great weekend, Tonya

Wednesday, January 13, 2010

Clear Mount

Hello, hello, hello! The sun is shining and it is great! Don't get me wrong the snow is pretty but the cold just makes you want to stay in and snuggle under a pile of blankets. I am happy to hear that warmer temperatures are headed our way. The cold weather also seems to have zapped my stamping mojo. I know I need to work on projects I just can't seem to get motivated to do so, but what better thing to make you really want to stamp but new stamps, accessories and Designer Series Paper. Yes, the Occasions Mini supplies have arrived at my house and I love them. The new Satin Ribbon is gorgeous, if you haven't gotten in on my Ribbon Share well what are you waiting for. The new punches are fun and easy to use and then there are the new Clear Mount Stamp Sets. I bought a few and all the Clear Mount Blocks and while I am not ready to completely change over to Clear Mount Blocks they are quite nice and easy to use. My only negative is that some of the tiny, tiny ones are hard to clean as they want to pop off my blocks. Maybe I just need to use a gentler touch. I really like the sentiments in clear mount and will definitely continue to buy them that way. Today's card is one that we are doing this week for our Stamp Club. It uses lots of new products and some free Sale-a-bration Designer Series Paper too. The love you much is from the new Well Scripted Clear Mount Stamp Set (118601). I have added a picture of the stamp on the Clear Block. This is Block C (118486). Other supplies used are Bermuda Bay Textured Card Stock (115719), Whisper White Card Stock (100730), Melon Mambo Card Stock (115320), Soft Suede Classic Ink Pad (115657), Welcome Neighbor Designer Series Paper Pad (118401), Pinking Hearts Border Punch (117649), Stampin'Up! Scalloped Heart of Hearts Emobsslits Die (117332), Pretty in Pink 5/8" Satin Ribbon (117289), Full Heart Punch (113693). All supplies can be purchase through my website and you can earn free Sale-a-bration product whether ordering online or directly through me. I hope you enjoyed today's project and if you have any questions be sure and leave me a comment. I am always happy to help and if you are interested in being a part of our Stamp Club then email me. We will be starting a new group next month. Until next time, Tonya

Monday, January 11, 2010

Bold, Bright and Fun!

Good afternoon, we have another birthday in our house today. Today my baby turns 6. I can't believe how fast the time as gone by and anyone that knows him, knows what a energetic and outgoing kids he it. So of course his birthday card had to be as bold, bright and fun as he it. I chose the colors for the card from the wrapping paper for his gifts. The colors are Crushed Curry, Brilliant Blue and Real Red. I love how fun they look together. Now some of you might be wondering why I am showing you a stamp set that was in the Holiday Mini, well because of the partnership with Build-a-Bear and Stampin'Up! these sets are still available to purchase and there is a new Coordinating set to go along with them. If you haven't received a Occasions Mini then ask your demonstrator for one, if you don't currently have a demonstrator then let me know and I will be happy to help you.
Now to the supplies: Beary Best Friends Stamp Set ( 118052), Beary Nice Wishes Stamp Set (118050), Beary Best Times Stamp Set (108088), Real Red Card Stock (102482), Brilliant Blue Card Stock (100721), Crushed Curry Card Stock (115319), Confetti White Card Stock (102028), Real Red Classic Ink ( 103133), Brilliant Blue Classic Ink (100691), Crushed Curry Classic Ink (115659), Basic Brown Classic Ink (104315), Creamy Caramel Classic Ink (103220), AquaPainter (103954). Remember that if you place an order for these or any of our supplies and your merchandise total is $50 or more you will get a free Sale-a-bration reward. Thanks for stopping by and have a great day, Tonya

Saturday, January 9, 2010

Rockin' Birthday!

Today is a special day out our house. My oldest son is turning twelve! So Happy Birthday to him. Of course a birthday wouldn't be complete without a handmade card from mom and I had just received a fun new stamp from my recent order. This stamp is one that you can receive free during Sale-a-bration. I don't have a lot of stamp sets that work for the tween or teens in my life at least not the boys so I was excited to get this stamp. It is Extreme Guitar (115328). I used Old Olive Card Stock(100702), Not Quite Navy (101722) and Kraft (102125). I embossed the Rocker with Versamark(102283) and Clear Embossing Powder (109130) . I used Itty Bitty Backgrounds (114996) in Old Olive Classic Ink (102277) for the base of the card then used my Color Spritzer Tool (107066) to add a little Not Quite Navy Ink (100059) with the Stampin' Write Marker. The Kraft piece across the bottom was torn then I did a little distressing and dragging with the Old Olive Classic Ink Pad and Not Quite Navy Classic Ink Pad (103008). The Happy Birthday sentiment is from Teeny Tiny Wishes (115370). It was stamped on Kraft Card Stock with Not Quite Navy Classic Ink then punched out with the Word Window Punch (105090) and layered on Old Olive Card Stock punched out with the Modern Label Punch(116630). I added a Silver Brads (104336) to the sides before adding it to the card. The Stars are punched out with the Star Punch(109045) and the Large Star Punch (110710). Before adding the Rocker image to the card I distressed the edges and dragged the Not Quite Navy Classic Ink Pad across the card stock for added distressing. Now it is a perfect card for the tween in your life. Not cutesy, but cool. If you would like to learn more about how you can earn your Extreme Guitar Stamp contact me or check out my website.

Thursday, January 7, 2010

Quilting Made Easy

Years, ago when we first moved back to Missouri I made this Rag Quilt the traditional way. I cut all the squares with my Rotary Cutter and Mat then sew this heavy and warm quilt. The squares took quite a while to cut even doing a couple of layers at a time and of course I had to make sure that I was cutting each one sqaure so they would match up. This quilt is made of jeans that my family had since disgarded and flannel. The back of the quilt is all red and red plaid flannel. I was and still am pleased with the result. Now you might be asking yourself what does this have to do with stamping will truthfully not much but the next project that I am going to show you uses Stampin'Up! Supplies to allow you to make a Rag Quilt so much faster and easier.


I saw these Rag Quilt Purses in various shapes and sizes on several blogs and recalled how much fun it was to make the quilt above, so I decided to give it a try. I used my Big Shot (113439) and Stampin'Up! Scallop Square Bigz Clear Dies (115950) to cut out all my fabric squares. I used two layers of fabric and some batting between the layers. For the Straps and the closure I watched Angie Juda's Video that gave directions and dimensions. After sewing the purse the fun part begins. I cut all the scalloped edges between the scallop being careful not to cut into the seam. Then you wash your purse and it is ready to use. I made this one for my Bible Bag for Church and Prayer Group but I like it so much I have started using it for my everyday purse. My daughter wants one for Church also and I am thinking about making a blanket. It is something a little different than my stamping but just as fun. If you would like your own

Rag Quilt Purse contact me as I have decided to make these to sell. If you are local we can work together to pick out the fabric you like and the pattern of the purse. As always have a great day , thanks for stopping by and stay warm! 'Til, next time, Tonya

Wednesday, January 6, 2010

Tic Tac Toe!

Good morning, today it is back to stamping and sharing with you projects that I am working on. Now before I get into today's card, let me tell you that I often sketch out cards I would like to make. I look through the catalog or pull out certain stamp sets and just sketch cards. A lot of the time they end up really close to the sketch but sometimes they sort of take on a mind of their own and look very little like the original sketch. This card is one of those cards. Sure there are some elements that remained the same like the background {Feb 14} and the tic-tac-toe board sort of in the middle. I used only one stamp set A Happy Heart (111758) and a few of our In Colors for this year. The supplies used were: Soft Suede Card Stock (115318), Confetti White Card Stock, Melon Mambo Textured Card Stock (115719), Bermuda Bay Card Stock (115317), Soft Suede Classic Stamp Pad (115657), In Color Stampin' Write Markers (116329), 1/2" Circle Punch (104390), 3/16" Corner Rounder (109047) and 1/2" Soft Suede Polka-Dot Grosgrain Ribbon (115612). Can I just say thank you to Stampin'Up! for giving us In Color Markers this year! They are fantastic and make inking up images with our Incolors so easy. Would you like to make this card? If so just contact me to book a workshop. The supplies to make this card will help you earn a free Sale-a-bration item. How great it that.
Well, I am off to run errands before I go to school to volunteer. Have a great day and thank you for stopping by. I hope you come back soon, Tonya

Tuesday, January 5, 2010

Sale-a-Bration Starts Today!

Sale-a-Bration starts today! It is the best time to be a customer, hostess and demonstrator as you can earn lots of free goodies just for purchasing our wonderful Stampin'Up! Products. Now if you are new to Sale-a-bration here is how it works:
Customers: When you spend $50 (before tax and shipping) on Stampin' Up! merchandise, you'll receive a free Sale-A-Bration reward. There's no limit--for every $50 you spend, you can select another FREE Sale-A-Bration reward!
Hostess: When you host a workshop of at least $300 (before tax and shipping), you'll receive a free Sale-A-Bration reward in addition to all of the regular hostess benefits!
Join: During Sale-A-Bration, anyone who joins as a demonstrator can choose any stamp set--a value of up to $47.95--from our current Idea Book and Catalog or Occasions Mini Catalog. Plus, for a limited time, get 15% off the price of the standard Starter Kit or Digital+ Starter Kit!
Plus, this year's Sale-A-Bration event gives you more free products than ever before! Choose from our exciting selection of exclusive Sale-A-Bration products, or choose a $15.95 set from the Idea Book & Catalog--you've got over 80 choices!
The Sale-A-Bration promotion starts on January 5 and runs through March 31, so don't miss your chance to earn free products! Talk to me today to book your workshop or learn more about this promotion. Wow can you see why I am so excited! I look forward to hearing from you. Tonya

Heart Treat Cups

Remember those cute little round Treat Cups that I showed you last week that you could add right in your card. Well, I am happy to announce that starting today you can buy Heart Shaped Treat Cups and a Coordinating Stamp Set just in time for Valentine's Day. These cups are easy to add to your cards by just punching out a opening with our Full Heart Punch (113693). The stamp set is Sweetheart and if offered in both Wood mount (102415) and Clear Mount (120780). You will receive 12 Heart Treat Cups (120435) for just $2.95. Stampin'Up! has let us know that the first shipment of these cups is limited and if you would like to use these for Valentine's Day you should order early. Also these items can be purchased to earn Sale-a-bration items. Contact me to place your order or order online, just remember to add your Sale-a-bration items if you quailfy. Thank for stopping by and have a great day, Tonya

Monday, January 4, 2010

Grandma's Birthday Card


Hello, to all! It is the 4th which means that today is my Grandmother's Birthday and since I gave this card to her yesterday it is safe to post today. Now for those of you that know my Grandma she doesn't have Internet so I could have posted it earlier without her seeing it but some other family members would have. Well, enough about that. If you are looking for two stamp sets that will get you through a lot of events then I would recommend the two I used on this card. The layout is quick and simple. That seems to be what I have time for right now and if you are like me and life is busy then you understand. I enjoy making complex cards too but I have to work with the time I have free. Maybe my next card class needs to be quick and easy cards for all occasions. Hmm, I will look at the calendar. Now back to the card, the sentiment if from Wonderful Favorites Stamp Set (115114). This stamp set is great! I love that it includes so many different options for all the family members in your life. It is a big set with 23 stamps and has Wonderful and Favorite in the bigger font and then husband, daughter, nephew, grand, friend, niece, and, aunt, son, to my, sister, uncle, brother, mother, couple, step, to a, wife, cousin, -in-law, father. Wow I think they have them all covered. I also used the Medallion Background Stamp (115223). This stamp works great in any color. The other supplies I used on the card are Cameo Coral Card Stock (100475), Ruby Red Card Stock (102030), Confetti White Card Stock (102028), Chocolate Chip Card Stock (102128), Ruby Red Classic Ink Pad (102259), Cameo Coral Classic Ink Pad (103035), Stamp-a-ma-jig (101049), 3/16" Corner Rounder (109047), Half back Pearl from the Pretties Kit (109114).
Well, my kids are back in school today even though the temperature was in the negative numbers, so while the house is quiet I am off to stamp and do some more laundry. Have a great day and stay warm, Tonya

Last Day!

Just a quick reminder that today is the last day to order from the Holiday Mini and the Dormant Retiring List. If there is any item from either that you would like to purchase please contact me by email or phone so I can place your order. You can also place your order online through my website. Have a great day and be sure and check back later when I have a project to share. Thanks, Tonya

Sunday, January 3, 2010

Family

Before I head up to my Grandma's house to help her celebrate her 80th Birthday I thought I would share this Digital Scrapbook page that I made for her. I used My Digital Studio and designed the page myself. This picture was taken last weekend when our family members gathered at Grandma's house for Christmas. This picture is Grandma with 18 of her 19 Great Grandchildren. This is a big undertaking and although the picture isn't perfectly posed it is perfect. The kids are all being themselves and that is of course what makes up a family all the different personalities. So today I hope that you too can spend some time with your family and those you love. Until tomorrow have a great day and thank you for stopping by, Tonya

Friday, January 1, 2010

Just a Little Bling!

Good afternoon, today's project is a pretty quick one but I really wanted to add a little personality to my Laptop. I just recently got it back and plan on using it for my Stampin'Up! business more. Well, I couldn't just leave it a boring gray back. That just wouldn't be right at least not for me. So I got out my Big Shot (113439), White Decor Elements Sheets (114335),
Stampin'Up! Beautiful Butterflies Bigz Die (114507), Rhinestone Ice Circle Brads (109111) and Crystal Effects (101055) and went to work decorating my laptop. I started out by cutting out several butterflies from the White Decor Elements Sheets and just randomly placed them on the laptop. This is so quick and easy. I would recommend cleaning the surface before you apply the Decor Elements so that they adhere well. I then took apart one of each of the lilac Rhinestone Brads so that I could just use the stone. I adhered them to the butterfly with a little Crystal Effects and this project is done. No more boring laptop for me and the best thing is that they come off if I ever decide I need to change the look. No permanent lasting effect on the laptop at all. Now if you don't have a Big Shot or the dies you can just as easily purchase one of our premade Definitely Decorative items. We have two that are designed to embellish laptops. Upsy Daisies which comes in eight colors and Adornment which also comes in eight colors. If you would like to see our complete line of Definitely Decorative items that is a link on the left side of the screen. This would be a great way to personalize that new laptop that you or someone you love just received for Christmas.
Thanks for stopping by today and I hope you are having a great day, Tonya

Happy New Year!

Hello everyone! I just wanted to take a few minutes to wish you a happy New Year and to let you know that I have posted links to the upcoming Occasions Mini, Sale-a-Bration Brochure as well as the new insert to the Definitely Decorative Catalog. There are also two new promotions starting January 5 which include the new Heart Shape Treat Cups and a Country Living Promotion. All the links are to the left and if you have any questions please contact me. I am always happy to help.
Now if you are a local customer I have had the Occasions Mini and Sale-a-bration Brochure mailed to your home address. StampinUp! did let us know that some of these did ship out late so that is why we are posting them online early. I love the new Occasions Mini and want almost everything in it. I will be posting Product Shares from the Mini on January 5. These will include the new 5/8" Satin Ribbon, Designer Series Paper and New Brads and Buttons. So go ahead and take a peak then contact me to place your order on January 5 or to book a workshop and earn free items. I will be back later with a new project but until then have a great day, Tonya