Hi everyone, no I haven't dissappeared as it has seemed this week. As I mentioned in my last post this has been a busy week. I have been doing some craft projects but they haven't been stamping related unless you count the treat boxes I made for the kids in three of my children's classes. I have been sewing this week and since I didn't have any stamping items to share I thought you might enjoy seeing my lastest creation. This is my oldest son and he is wearing this costume tonight at our STUCO Haunted House. I am really proud of how well it turned out. I found the directions online and simply made changes as we needed to. Thanks for stopping by and have a safe and Happy Halloween. Tonya
Friday, October 30, 2009
Monday, October 26, 2009
Deal of the Week #4
Hello, again! I am back with this Week's Deal of the Week. Remember that this is the final week for our Deals. You can purchase as many of this weeks Deal item as you like and there is no minimum purchase to receive the discount price. Our deal for this week is the Pirate and Princess Party Kits. Each kit regularly sells for $15.95 but this week they will be on sale for $9.95. These are perfect for birthday parties.
In the Princess Party Kit you receive
8 Invitations and Envelopes
8 Purse Boxes
8 Crowns
24 Food Toppers with picks
20 Paper Pennants
White 1/4" Grosgrain Ribbon
The colors are a very pretty combo of Regal Rose, Pretty in Pink, Barely Banana, Bashful Blue, Pale Plum and Certainly Celery
8 Invitations and Envelopes
8 Treasure-chest Boxes
8 Chipboard Eye Patches
24 Food Toppers with picks
20 Paper Pennants
Black 1/4" Grosgrain Ribbon
Black Elastic Cord
The colors in the kit are Real Red, Chocolate Chip, Basic Black, More Mustard, So Saffron, Taken with Teal and Garden Green.
Both kits have coordinating stamp set that can also be purchased to help make your party extra special.
If you are interested in purchase either or both of these deals please contact me and I will help you place your order. Thanks again for stopping by and have a great day, Tonya
Treats for the kids!
Happy Monday morning, this is a super busy week so if my post are hit and miss you will know why. I am making treat bags for three of my four kids classes for their Halloween Parties. My kindergartener wanted a specific box for his treats. He asked that I use the Fancy Favors Die and the Build-a-Bear Halloween die.
I started with the Stampin'Up! Fancy Favor Die (115965) and cut it out in Basic Black Card Stock (106532). The Bear Body was cut out in Close to Cocoa Card Stock (101341) with the Stampin'Up! Bear Bigz Die (117977). His muzzle is Creamy Caramel Card Stock (102514). The Pumpkin was cut out in Pumpkin Pie Card Stock with Stampin'Up! Kooky Spooky Orginals Die (117979). I added a 1 3/4" Circle Punch (112004) of Summer Sun Card Stock (103124). I added the pieces with glue dots then added the bear to with Stampin' Dimensionals. I am still trying to decide if I want to add a handle or not. I will be back in a little while with the Deal of the Week. Stay tuned for that.
Thanks for stopping by, Tonya
Thursday, October 22, 2009
Autumn Wreath
Good morning, what a rainy dreary day it is. The perfect day to stay inside and stamp! At least is seems so to me, now if I can just get some stamping done today. Yesterday I mentioned a fall card I was working on well I finished it and am going to share it with you today. Stampin'Up! is great about sharing ideas with us that fellow Demonstrators have discovered and today's card is one of those ideas. Barbara Goetz submitted a Christmas card using the Autumn Days set to make a wreath and after seeing it a decided to make one of my own but I went with fall colors and thought it would make a perfect Thanksgiving card. The card itself went together quickly and it has just enough detail to make it really stand out. I even used one of this weeks Deal of the Week 1/2" Library Clips. Now before I get to far into the card let me start at the base. I started with a base of Kraft Card Stock (102125), then I added strips of card stock in Chocolate Chip (102128), Pumpkin Pie (105117), Crushed Curry (115319) and Dusty Durango (115321). These were just cut in random widths and then the ends were cut at an angle and they were placed on the card. The main image is a Very Vanilla Card Stock (101650) that is cut in a 3 1/2 x 3 1/2" square. I started with Soft Suede Classic Ink (115657) and stamped the berry image from Autumn Days Stamp Set (115452) four times making a square. Then I stamp the same image again with Pumpkin Pie Classic Ink (105216), but when I stamped the second time I rotated the card stock and stamped it at the corners of the square. This step was repeated two more times with the Crushed Curry (115659) and Dusty Durango (115654)Classic Ink each time stamping slightly off from the layer before. This makes a circle image. I finished off the wreath with a 1/4" Pumpkin Pie Grosgrain Ribbon (109030) bow and added it to the wreath with a Mini Glue Dot. The image was then added to the card with Stampin' Dimensionals. I wanted to add a Happy Thanksgiving sentiment and I of course pulled out my Teeny Tiny Wishes Stamp Set (115370). This set is an must for me as it has a sentiment for every occasion. If you haven't purchased this set I highly recommend that you do! I stamped Happy Thanksgiving in Chocolate Chip Classic Ink (100908) on Very Vanilla Card Stock and punched it out with the Word Window Punch (105090), then layered it on a Modern Label Punch (116630) made with Crushed Curry Card Stock. I added a Chocolate Chip 1/2" Library Clip (112581) to the left side and tied some Linen Thread (104199) around the Library Clip. I used more Stampin' Dimensionals to add my sentiment to the card. Then I decided the card needed some distressing so I used the Chocolate Chip Classic Ink Pad and simply drug it across the edges of the card to give it a more rustic look. All supplies are from Stampin'Up! and I really want to thank Barbara Goetz for the great idea.
Thank you for stopping by today and I hope that you are able to get some stamping time in today. 'Til next time have a great day, Tonya
Wednesday, October 21, 2009
Santa Bear
Good morning, I am still on a Christmas theme for my card making but tomorrow expect a fall card as I have one almost finished that I will share with you then. For today's card I decided to use my Build-a-Bear Dies and turn him into a cute Santa complete with bag. He is just to cute and so super easy to make with the Big Shot. There is no stamping on this card at all. Let me start with the base. I used Real Red Card Stock (102482) cut to 8 1/2 x 5 1/2 then folded in the middle to make the finished card 4 1/4 x 5 1/2. The next layer is Chocolate Chip Card Stock (102128) and is cut 4 1/8 x 5 5/8. Then I added a layer of Merry Moments Designer Series Paper (115672). Then I moved onto my Santa Bear. To make the Build-a-Bear you will need the Stampin'Up! Bear Bigz Die (117977) and Stampin'Up! Beary Merry Die (117980). I used Close to Cocoa Card Stock (101341) and Creamy Caramel Card Stock (102514) to make the bear. Then I used Real Red Card Stock (102482), Basic Black Card Stock (102851), Whisper White Card Stock (100730), Brushed Silver Card Stock (100712). I added a piece of Chocolate Chip Card Stock (102128) and Pretty in Pink Card Stock (100459) behind the bears face to add his eyes and mouth. I also did some sponging to add a little extra dimension. For Santa's Buttons on his jacket I added Black Brads(109109). To make Santa's Bag I used the Ornament Punch (116794) and rounded the bottom edge with the Wide Oval Punch (112082).I used Chocolate Chip Textured Card Stock (108697) and used Direct to Paper with Chocolate Chip Classic Ink. The bag was finished off Linen Thread and the bear and bag were added to the card with Stampin' Dimensionals. Wouldn't you like to have your very own Santa Bear? All items are available through Stampin'Up! and my Stampin'Up! website. Have a great day and 'til next next time, Tonya
Tuesday, October 20, 2009
Shimmer Angel
Good morning, I finally got a chance to work on something new yesterday and today's card is what I created. I had made the embossed scallop oval (made with the Big Shot and Frame Scallop Oval Die (114521) and Stampin'Up! Textured Impressions Folder Petals-a-Plenty (116824), a few weeks ago and set it aside when it didn't fit the card that I was working on but yesterday I got is back out and decided to sponge the poinsettias Real Red and from there the card just moved right along. The inside oval seemed like the perfect place to have the Angel from the Holy Triptych Stamp Set (110370). I know I have mentioned it before but I really love this set. I stamped the angel in Basic Gray Classic Ink (109120) and watercolored her with Blush Blossom (102609), Real Red (103133), and So Saffron (105213) Classic Ink and the Aquapainter (103954). I also used an old Blender Pen (102845) and the Champagne Mist Shimmer Paint (116806) to paint her wings, and highlight her dress and hair. I stamped the Peace on Earth from Four the Holidays Stamp Set (116921) on Whisper White Card Stock (100730) with Gold Encore! Pad (101017). After the image dried, I mixed 70% Rubbing Alcohol and more Champagne Mist Shimmer Paint and made a Shimmer Mister to spray over the Scallop Oval, the Whisper White Angel Oval and the Sentiment to add some extra shimmer and shine. It makes the card stock look like Shimmer Card Stock (101910) only with a gold sheen. The base of the card is Real Red Card Stock (102482) with a layer of Burshed Gold Card Stock (102935) that I texturized with the Stampin'Up! Perfect Details Texturz Plate (115962). The Scallop Oval was added to the card with Mini Glue Dots (103683) and the sentiment and Angel were added with Stampin' Dimensionals (104430). I really wish the shimmer showed up better on the picture but know that in person this card has a lot of shimmer. If you would like to make a Christmas card like this for your friends and family please stop by my Christmas Card Planning Night on Oct. 29 at 7pm. If you would like to make cards but that evening doesn't work contact me and we will work out a good time for you. Thanks for stopping by today and have a great day, Tonya
I have added a second picture of the angel that I think shows the shimmer a little better. It does highlight the shimmer paint in her hair and dress more. Thanks again for stopping by.
Monday, October 19, 2009
Deal of the Week #3
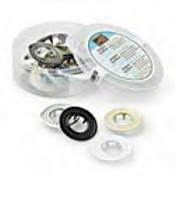
Good afternoon, I am happy to bring you this weeks Deal of the Week items. They are listed below and I have added a picture if you are interested in ordering any of these items, there are no minimum purchase and you can order as many as you like, then please contact me through email or by phone. I will be placing an order at the end of the week for those wanting to take advantage of these great deals. Thanks for stopping by today, Tonya
112571 Circle Designer brads Were $5.95 Now $3.99
Friday, October 16, 2009
Scrappin' Halloween
Hello! Thank you for stopping by my blog today. Yesterday I mentioned some Scrapbook pages that we had made the night before well today I am going to share those with you.
I will be the first to admit that I am way behind on my scrapbooking. I started stamping with the intentions to use it as a way to complete more scrapbook pages but also to have the color coordination that I really found lacking in other products, but after discovering the world of card making and Digital Photography I have found that I print less pictures. I would however love to change that and after making these two pages am eager to get some new Halloween pictures of my kiddos to finish this pages. So enough rambling from me and on to the pages. Both have similar layouts and start with 12x12 Perfect Plum Card Stock (107084). I love the fact that you can buy any of our 48 colors in 12 x 12 Card Stock! I used Sponge Daubers (102892) and sponged the edges of the Perfect Plum Card Stock with Perfect Plum Classic Ink (101437). Then I added a Pumpkin Pie Card Stock (107100) layer cut 6x12". On the Pumpkin Pie I used Versamark and stamped the bubbles from Halloween Hoot Stamp Set (111582). Halloween Hoot was the only stamp set used while making these pages. On both pages I added a 1"x 12" strip of Cast-a-Spell Designer Series Paper (115677). On the top page I also added 1/4" Black Grosgrain Ribbon (109027). Trick or Treat was cut out with the Big Shot and the Stampin' Up! Timeless Type Sizzlits Dies (115951). Having the Big Shot and a Alphabet set to use with it makes cutting out your titles so easy and you never have to worry about running out of a letter and with three J names at our house that is a big benefit! I added photo mats of various sizes in Old Olive Card Stock (100702). On the first page I cut out a circle with the Circle Scissor Plus (112530) and stamped the witch, sign and sentiment all with the Stamp-a-ma-jig (101049). They were colored with the Stampin' Write Markers in Basic Black (100082), Perfect Plum (100035), Old Olive (100079), Pumpkin Pie (105115), and Chocolate Chip (100071). On the second page I stamped with frog and cauldron with Stampin' Write Markers and cut them out and added them to the page with Stampin' Dimensionals. On the second page I also added a Whisper White Top Note for journalling. Both the circle and the top note were sponged with Perfect Plum Classic Ink. I added some Photo Corner (109042) Accents in Basic Black Card Stock (102851) and the pages are ready for pictures. Now if my kids Halloween costumes were ready for them.
Don't forget that time is running out to take advantage of the Deal of the Week Specials for Week #2. If you have a Big Shot these are great deals on some wonderful dies and Embosslit Die. All the items to make this and all my projects can be purchased through my website or by just giving me a call. I would love to hear from you. Have a great weekend, Tonya
Thursday, October 15, 2009
Flowers for Roo!
Good morning! This has been a busy week and I have loved stamping with several different groups. Last night I had a Halloween Scrapbook Workshop and we had a great time! It has inspired me to do more scrapbooking and I am already thinking about Christmas and Fall layouts so watch for more information. I will share the Halloween pages with you a little later. I wanted to take a few new pictures and with the rainy weather it isn't the best picture taking time. So for today I thought I would share with you a card that we did over the weekend at a Baby Shower I was asked to do. The host of the shower asked me to design two cards using the Build-a-Roo Stamp Set (115948). One would be for the Mom to be and the other would be for the guest to take home. It was a lot of fun and I was able to take me assistant (aka my wonderful daughter) with me so that made the day even more enjoyable. Both Cards were simple in design because I knew that the Watercoloring would take a while and since all were beginner stampers I didn't want to overwhelm them their first day. We also used the Stamp-a-ma-jig which takes some time and patience. Everyone did a great job and I hope they had a good time. The card colors were based off of the bedding that the Mom to be had chosen for the baby's room. On the first card the base is Rich Razzleberry Card Stock (115658) with an accent strip of Cottage Wall Designer Series Paper (115671) that I used the Eyelet Border Punch (113692) on both sides of. I also used Versamark and stamped hearts from the same set randomly on the Rich Razzleberry card stock just to add a little extra element. Then the Kangaroo was stamped with Basic Brown Classic Ink (104315) on Whisper White Card Stock (100730). On this card the Joey was added in the pouch and the sentiment Peek a Boo Someone New was added to the top also in Basic Brown Classic Ink (104305). The kangaroos were then watercolored with Creamy Caramel (103220), Pink Passion ( 101212) and Close to Cocoa (103139) Classic Ink and the Aquapainter. After rounding the corners with the 3/16" Corner Rounder (109047) the image was added to the card with Stampin' Dimensionals.
The second card started with a base of Pale Plum Card Stock (101658) and I added Polka Dot Dry Embossing with the Big Shot and the Stampin' Up! Backgrounds ! Texturz Plates (114512). A little Rich Razzleberry 1/2" Polka-Dot Grosgrain Ribbon (115613) was added around the middle and tied in a simple knot. On this Kangaroo I added flowers in her pouch and a Thanks So Very Much sentiment. The flowers were colored with Rich Razzleberry (115658), Pink Passion (101212), Pale Plum (102732) and Green Galore (102122) Classic Ink before the corners were again rounded and the image was added to the card.
Would you like me to help you plan your next baby or wedding shower. I would love to help! Just contact me and we can work on design ideas to make your next shower a customized event.
As always thank you for stopping by today. Be sure and stay warm and dry. Thanks, Tonya
Tuesday, October 13, 2009
Pop Up! Cake
Good afternoon, tonight is of course Stamp Club night. I always look forward to having Stamp Club. We always have so much fun! Well, I was going to share another Christmas card with you today but after seeing the wonderful Deal of the Week specials I thought I Three Tier Pop Up Cake Card was in order. This is a super fun die and makes those Birthday cards just a little extra special. I decided to use a color combo that I hadn't tried before. Bermuda Bay, Rich Razzleberry and Soft Suede. I started with a base that is 11"x 5 1/2" so that the finished card is a 5 1/2" square. This is a good size to use when working with the Cake Die as it allows the cake plenty of room to fold down. The base is Bermuda Bay Card Stock (115317), then I added a layer of Rich Razzleberry Pattern Designer Series Paper (115685). The cupcake is from Crazy for Cupcakes (111618) and I stamped is on Whisper White Card Stock (100730), Soft Suede Texture Card Stock (115719), Bermuda Bay Pattern Designer Series Paper (115684) and Cottage Wall Designer Series Paper (115671) then cut out the parts of the cupcake and layered them onto my Whisper White image. I colored in the flame with Crushed Curry (116329) and Dusty Durango Markers (116329) then added some Two Way Glue (100425) and Dazzling Diamonds (102023) on the flame and Frosting. I used Bermuda Bay Polka Dot Ribbon (115610) and wrapped it around the whole card to hold it shut. With the Pop Up Cake the card is thicker and the ribbon just makes it look more finished when it keeps it closed.
Moving on to the inside I again used Bermuda Bay Card Stock and cut out Pop-up Three Tier Cake (116760). Remember that this die is on sale until Monday at 9:50 am. After assembling the cake, I cut the strips to go around the card sides a little larger 1 1/4" and scalloped the top edge with the Scallop Edge Punch (112091). I used Bermuda Bay and Rich Razzleberry Pattern Designer Series Paper (115685) again in the Polka Dots to carry the theme from the front. I also stamped the balloon from the Crazy for Cupcakes Stamp Set on a Window Sheet (114323)and on Bermuda Bay Pattern Series Paper and cut them out. I added the Balloon to the top of the cake so that it appears to be floating above the cake. Would you like to own this Big Shot Die, if so give me a call and I would be happy to help you place your order.
Thanks for stopping by today and happy stamping, Tonya
Monday, October 12, 2009
Deal of the Week #2
Good morning, it is once again time for our Deal of the Week. This is week two and these great deals are available to purchase until a week from today at 9:50am. They are available both online and also through Direct orders. So if you are interested in placing an order be sure and contact me. We have three products that are on sale this week. The first is:
114515 Flower Burst Embosslit Die Regular Price $11.95 Sale Price $5.99
These are fantastic deals! Club members remember that you can order this weeks Deal of the Week items on your club order. I have the Pop-up Three Tier Cake Die and love to use it for birthday's as well as other events. If you have any questions about these Deal of the Week items please contact me. I would love to help you. Thanks and be sure and stop back by later today when I post a new project. Tonya
Friday, October 9, 2009
Peace
Good afternoon, it is a busy day at our house but I didn't want to miss a chance to post another Christmas card. I made a card similar to this one for one of my convention swaps but realized that I had never posted. I changed it just a little bit for my Christmas Card Class that I am having tomorrow. This is my favorite Christmas Set. I had to buy it as soon as I saw it in the Holiday Mini and was thrilled to see it in the Catalog. The set is called Holy Triptych (110370) and has images of an angel, Mary, Joseph, baby Jesus and then the three Wise Men. The base Night of Navy Card Stock (100867), then a layer of Rich Razzleberry Card Stock (115316) that I ran through a Swirled Texturz Plate from the Stampin'Up! Backgrounds 1 (114512). The image is stamped with Basic Gray Classic Ink (109120) and watercolored with Night of Navy (102977), Rich Razzleberry (115658), So Saffron (105213), Brocade Blue (101102), Blush Blossom (102609) and Chocolate Chip (100908) Classic Ink and the Aquapainter (103954). I used a mat of Brocade Blue Card Stock (101166) behind the image. The card looked a little plain so I added Whisper White 5/8" Satin Ribbon (114616) and added a knot. The Peace on Earth is from the new Four the Holidays Stamp Set ( 116921) that is in the Holiday Mini. I stamped it in Night of Navy Classic Ink on Whisper White Card Stock and then added a mat of Night of Navy Card Stock. This card is a little more time consuming because of the watercoloring but definitely one you can make multiples of for all your friends and family. Are you interested in making this your Christmas card? Contact me and I will be more than happy to help you place your order. Thank you for stopping by today! Have a great weekend, Tonya
Wednesday, October 7, 2009
Courage
Today's card is a special thank you to our troops. We will be sending one of each of these in the boxes that we send over to the troops. I keep the layout very simple and the colors are Real Red (102482), Night of Navy (100867)and Confetti White (102028) Card Stock. The stamp set is Courage (115330) and can be found on page 67 of the main catalog. I stamped both images with Basic Gray Classic Ink (109120) on the Confetti White Card Stock.
The main image was then watercolored with the Bold Bright (106695) , Rich Regals (106698), Earth Elements (106696) and Neutrals (106746) Watercolor Wonder Crayons. On some areas I colored directly on the image and then used the Aquapainter (103954) to blend the color and on other areas I picked up the color with the Aquapainter and then colored with it. I used the White Uni-ball Signo Gel Pen (105021) to highlight the stars and smaller stripes on the flags. Both stamped images were added to the card with dimensionals. This is a great set to have if you have a loved one that has served or is serving in the military. We really can't thank them enough for all that they do to insure our freedom.
Tuesday, October 6, 2009
Fall Fun!
I just love this stamp set and if the layout looks familiar it is because I also used it on the Halloween card that I made last month. The stamp set is Branch Out (113200) and is on the dormant list but that doesn't mean you can't order it. The base of the card is Really Rust Card Stock (100661) and I used Really Rust Classic Ink (102549) to randomly stamp leaves. I used the Top Note Die (113463) and the Big Shot (113439) to cut out the Whisper White Card Stock (100730). The tree trunk was stamped first in Close to Cocoa Classic Ink (103139), then the leaves were added in Really Rust, More Mustard (103162) and Ruby Red Classic Ink(102259). I also added a few Really Rust Butterflies. The sentiment is from Teeny Tiny Wishes (115370) and it was stamped on Whisper White Card Stock before punching it out with the Word Window Punch (105090) and layering it on a Modern Label Punch (116630) of Chocolate Chip Card Stock(102128).
This was one of the cards that we made to send to the troops. There are so many options with this stamp set. It also includes a tire swing, snowflakes, bird and bird house and a pair of rubber boots. You can make a card for every season with this one stamp set. Thank you for stopping by today and be sure and stop by tomorrow. I have a patriotic card to share with you. Have a great day, Tonya
Monday, October 5, 2009
Digital Starter Kit
My Digital Studio software
Party Hearty and Petal Pizzazz stamp sets
Whisper White card stock (8-1/2" x 11")
Earth Elements assorted card stock (8-1/2" x 11")
Old Olive, Pumpkin Pie, Real Red, and Tempting Turquoise Classic Stampin' Pads
Chocolate Chip, Old Olive, Pumpkin Pie, and Real Red Stampin' Write markers
Chocolate Chip 1/4" grosgrain ribbon
Real Red 1" double-stitched grosgrain ribbon
Button Latte Designer buttons
Stampin' Dimensionals
Mini Glue Dots
SNAIL Adhesive
Business supplies (product catalogs, order forms, training DVD, and other supplies)
Would you like to receive all the above supplies for only $185 and recieve sneak peeks for new products as well as the opportunity to earn some extra money? If you answered yes to any of the above then contact me to become a Stampin'Up! Demonstrator. The Digital Starter Kit is available until March 31, 2010 but why. I would love to have you join my team of demonstrators. Thanks, Tonya
Autumn Days
Good morning, as I took my walk this morning it is easy to tell that Fall is here and what a perfect card to share with you on this fall day. The set is called Autumn Days (115452) and it caught my eye as soon as the catalog came out. I didn't look at it so much as a fall set but as rather a guys' set. I struggle with stamp sets to make cards for the men in my life. You know the ones, husband, father, brothers, maybe even uncles. I have plenty of flower sets and even sets for kids but for men I don't have as many so I finally purchased this set. I have been playing around with it for about a week but couldn't get quite the right look on the pheasant until I looked up pheasant online to get a more accurate color photo then my bird came out just like I wanted it to. This card is one that we did on Saturday for the Cards For the Troops and the kids did a great job on it. There were a couple of different techniques and they picked right up on them and had these cards done in no time.
I started with a More Mustard Card Stock Base (100946) and added the wheat stalks in More Mustard Classic Ink (103162) across the bottom. I used Confetti White Card Stock (102028) to stamp the Pheasant on. The Pheasant was inked with the Soft Suede Stampin' Write Marker (116329) on his body, Always Artichoke Stampin' Write Marker (105113) on his head, More Mustard Stampin' Write Marker
(100076) on his feet then I thumped the More Mustard and Ruby Red (100075) Stampin' Write Markers across the chest to give the pheasant some variation. I lightly breathed on the image then stamped it on the card stock. The Happy Birthday sentiment is from Teeny Tiny Wishes (115370) and was inked with the Soft Suede Stampin' Write Marker. Because we made 20 of this card the sentiments were changed on some to say Happy Thanksgiving and also Happy Father's Day. I sponged some More Mustard Classic Ink across the bottom of the Confetti White and then mounted it on a layer of Always Artichoke Card Stock (105119). This was then added to the front of the card with Dimensionals. You can purchase all the supplies to make this card through my Business Website or by contacting me.
I hope you enjoyed today's card. I am working on more fall projects but also starting on Christmas so I will probably alternate between the two on my post. What would you like to see? Leave me a comment and I will work on your suggestions. Thank you for stopping by and have a great day, Tonya
Saturday, October 3, 2009
Cards for the troops!
Hello, and good evening! What a great day we had making Cards For the Troops. We had a great group of individuals who came to help our Student Council Members make the 200 cards and it went smoother than I had even guessed it would. Makes me want to have more large group stamping event! We were able to finish the cards in less time than we had planned and everyone enjoyed themselves. Thank you to all the stampers who helped today. I thought I would share some pictures from today. My daughter did the picture taking so with out futher chatter from me here are a few pictures.
Thursday, October 1, 2009
Deal of the Week is Back!
Stampin'Up! is offering a Deal of the Week for the entire month of October. These deals will only be good for the week that they are offered and you need not make any other purchase to get the deal price. I loved the deals the last time Stampin'Up! offered them and am excited to see them do it again. So the deals for this week are the Trio Flower punch (109183) for only $10.99, 5-Petal Flower punch (109041) for $10.99 and the My Way Punch (110709) for $11.99. These deals start today and continue until Oct. 12 at 9:50 am. If you are interested in placing an order you can do so through online ordering, or by emailing or calling me. I will be back later with a card post but must run for now. Thanks, for stopping by, Tonya